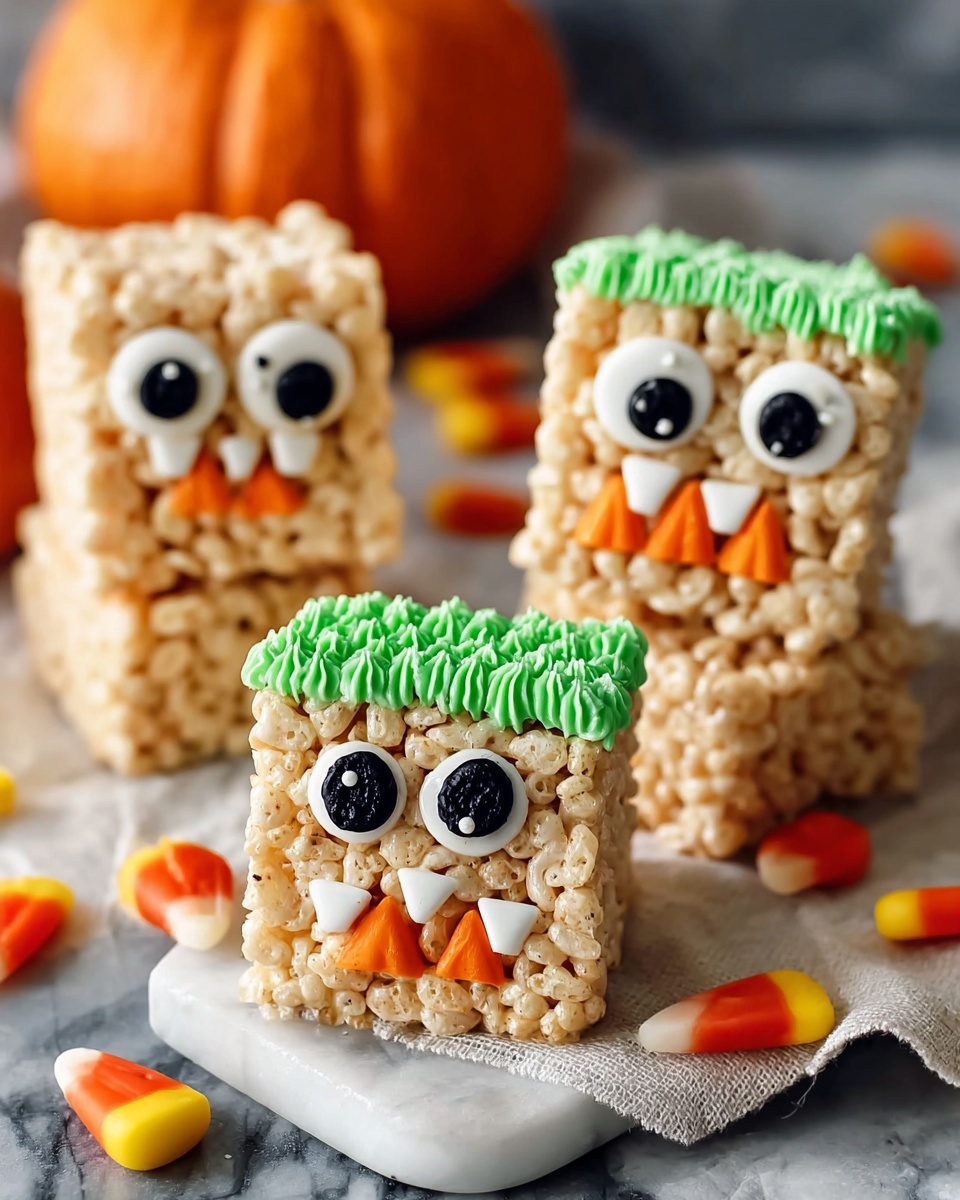
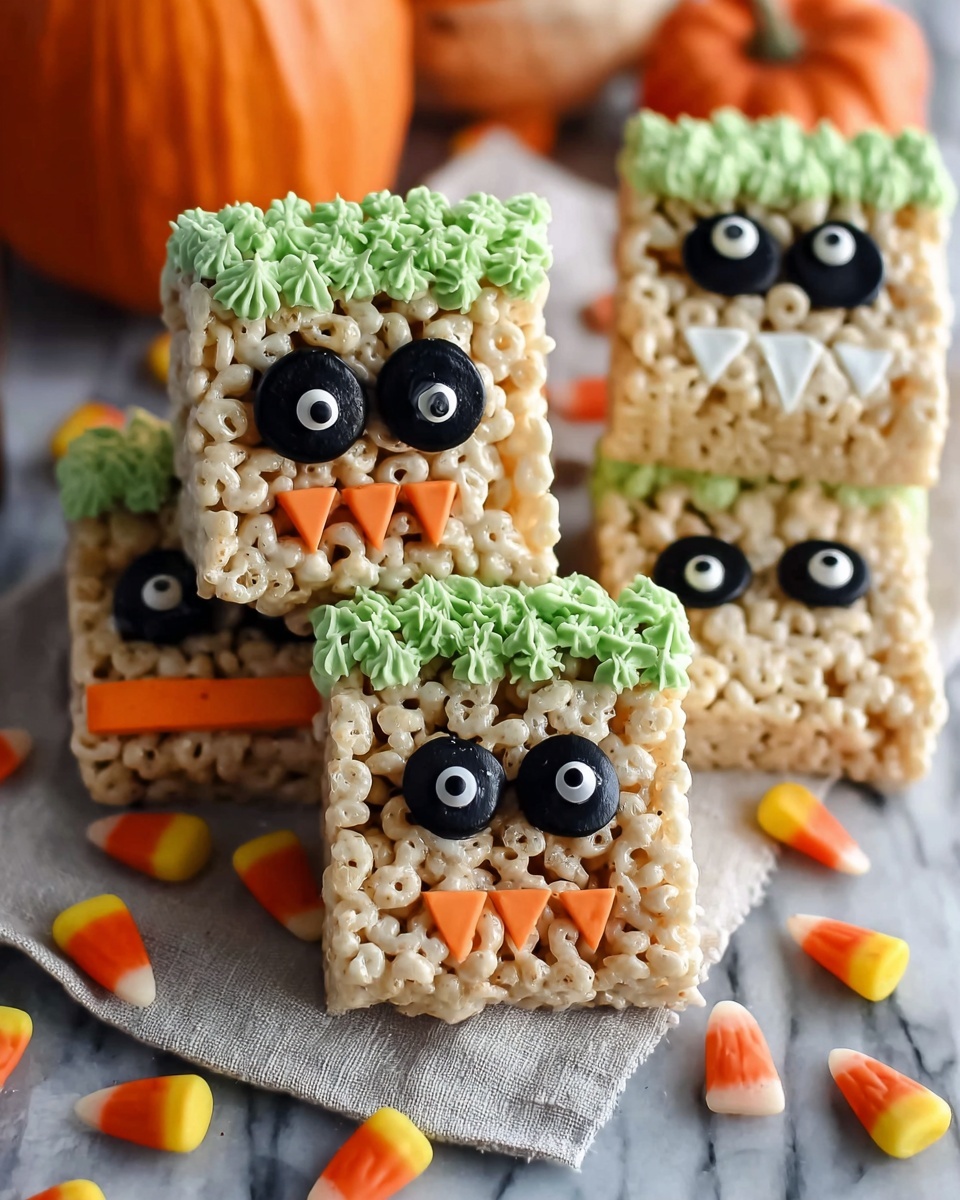
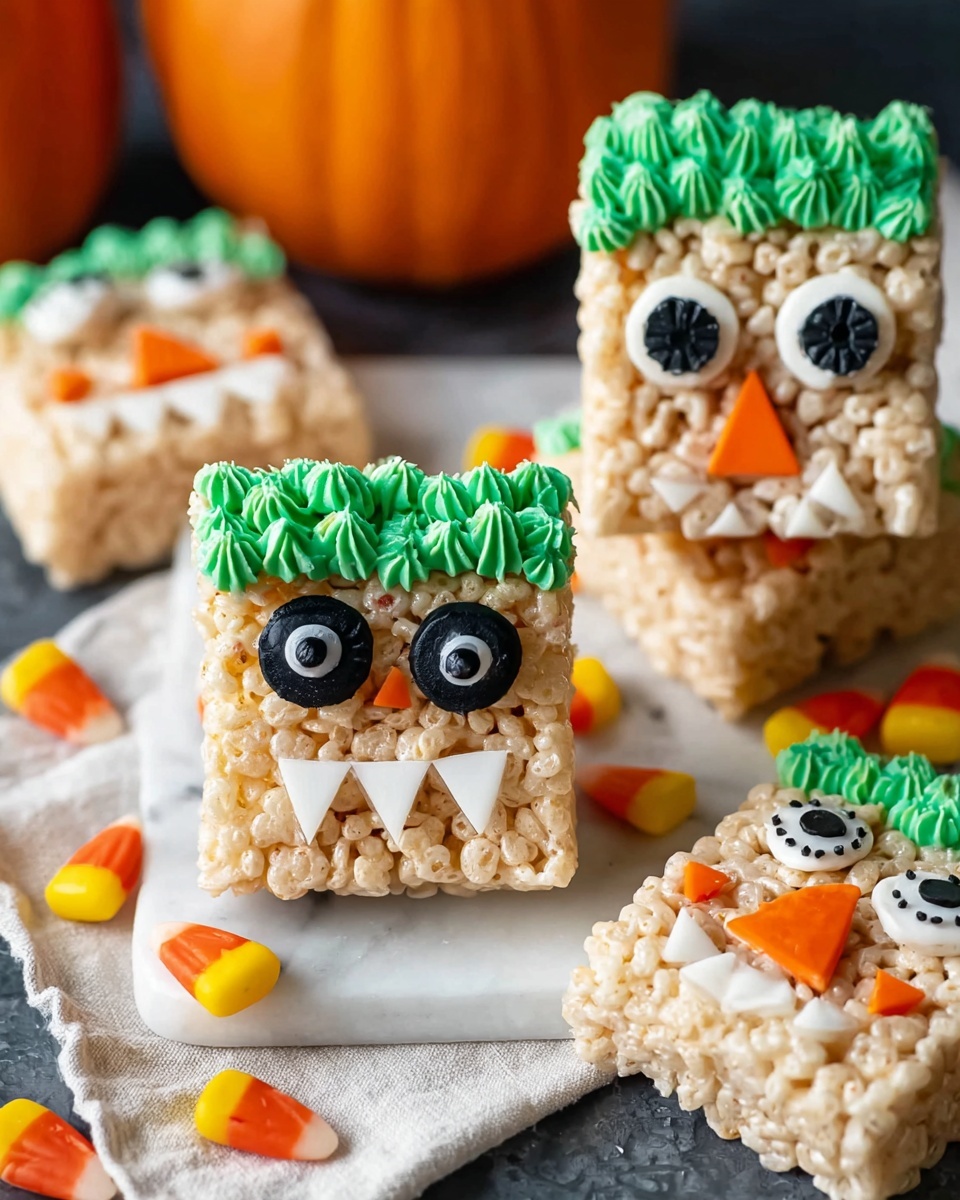
If you’re on the hunt for a fun and festive treat that captures the playful spirit of the season, this Spooky Halloween Rice Krispie Treats Recipe is an absolute must-try. Combining the nostalgic crunch and sweetness of classic Rice Krispies with a ghoulishly delightful twist, these treats bring together vibrant green candy melts and spooky accents that turn a simple snack into a Halloween hit. Easy to make and irresistibly addictive, they’re perfect for parties, school events, or just a cozy night in with a scary movie.
Ingredients You’ll Need
These ingredients are delightfully straightforward, yet each one plays a crucial role in creating the perfect texture, flavor, and spooky look of your Rice Krispie treats. From the gooey marshmallows to the vibrant candy melts, you’re about to bring this delicious vision to life.
- Rice Krispie cereal (6 cups): The crunchy foundation providing that classic, airy texture everyone loves.
- Mini marshmallows (1 10oz bag): The sticky, sweet binder that makes the treats chewy and irresistible.
- Unsalted butter (4 tbsp): Adds richness and helps melt the marshmallows smoothly for easy mixing.
- Green candy melts (10 oz): For coating and adding that eerie green color perfect for Halloween vibes.
- Black candy melts (3 oz): Used for creating spooky accents and designs to bring your treats to life.
- Royal icing eyes: These little edible eyes instantly up the creepy factor and make your treats adorable (and a little spooky).
- Black jimmies sprinkles: Adds texture and a dash of Halloween darkness to the final decoration.
How to Make Spooky Halloween Rice Krispie Treats Recipe
Step 1: Melt the Butter and Marshmallows
Start by melting the butter in a large saucepan over low heat. Once melted, add the entire bag of mini marshmallows and stir constantly until everything is smooth and fully melted. This creates the luscious glue that holds your Rice Krispie treats together, ensuring that every bite is perfectly chewy.
Step 2: Combine with Rice Krispie Cereal
Remove the marshmallow mixture from heat and immediately pour it over the Rice Krispie cereal in a large mixing bowl. Stir quickly but gently, making sure every crispy piece is coated with that golden, gooey marshmallow blend. This balancing act between mixing thoroughly yet preserving crunch is what makes these treats extra special.
Step 3: Press into the Pan
Transfer your mixture into a greased or parchment-lined 9×13 inch pan. Using a spatula or wax paper, firmly press the mixture to create an even, compact layer. This sets the perfect canvas for your spooky scene to come alive.
Step 4: Melt the Green Candy Melts and Coat
While the base cools slightly, melt the green candy melts in a microwave-safe bowl in 30-second intervals, stirring between each, until smooth. Pour or drizzle the melted green candy over the pressed Rice Krispie base, spreading it evenly until fully coated. This vibrant layer adds a fantastic pop of Halloween color and a deliciously sweet contrast.
Step 5: Add Black Candy Melt Details
Melt the black candy melts similarly in the microwave. Transfer the melted black candy to a piping bag or zip-top bag with a small corner snipped off, then elegantly pipe spooky designs—think creepy webs or zigzags—over the green coating. This artistic step really brings the Halloween theme bursting forward.
Step 6: Decorate with Royal Icing Eyes and Sprinkles
While the candy layers are still tacky, gently press royal icing eyes and black jimmies sprinkles onto the surface. These little details are what turn a great treat into an unforgettable, spooky sensation, giving your Rice Krispie treats personality and flair.
Step 7: Let Set and Slice
Allow your masterpiece to set completely at room temperature (or speed up the process in the fridge), then slice into squares or fun shapes. Your spooky treats are now ready to haunt your Halloween celebrations!
How to Serve Spooky Halloween Rice Krispie Treats Recipe
Garnishes
Consider adding extra royal icing eyes or edible glitter around the serving platter to enhance the eerie atmosphere. Fresh mint leaves can also add a pop of dark green color to complement the candy melts.
Side Dishes
Serve these treats alongside warm apple cider or a frothy pumpkin spice latte for a perfect seasonal pairing that balances sweet and spice. Mini caramel apples or candy corn bowls also work wonderfully as complementary snacks on your Halloween spread.
Creative Ways to Present
For an eye-catching presentation, arrange your Spooky Halloween Rice Krispie Treats Recipe on a black or orange platter lined with spooky-themed paper or fabric. Wrapping individual squares in clear cellophane tied with striped ribbons makes for perfect party favors. You could also use cookie cutters to create ghosts, pumpkins, or bats before coating, leveling up the fun factor.
Make Ahead and Storage
Storing Leftovers
Store any leftover treats in an airtight container at room temperature to maintain their crisp-chewy texture. They’ll stay fresh for about 3 to 4 days, but honestly, they rarely last that long!
Freezing
You can freeze these treats by wrapping the individual pieces tightly in plastic wrap and placing them in a freezer-safe container. They’ll preserve well for up to 6 weeks and thaw quickly at room temperature when you’re ready for a spooky snack attack.
Reheating
Since these treats are best enjoyed as-is, reheating isn’t really necessary. If your green candy melts have hardened and you want to soften them slightly, a brief 5-10 second microwave zap can help but avoid overheating which might affect the texture.
FAQs
Can I use regular marshmallows instead of mini marshmallows?
Absolutely! If mini marshmallows aren’t on hand, regular-sized marshmallows work fine. Just be sure to chop or roughly break them up so they melt evenly and quickly for the perfect texture.
Are there alternatives to candy melts for decorating?
Yes, you can use colored white chocolate or even royal icing for decorating. Candy melts are popular because they’re easy to melt and set firmly, but feel free to experiment with what you have!
Can these treats be made gluten-free?
Definitely! Just ensure you use a gluten-free crispy rice cereal and double-check that your candy melts and other decorations are certified gluten-free. This way, everyone can enjoy the spooky fun.
How long do these Rice Krispie treats keep their freshness?
Stored properly in an airtight container, they stay fresh and chewy for about 3 to 4 days at room temperature. Beyond that, the texture can become harder or stale.
What if I want to make these treats in shapes instead of squares?
That’s a fantastic idea! Press the mixture into the pan, chill until firm, then use cookie cutters to press out fun Halloween shapes before decorating. Just be gentle to keep the shapes intact.
Final Thoughts
There’s something truly magical about making and sharing this Spooky Halloween Rice Krispie Treats Recipe that turns any gathering into a memorable celebration. The ease, the flavor, and those playful spooky details make it a standout on any Halloween table. I can’t wait for you to try this recipe and watch it become your fall tradition too!
Print
Spooky Halloween Rice Krispie Treats Recipe
- Prep Time: 25 minutes
- Cook Time: 10 minutes
- Total Time: 35 minutes
- Yield: 15 servings
- Category: Dessert
- Method: Stovetop
- Cuisine: American
- Diet: Vegetarian
Description
Celebrate Halloween with these fun and spooky Rice Krispie Treats that are easy to make and perfect for parties or festive snacks. The classic crispy, gooey treat is elevated with vibrant green and eerie black candy melts, decorated with royal icing eyes and black jimmies sprinkles to create a creepy-crawly monster effect that kids and adults will love.
Ingredients
Base Ingredients
- 6 cups Rice Krispie cereal
- One 10oz bag mini marshmallows
- 4 tbsp unsalted butter
Decorations
- 10oz green candy melts
- 3oz black candy melts
- Royal icing eyes
- Black jimmies sprinkles
Instructions
- Prepare the Base: In a large saucepan over low heat, melt the 4 tablespoons of unsalted butter. Once melted, add the 10oz bag of mini marshmallows and stir continuously until completely melted and smooth.
- Add the Cereal: Remove the marshmallow mixture from heat and immediately add the 6 cups of Rice Krispie cereal. Stir gently but quickly to ensure the cereal is fully coated with the marshmallow mixture.
- Shape the Treats: Lightly grease a 9×13 inch baking pan or line it with parchment paper. Pour the cereal mixture into the pan and press it evenly into the pan using a buttered spatula or wax paper. Allow it to cool and set for about 10 minutes.
- Melt the Candy: While the treats are setting, melt the 10oz green candy melts and 3oz black candy melts separately according to package instructions, either in the microwave or using a double boiler, until smooth.
- Decorate the Treats: Once the Rice Krispie base has set, cut it into 15 equal pieces. Dip or drizzle the green candy melts onto the treats, then add accents with the black candy melts. Use royal icing eyes and sprinkle black jimmies sprinkles on top to create spooky monster faces and textures.
- Final Setting: Allow decorated treats to fully set at room temperature or refrigerate briefly until the candy melts harden, making them ready to serve and enjoy.
Notes
- For easier shaping, butter your hands before cutting or shaping the treats.
- The candy melts can be substituted with colored white chocolate melts if preferred.
- Store the treats in an airtight container to maintain freshness for up to 3 days.
- Royal icing eyes can be bought pre-made or homemade for customization.
- If you want a gluten-free option, make sure to use gluten-free Rice Krispie cereal.


