
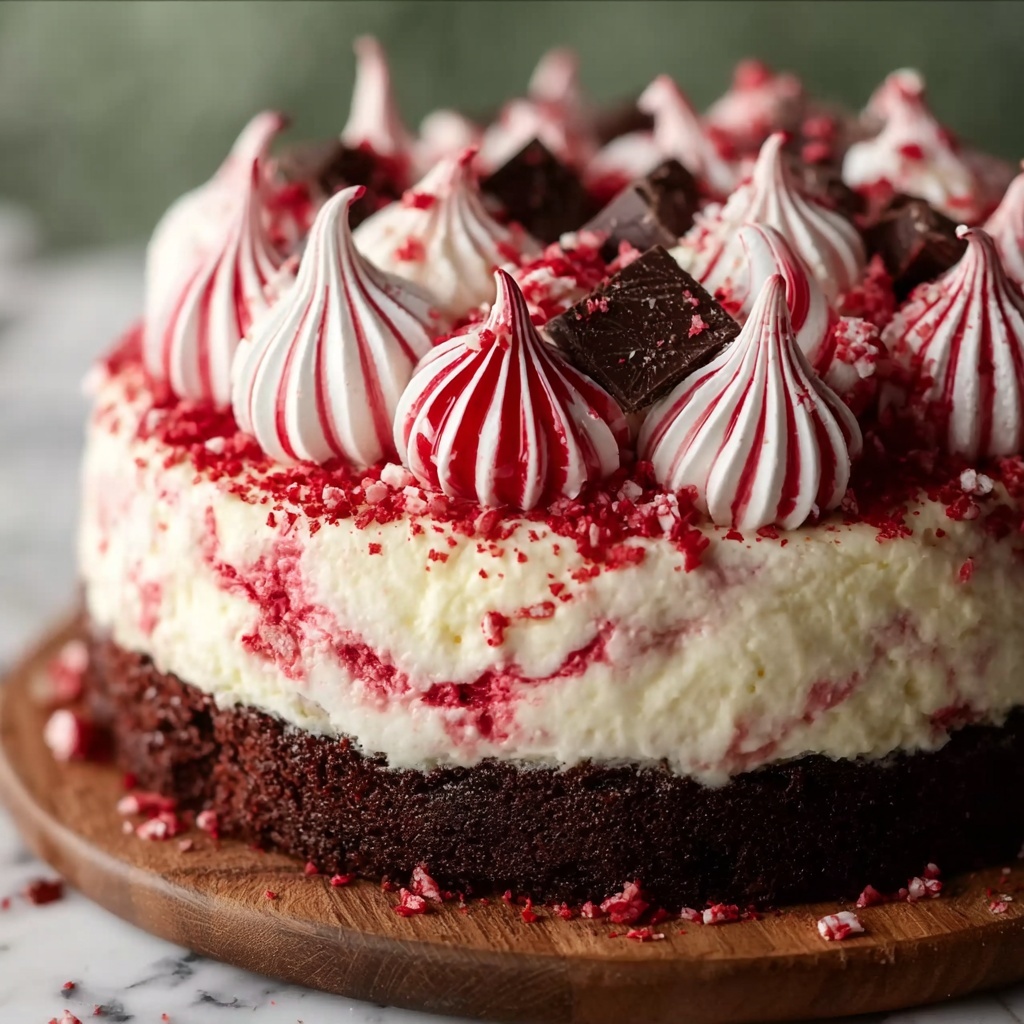
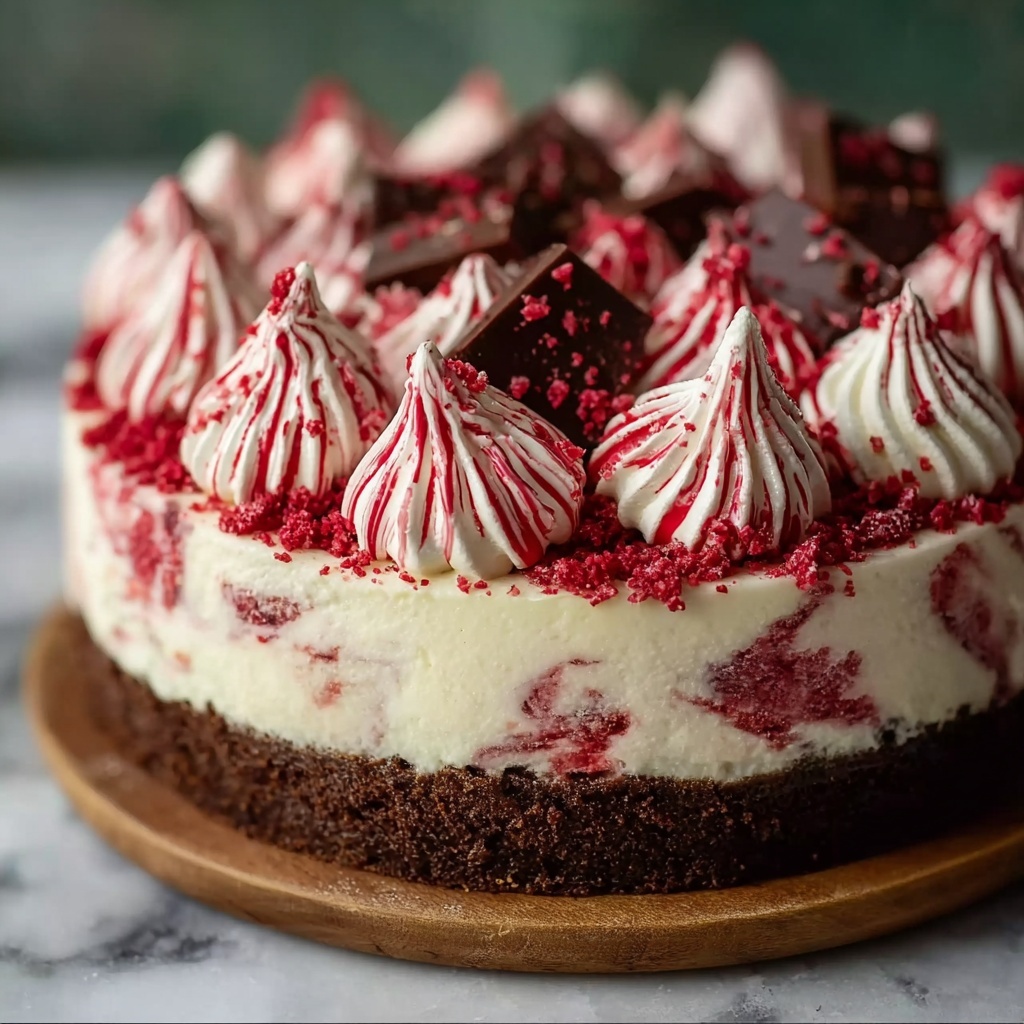
If you’re searching for a show-stopping dessert that’s refreshing, rich, and festive all at once, this Peppermint Ice Cream Cake Recipe is exactly what you need. Imagine layers of velvety peppermint ice cream nestled on a crunchy chocolate cookie crust, all topped with fluffy whipped cream and sprinkled with crunchy candy canes and chocolate bits. It’s like holiday magic in every bite, perfect for any celebration or simply treating yourself to something extraordinary. This Peppermint Ice Cream Cake Recipe brings cool minty freshness and indulgent chocolate together in a way that’s both easy to make and impossible to forget.
Ingredients You’ll Need
Every ingredient in this recipe plays an essential role in crafting the perfect balance of flavors and textures. From the crumbly chocolate cookie crust that holds everything together to the luscious peppermint ice cream and light whipped topping, each element adds a unique touch that makes this cake truly special.
- Chocolate cookie crumbs (2 cups/200g): These create a sturdy, chocolatey crust that contrasts beautifully with the creamy ice cream.
- Unsalted butter (6 tbsp/85g), melted: Helps bind the cookie crumbs into a firm, buttery base.
- Peppermint ice cream (1 ½ quarts/1.4 liters), slightly softened: The star ingredient delivering that refreshing peppermint flavor and creamy texture.
- Crushed peppermint candies or candy canes (½ cup/50g): Adds delightful crunch and bursts of minty sweetness.
- Heavy whipping cream (2 cups/480ml): Whipped into a light topping that balances the richness of the ice cream.
- Powdered sugar (3 tbsp): Sweetens the whipped cream to perfection.
- Vanilla extract (½ tsp): Enhances the flavor complexity of the whipped topping.
- Decorations: Crushed candy canes, chocolate shavings, or mini chocolate chips: For a festive and textured finish.
How to Make Peppermint Ice Cream Cake Recipe
Step 1: Prepare the Crust
Start by greasing a 9-inch springform pan or lining it with parchment paper to make sure your cake comes out easily. Then mix the chocolate cookie crumbs and melted butter in a bowl until you have a mixture resembling wet sand. This step is crucial because it ensures your crust will be firm and hold together without crumbling apart when sliced.
Step 2: Form the Crust
Press the crumb mixture firmly and evenly into the bottom of your prepared pan. Make sure the layer is compact because this will provide the perfect crunchy base for your peppermint ice cream. Once firmly pressed, pop it in the freezer for 15 minutes to set.
Step 3: Add the Ice Cream Layer
Once the crust is firm, spread the slightly softened peppermint ice cream evenly on top. Using softened ice cream rather than frozen solid helps create a smooth, even layer that’s easy to spread and slice later on.
Step 4: Sprinkle the Candy Crunch
Generously sprinkle crushed peppermint candies over the ice cream layer. This adds wonderful texture and festive flair, plus a little extra peppermint punch in every bite.
Step 5: Freeze Until Firm
Cover the pan tightly with plastic wrap and freeze the cake for at least 4 hours or until the ice cream layer is completely firm. This step ensures your layers meld perfectly and hold their shape at serving time.
Step 6: Whip the Cream Topping
In a chilled bowl, whip the heavy cream along with the powdered sugar and vanilla extract until stiff peaks form. This light, sweet whipped topping will beautifully balance the minty, rich ice cream while adding a soft, airy texture.
Step 7: Assemble the Cake
After the ice cream layer has frozen solid, remove the cake from the freezer and spread the whipped cream evenly over the top. This final creamy layer brings a lovely visual appeal and taste contrast.
Step 8: Decorate and Chill
Now comes the fun part — decorate the top with more crushed candy canes, chocolate shavings, or mini chocolate chips to give your cake a festive, inviting look. Then, return the cake to the freezer for at least 1 hour to let the whipped topping set firmly.
Step 9: Then, Serve with Ease
Before slicing, let the cake sit at room temperature for 5-10 minutes to soften slightly and allow easy, clean cuts. Enjoy the rewarding combination of crunchy, creamy, sweet, and minty flavors all in one delightful bite!
How to Serve Peppermint Ice Cream Cake Recipe
Garnishes
Adding garnish to your Peppermint Ice Cream Cake Recipe elevates the presentation and enriches every bite. Crushed candy canes not only look festive but add a fresh crunch that complements the soft textures. Don’t hesitate to get creative with colorful sprinkles or a drizzle of chocolate sauce for extra indulgence.
Side Dishes
Serve your cake with a simple cup of hot cocoa or coffee to contrast the cold minty flavors with warm, comforting sips. Fresh berries or a light berry coulis also pair wonderfully, adding a fruity brightness that doesn’t overpower the delicate peppermint flavor.
Creative Ways to Present
For an unforgettable dessert display, slice the cake into individual portions and place each on a small plate with a sprig of mint or a few whole peppermint candies on the side. You can even serve mini versions in clear cups layered with extra candy crushed for a fun twist. Presentation sets the mood, so let your imagination run wild!
Make Ahead and Storage
Storing Leftovers
The beauty of this Peppermint Ice Cream Cake Recipe is its freezer-friendly nature; you can keep leftovers fresh by storing any uneaten cake tightly covered with plastic wrap or in an airtight container in the freezer for up to a week without compromising flavor or texture.
Freezing
If you plan to make the cake ahead of time, assemble it fully and freeze until ready to serve. This recipe actually tastes better after sitting in the freezer for a day, allowing all the flavors to meld together beautifully.
Reheating
No need to reheat this dessert! Simply let slices sit at room temperature for a few minutes before serving to achieve the perfect scoopable consistency. This easy step makes slicing neat and keeps the whipped topping beautifully intact.
FAQs
Can I use another flavor of ice cream instead of peppermint?
Absolutely! While peppermint ice cream offers that iconic minty freshness, vanilla or chocolate ice cream will also work wonderfully if you prefer a twist or want to customize your cake for different occasions.
What if I don’t have a springform pan?
You can use a regular cake pan lined with parchment paper or foil for easier removal. Just make sure to allow enough chill time so you can invert the cake carefully without breaking the crust.
Can I make this recipe dairy-free?
Yes, by substituting the ice cream and whipped cream with high-quality dairy-free alternatives, you can enjoy this cake without compromising flavor or texture. Look for coconut-based or nut-based ice creams and creamers that whip well.
How far ahead can I make the Peppermint Ice Cream Cake Recipe?
Making the cake up to 3 days ahead is perfect and convenient. Just keep it well-wrapped in the freezer until serving day to maintain its fresh taste and texture.
Is it possible to make a smaller or larger cake using this recipe?
Definitely. Just adjust the ingredients proportionally to fit the size of your pan. Keep in mind that freezing and setting times might vary slightly, so plan accordingly.
Final Thoughts
Trust me when I say this Peppermint Ice Cream Cake Recipe will become one of your go-to desserts, especially during the holidays or whenever you want to impress with minimal fuss. With its perfect blend of mint, chocolate, and creamy textures, it’s a dessert that feels both festive and comforting. So go ahead — gather your ingredients, dive into this easy recipe, and share a slice of minty magic with your loved ones. You’ll be so glad you did.
Print
Peppermint Ice Cream Cake Recipe
- Prep Time: 15 minutes
- Cook Time: 0 minutes
- Total Time: 5 hours 15 minutes
- Yield: 8-10 servings
- Category: Dessert
- Method: No-Cook
- Cuisine: American
Description
This Peppermint Ice Cream Cake is a festive and refreshing dessert perfect for the holiday season. Featuring a crunchy chocolate cookie crust, a creamy peppermint ice cream layer, and a fluffy whipped cream topping sprinkled with crushed candy canes and chocolate shavings, this no-bake cake is easy to assemble and sure to impress your guests with its cool minty flavor and delightful texture.
Ingredients
Crust
- 2 cups (200g) chocolate cookie crumbs (e.g., Oreos, without the filling)
- 6 tbsp (85g) unsalted butter, melted
Ice Cream Layer
- 1 ½ quarts (1.4 liters) peppermint ice cream, slightly softened
- ½ cup (50g) crushed peppermint candies or candy canes
Whipped Topping
- 2 cups (480ml) heavy whipping cream
- 3 tbsp powdered sugar
- ½ tsp vanilla extract
Decoration
- Crushed candy canes or peppermint candies
- Chocolate shavings or mini chocolate chips
Instructions
- Prepare the Crust: Grease a 9-inch springform pan or line it with parchment paper to prevent sticking and make removal easier.
- Make Crust Mixture: In a bowl, mix the chocolate cookie crumbs with melted butter until the texture resembles wet sand, ensuring the crumbs are evenly coated.
- Form Crust: Press the crumb mixture firmly and evenly into the bottom of the prepared pan to create a solid base. Freeze the crust for 15 minutes to set it firmly.
- Add the Ice Cream Layer: Spread the softened peppermint ice cream evenly over the chilled crust, creating a smooth, even layer.
- Sprinkle Peppermint Candies: Distribute the crushed peppermint candies over the ice cream to add texture and festive crunch.
- Freeze Cake: Cover the pan tightly with plastic wrap and freeze for at least 4 hours, or until the ice cream is firm and well set.
- Prepare the Whipped Topping: In a chilled mixing bowl, whip the heavy cream with powdered sugar and vanilla extract until stiff peaks form, making a light and fluffy topping.
- Assemble the Cake: Remove the cake from the freezer and evenly spread the whipped topping over the ice cream layer to finish the cake.
- Decorate the Cake: Garnish the whipped topping with crushed candy canes, chocolate shavings, or mini chocolate chips for added visual appeal and flavor.
- Chill to Set: Return the assembled cake to the freezer for at least 1 hour to allow the whipped topping to firm up properly.
- Serve: Before slicing, let the cake sit at room temperature for 5-10 minutes to soften slightly, easing cutting and enhancing the texture.
Notes
- Use a springform pan for easy removal of the cake without damaging its shape.
- If peppermint ice cream is too hard, allow it to soften at room temperature for about 10 minutes before spreading.
- Crushed peppermint candies can be substituted with crushed candy canes or peppermint baking chips.
- For an extra chocolatey touch, add a drizzle of chocolate sauce before adding the whipped topping.
- This cake should be kept frozen until ready to serve to maintain its structure.


