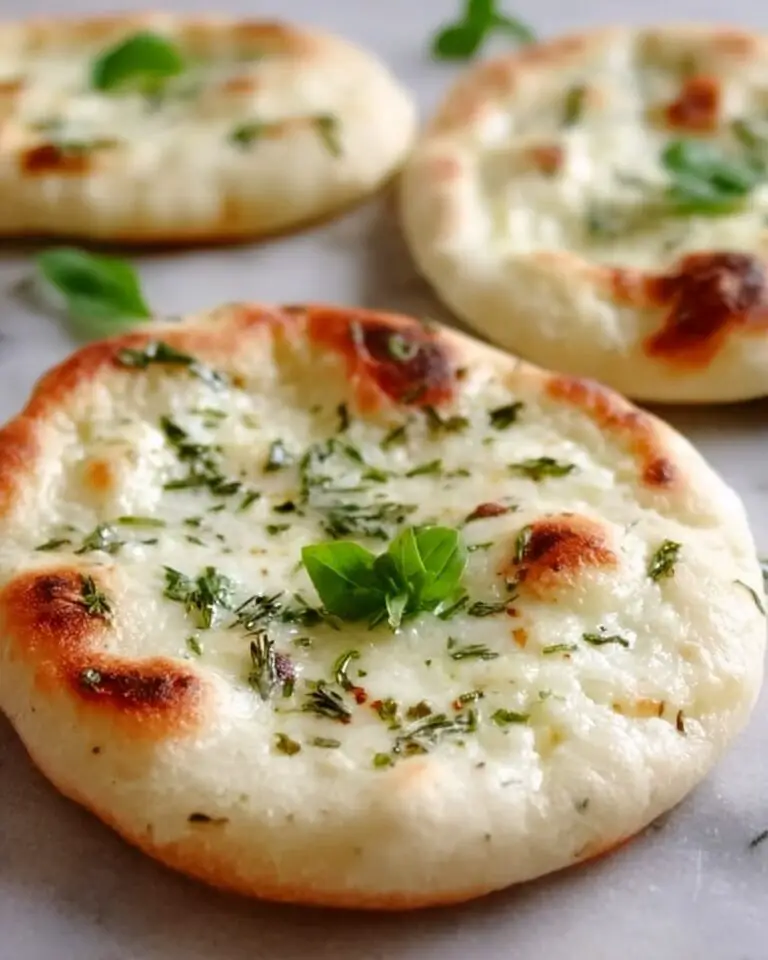
If you have ever found yourself craving that warm, soft, garlicky experience from your favorite Italian restaurant, then you are going to fall head over heels for this Olive Garden Breadsticks: An Amazing Ultimate Classic Recipe. This recipe captures every bit of that iconic flavor and texture, delivering soft, chewy breadsticks with just the right hit of buttery garlic goodness. Whether you are feeding a crowd or just treating yourself, these breadsticks are a guaranteed crowd-pleaser that bring a comforting and irresistible touch to any meal.
Ingredients You’ll Need
Gathering simple, pantry-friendly ingredients is key to making these breadsticks just like the ones you adore from Olive Garden. Each component plays a vital role, from the yeast that gives the perfect rise to the garlic powder that infuses that signature flavor.
- Warm water (1 cup, about 110°F): Activates the yeast to give the dough its perfect rise and tenderness.
- Active dry yeast (2 1/4 teaspoons or 1 packet): The magic ingredient that makes your breadsticks fluffy and airy.
- Granulated sugar (2 tablespoons): Feeds the yeast and adds a touch of sweetness for balanced flavor.
- Unsalted butter (3 tablespoons melted, plus 2 tablespoons for brushing): Adds richness and moisture both in the dough and for that luscious finish.
- Salt (1 1/2 teaspoons in dough, plus 1/2 teaspoon for topping): Enhances all the flavors and seasons the breadsticks evenly.
- All-purpose flour (3 cups, plus more for kneading): The foundation of your dough, giving structure and softness.
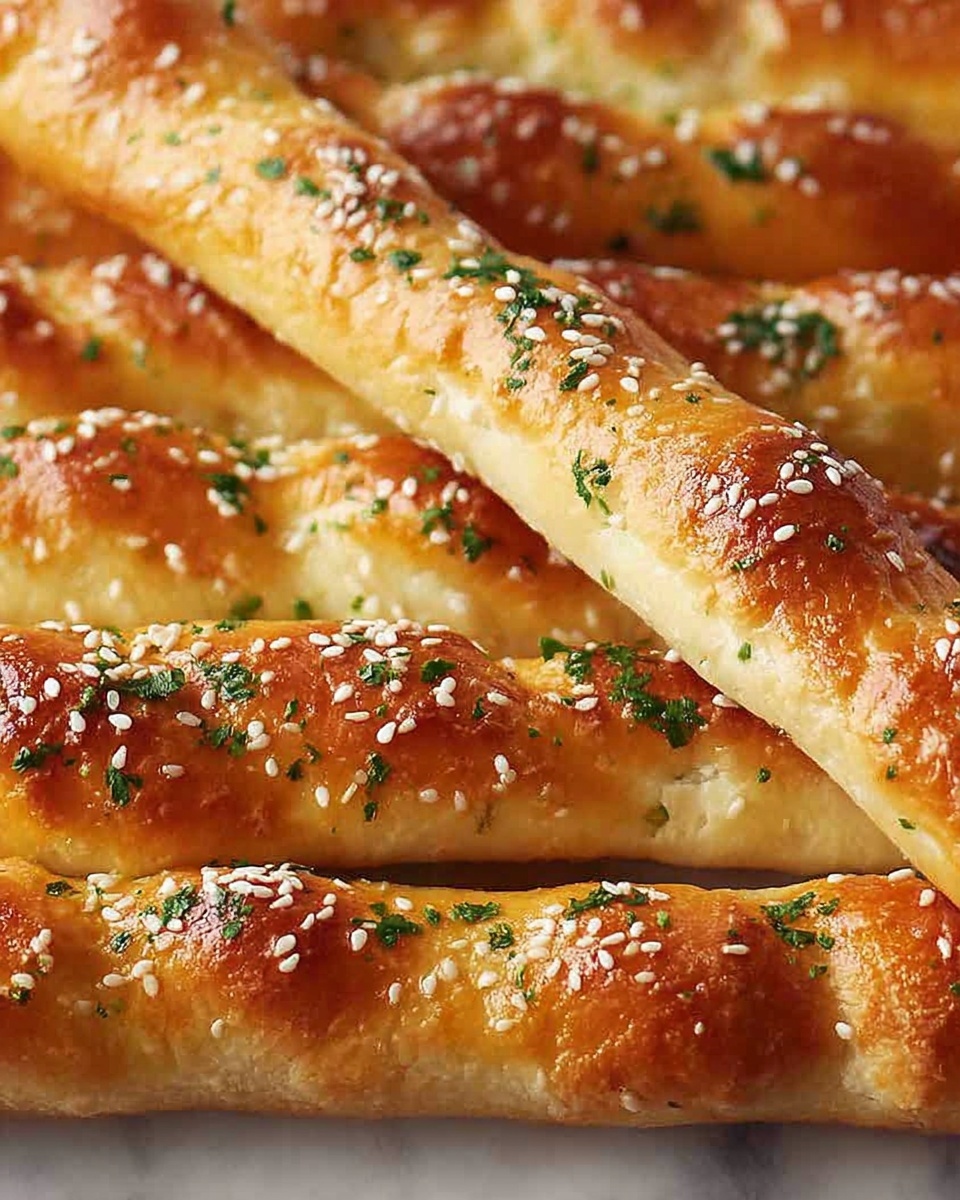
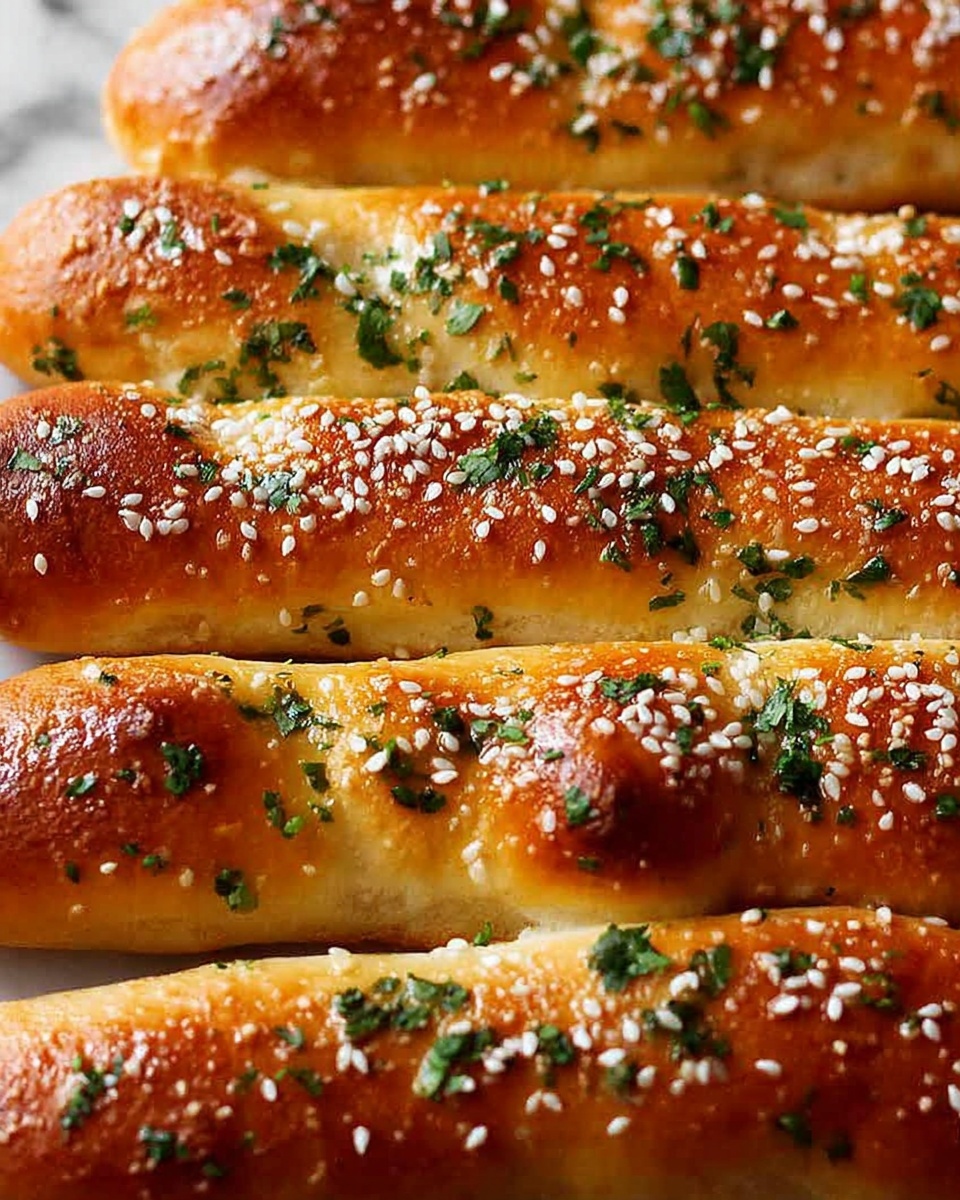
- Garlic powder (1/2 teaspoon): The signature punch of garlicky goodness that you can’t resist.
How to Make Olive Garden Breadsticks: An Amazing Ultimate Classic Recipe
Step 1: Activate and Mix Your Ingredients
Begin by combining the warm water, active dry yeast, and sugar in a large bowl or stand mixer. Allow this mixture to sit for about 5 to 10 minutes until it’s foamy on top. This step is crucial because it confirms your yeast is alive and ready to make your dough light and fluffy.
Step 2: Form the Dough
Once foamy, add melted butter, salt, and flour to the yeast mixture. Stir everything together until the dough starts to clump and pull away from the sides of the bowl. This soft dough is the base that will become those irresistible breadsticks.
Step 3: Knead Until Smooth and Elastic
Flour your work surface lightly and knead the dough for about 7 to 8 minutes by hand, or about 5 minutes if you’re using a dough hook. Proper kneading develops gluten, which gives the breadsticks their classic chewy texture you’re aiming for.
Step 4: First Rise
Place your dough ball in a greased bowl and cover it with a clean cloth or plastic wrap. Let it rise in a warm, draft-free place for about 1 hour or until it has doubled in size. This resting phase lets the dough relax and expand beautifully.
Step 5: Shape and Second Rise
After the dough has risen, gently punch it down and divide it into 12 equal pieces. Roll each piece into a 7-inch rope and arrange them evenly on a parchment-lined baking sheet. Cover again and let them rise for another 20 to 30 minutes. This second rise ensures your breadsticks are pillowy soft inside.
Step 6: Bake to Perfection
Preheat your oven to 400°F and bake the breadsticks for 12 to 14 minutes or until they turn a beautiful golden brown. While still hot, brush them generously with melted butter and sprinkle with a blend of garlic powder and salt. This finishing touch seals in flavor and delivers that skilled Olive Garden breadstick magic in your kitchen.
How to Serve Olive Garden Breadsticks: An Amazing Ultimate Classic Recipe

Garnishes
Serving your breadsticks with a sprinkle of freshly grated Parmesan or a dusting of chopped Italian parsley can elevate these to next-level deliciousness, adding a pop of color and a burst of cheesy or herbaceous notes.
Side Dishes
These breadsticks pair beautifully with a variety of Italian dishes like rich pasta with marinara sauce, creamy Alfredo, or hearty soups. They also make a wonderful accompaniment to crisp salads and antipasto platters, rounding out your meal with their soft, buttery charm.
Creative Ways to Present
Try serving your breadsticks in a basket lined with a colorful napkin or arranged in a decorative swirl on a large platter for a fun and inviting display. Presentation can make all the difference, turning these simple breadsticks into the centerpiece of your table.
Make Ahead and Storage
Storing Leftovers
If you find yourself with leftovers (though it’s hard with this recipe), keep them fresh by storing in an airtight container at room temperature for up to two days. This will preserve their softness without drying out.
Freezing
You can freeze baked breadsticks by wrapping them tightly in plastic wrap and placing them in a freezer-safe bag. They’ll keep well for up to a month. This makes for an effortless future snack or side dish whenever the mood strikes.
Reheating
Reheat frozen or leftover breadsticks in a 300°F oven for about 10 minutes until warmed through. Brushing a little extra melted butter before reheating helps revive their original buttery softness and garlic flavor.
FAQs
Can I use instant yeast instead of active dry yeast?
Yes, you can substitute instant yeast for active dry yeast, but reduce the amount slightly and add it directly to the flour instead of proofing it in water. The breadsticks will still be deliciously soft and flavorful.
Is there a gluten-free version of this breadstick recipe?
While this recipe relies on all-purpose flour for texture, you can experiment with gluten-free flour blends designed for baking. Keep in mind that the texture will differ, and you may need to adjust liquid amounts for the best results.
Can I make these breadsticks vegan?
Absolutely! Replace the butter with a plant-based margarine or oil, and omit any dairy toppings. The breadsticks will still be wonderfully soft and garlicky.
How do I get the breadsticks to be soft and not crunchy?
The secret is in the dough moisture and the second rise. Allowing the breadsticks to rise twice and brushing them with melted butter keeps them tender rather than crispy.
Can I add cheese inside the breadsticks?
Yes! For a fun twist, roll small strips of mozzarella inside each dough rope before the second rise. They bake up with gooey cheese inside, adding a delightful surprise.
Final Thoughts
There is something so wonderfully comforting about homemade breadsticks, and this Olive Garden Breadsticks: An Amazing Ultimate Classic Recipe truly captures the magic behind one of the most beloved starters in Italian-American cuisine. Easy to prepare and utterly delicious, it’s the perfect way to bring warmth and hospitality right to your own table. I can’t wait for you to try making these—you’re sure to keep coming back for more every time!
Print
Olive Garden Breadsticks: An Amazing Ultimate Classic Recipe
- Prep Time: 20 minutes (plus rising time)
- Cook Time: 14 minutes
- Total Time: 1 hour 45 minutes
- Yield: 12 breadsticks
- Category: Side Dish
- Method: Baking
- Cuisine: Italian-American
- Diet: Vegetarian
Description
This Olive Garden Breadsticks recipe recreates the beloved classic breadsticks with soft, fluffy dough infused with garlic and butter, perfect for serving as a side dish or appetizer at Italian-American meals. These homemade breadsticks are easy to prepare and bake to a golden perfection, then brushed with garlic butter for irresistible flavor.
Ingredients
Dough Ingredients
- 1 cup warm water (about 110°F)
- 2 1/4 teaspoons active dry yeast (1 packet)
- 2 tablespoons granulated sugar
- 3 tablespoons unsalted butter, melted
- 1 1/2 teaspoons salt
- 3 cups all-purpose flour (plus more for kneading)
Topping Ingredients
- 2 tablespoons unsalted butter (for brushing)
- 1/2 teaspoon garlic powder
- 1/2 teaspoon salt (for topping)
Instructions
- Activate the Yeast: In a large bowl or stand mixer, combine warm water, active dry yeast, and granulated sugar. Let the mixture sit for 5 to 10 minutes until it becomes foamy, indicating that the yeast is active and ready.
- Make the Dough: Add melted butter, salt, and the all-purpose flour to the yeast mixture. Mix until a soft dough forms. If using a stand mixer, use a dough hook attachment; otherwise, prepare to knead by hand.
- Knead the Dough: On a floured surface, knead the dough for 7 to 8 minutes by hand or 5 minutes in a stand mixer until it becomes smooth and elastic. This develops the gluten necessary for a chewy texture.
- First Rise: Place the dough in a greased bowl and cover it. Let it rise in a warm spot for 1 hour, or until the dough doubles in size, which allows it to become airy and light.
- Shape the Breadsticks: Punch down the risen dough to release air bubbles. Divide it into 12 equal pieces. Roll each piece into a 7-inch rope and arrange them on a baking sheet lined with parchment paper.
- Second Rise: Cover the shaped breadsticks and let them rise again for 20 to 30 minutes until they puff up slightly, ensuring a tender crumb.
- Preheat Oven: Preheat your oven to 400°F (204°C) so it’s ready for baking.
- Bake: Bake the breadsticks for 12 to 14 minutes or until they turn golden brown on top and are cooked through.
- Add Garlic Butter Topping: While the breadsticks are still hot, brush them with melted butter mixed with garlic powder and a sprinkle of salt to infuse them with classic Garlic Breadstick flavor.
- Serve Warm: Serve the breadsticks warm for the best taste and texture. Optionally, sprinkle with grated Parmesan cheese for a cheesier variation.
Notes
- For a cheesier version, sprinkle grated Parmesan cheese over the breadsticks immediately after brushing with garlic butter.
- These breadsticks freeze well after baking. Reheat in a low oven before serving to restore freshness.
- Ensure the water temperature is warm and not hot to properly activate the yeast without killing it.
- Use parchment paper when baking to prevent sticking and promote even browning.
