
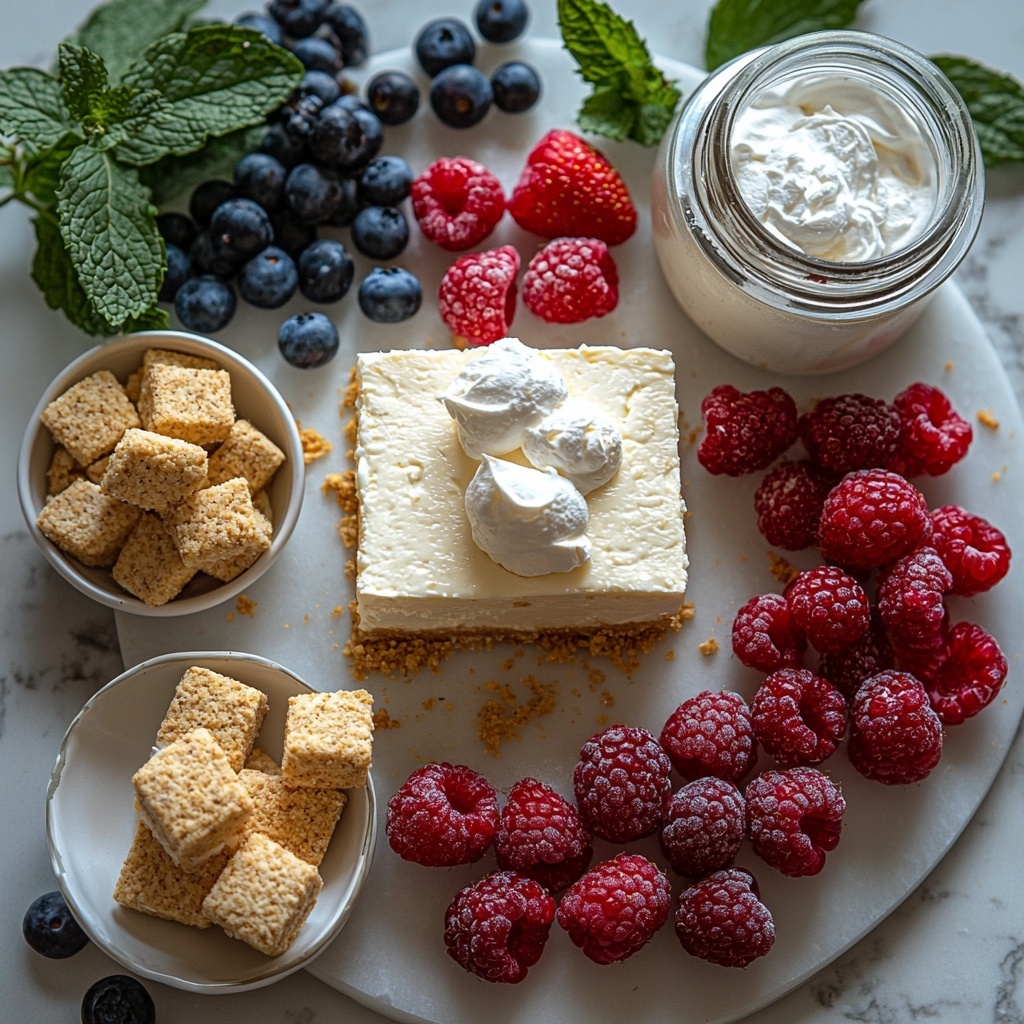
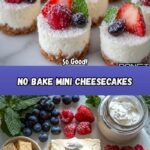
If you’re craving a dessert that feels indulgent yet light, the No Bake Mini Cheesecakes Recipe is your new best friend. These little delights pack creamy, dreamy cheesecake filling on a crunchy graham cracker crust, all without firing up your oven. Perfect for parties, quick treats, or whenever you need a guaranteed crowd-pleaser, this recipe transforms simple ingredients into bite-sized moments of pure joy.
Ingredients You’ll Need
Getting started with the No Bake Mini Cheesecakes Recipe is a breeze because the ingredients are straightforward and each one plays an essential role. From the buttery crust to the fluffy cream filling, every element comes together to create a luscious texture and balanced sweetness.
- 1 cup graham cracker crumbs: Provides a buttery, crisp base that offers the perfect contrast to creamy filling.
- 4 tablespoons melted butter: Binds the crumbs for a sturdy crust and adds richness.
- 16 oz cream cheese, softened: The star of the filling with its rich, smooth body.
- 1/2 cup powdered sugar: Sweetens the cream cheese filling evenly without graininess.
- 1 teaspoon vanilla extract: Adds a warm, fragrant note that complements the tang of cream cheese.
- 1 cup heavy whipping cream: Whipped to fluffy perfection for that light, airy texture in the filling.
- Fresh berries (raspberries, strawberries, blueberries): Bright and colorful, they bring natural sweetness and freshness as a topping.
- Mint leaves (optional): Adds lovely aromatic freshness and lively color accents.
- Powdered sugar (for dusting): Gives a delicate, pretty finish before serving.
How to Make No Bake Mini Cheesecakes Recipe
Step 1: Creating the Crust
Begin by combining the graham cracker crumbs with melted butter until the mixture resembles wet sand. This step is crucial to ensure your crust sets firmly and holds its shape within the muffin liners, giving you that delightful, crumbly bite beneath the creamy cheesecake.
Step 2: Forming the Base
Press the crust mixture firmly and evenly into the bottoms of muffin liners placed in a tin. Chilling them now sets the stage for the rest of the cheesecake magic by letting the crust harden just enough to support the filling without crumbling.
Step 3: Making the Cream Cheese Mixture
Using soft cream cheese, beat it together with powdered sugar and vanilla extract until smooth and silky. This forms the luscious heart of your mini cheesecakes, so take your time to achieve a perfectly creamy texture without lumps.
Step 4: Whipping the Cream
In a separate bowl, whip heavy cream until stiff peaks form. This is the secret to a light, fluffy filling that won’t weigh down the mini cheesecakes but will instead melt delightfully on your tongue.
Step 5: Folding in the Whipped Cream
Gently fold the whipped cream into the cream cheese mixture to keep as much air as possible while combining them evenly. This step ensures your filling is airy and smooth, a perfect contrast to the crunch of the crust.
Step 6: Assembling the Cheesecakes
Spoon or pipe the filling carefully over the chilled crusts, smoothing the tops with a spatula or the back of a spoon. Now your mini cheesecakes start to look irresistibly creamy and inviting.
Step 7: Chilling Time
Place the assembled mini cheesecakes in the refrigerator for at least 4 hours or preferably overnight. This lets the filling set firmly and the flavors meld together beautifully. Patience here really rewards you with luscious, sliceable cheesecakes.
Step 8: Adding the Finishing Touches
Just before serving, top each cheesecake with fresh berries, a sprinkle of powdered sugar, and optionally a small mint leaf. This final flourish adds freshness, color, and that amazing visual appeal that makes these mini treats truly special.
How to Serve No Bake Mini Cheesecakes Recipe
Garnishes
Fresh berries like raspberries, blueberries, and sliced strawberries are perfect for adding vibrant pops of flavor and color. A dusting of powdered sugar creates a delicate, snow-like effect, while a small mint leaf brings a subtle herbal lift that complements the richness beautifully.
Side Dishes
Serve alongside a light fruit salad or a small scoop of sorbet to balance the richness of these mini cheesecakes. They also pair wonderfully with a hot cup of coffee or a fragrant tea, enhancing the dessert experience with simple yet thoughtful accompaniments.
Creative Ways to Present
Try serving these mini cheesecakes in clear glass jars or on a pretty tiered dessert stand for a stunning display at your next gathering. You can also experiment with different crusts like crushed cookies or nuts for variation that suits your taste or the occasion.
Make Ahead and Storage
Storing Leftovers
Keep any leftover mini cheesecakes refrigerated in an airtight container to preserve their freshness and texture. They remain delicious for up to 3 days, perfect for enjoying little treats all week long.
Freezing
If you want to make these ahead of time, mini cheesecakes freeze exceptionally well. Wrap them individually in plastic wrap and store in a freezer-safe container for up to 2 months. Thaw in the fridge before serving to maintain their creamy texture.
Reheating
Since these are no bake and best eaten cold, reheating is not recommended. Instead, allow frozen cheesecakes to thaw gradually in the refrigerator. Serve chilled to enjoy the classic smooth and creamy mouthfeel.
FAQs
Can I use a different crust instead of graham crackers?
Absolutely! You can substitute graham cracker crumbs with crushed digestive biscuits, chocolate cookies, or even finely chopped nuts for a unique twist on the classic crust. Just be sure to keep the same ratio with melted butter for consistency.
Do I have to use heavy whipping cream?
Yes, heavy whipping cream is essential to achieve the light, fluffy texture in the filling. Using lighter creams or milk won’t whip up properly and can affect the structure and mouthfeel of your mini cheesecakes.
How long do these mini cheesecakes need to chill?
The filling sets best after chilling for at least 4 hours, but overnight chilling is ideal for a firmer texture and enhanced flavor fusion. The wait is 100% worth it!
Can I make these mini cheesecakes vegan or dairy-free?
With some substitutions like vegan cream cheese and coconut cream, you can make a dairy-free version. However, the texture and taste will vary slightly, so be prepared for a different but still delicious treat.
What is the best way to serve these at a party?
Serve them chilled on a pretty platter with fresh berries on top and let guests enjoy them as finger food. Their mini size makes them perfect for gatherings, and they pair well with sparkling wine or a light dessert cocktail.
Final Thoughts
There is something truly magical about how the No Bake Mini Cheesecakes Recipe comes together so effortlessly yet delivers that perfect bite every time. Whether for a weekend treat or a special occasion, these little cheesecakes make any moment sweeter and more joyful. Give them a try—you won’t believe how simple indulgence can be!
Print
No Bake Mini Cheesecakes Recipe
- Prep Time: 4 hours 20 minutes
- Cook Time: 0 minutes
- Total Time: 4 hours 20 minutes
- Yield: 12 mini cheesecakes
- Category: Dessert
- Method: No-Cook
- Cuisine: American
Description
Delight in these creamy, no-bake mini cheesecakes featuring a buttery graham cracker crust and a light, fluffy cream cheese filling. Perfectly portioned for individual servings and topped with fresh berries and mint for a refreshing finish. No oven required, making them an easy and elegant dessert for any occasion.
Ingredients
Crust
- 1 cup graham cracker crumbs
- 4 tablespoons melted butter
Filling
- 16 oz cream cheese, softened
- 1/2 cup powdered sugar
- 1 teaspoon vanilla extract
- 1 cup heavy whipping cream
Toppings
- Fresh berries (raspberries, strawberries, blueberries)
- Mint leaves (optional)
- Powdered sugar (for dusting)
Instructions
- Prepare the crust: In a mixing bowl, combine the graham cracker crumbs with melted butter until the mixture is evenly moistened.
- Form crust bases: Press the graham cracker mixture firmly into the bottom of muffin liners placed in a muffin tin. Ensure the crust is compact and even. Place the tin in the refrigerator to chill while preparing the filling.
- Mix cream cheese base: In a separate bowl, beat the softened cream cheese together with powdered sugar and vanilla extract until the mixture is smooth and creamy.
- Whip cream: In another bowl, whip the heavy cream until stiff peaks form, indicating it can hold its shape.
- Combine filling: Gently fold the whipped cream into the cream cheese mixture, taking care to maintain the airy texture without overmixing.
- Assemble cheesecakes: Spoon or pipe the cream cheese filling evenly over the chilled crusts in each muffin liner, smoothing the tops with a spatula.
- Chill to set: Refrigerate the assembled mini cheesecakes for at least 4 hours or overnight to allow them to firm up.
- Add toppings before serving: Just before serving, garnish each mini cheesecake with fresh berries, optional mint leaves, and a light dusting of powdered sugar for an elegant finish.
Notes
- For best results, use full-fat cream cheese and heavy whipping cream to achieve a rich, creamy texture.
- Ensure cream cheese is softened to room temperature to avoid lumps in the filling.
- This recipe requires chilling time but no baking, making it ideal for warm weather or easy preparation ahead of time.
- Use silicone or paper muffin liners for easy removal and serving.
- Experiment with different toppings like chocolate shavings or caramel drizzle for variety.
