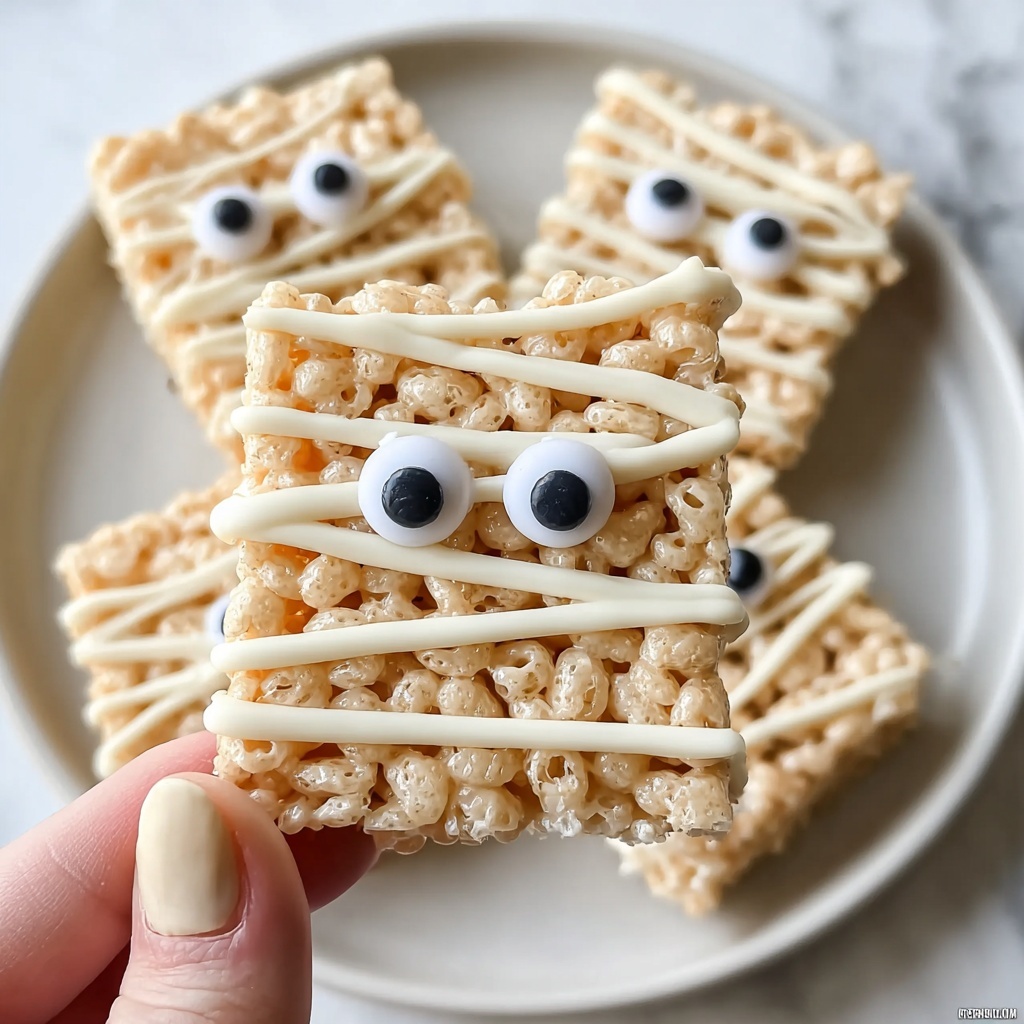
If you’re looking for a delightfully spooky yet irresistibly tasty treat to wow your friends and family, look no further than this Mummy Rice Krispie Treats Recipe. These fun and festive treats combine the classic chewy goodness of Rice Krispies with a playful mummy design, bringing a perfect blend of nostalgia and Halloween spirit to your dessert table. You’ll adore how the sweet marshmallows, crispy cereal, and creamy white chocolate come together so effortlessly in this charming snack, sure to impress both kids and adults alike.
Ingredients You’ll Need
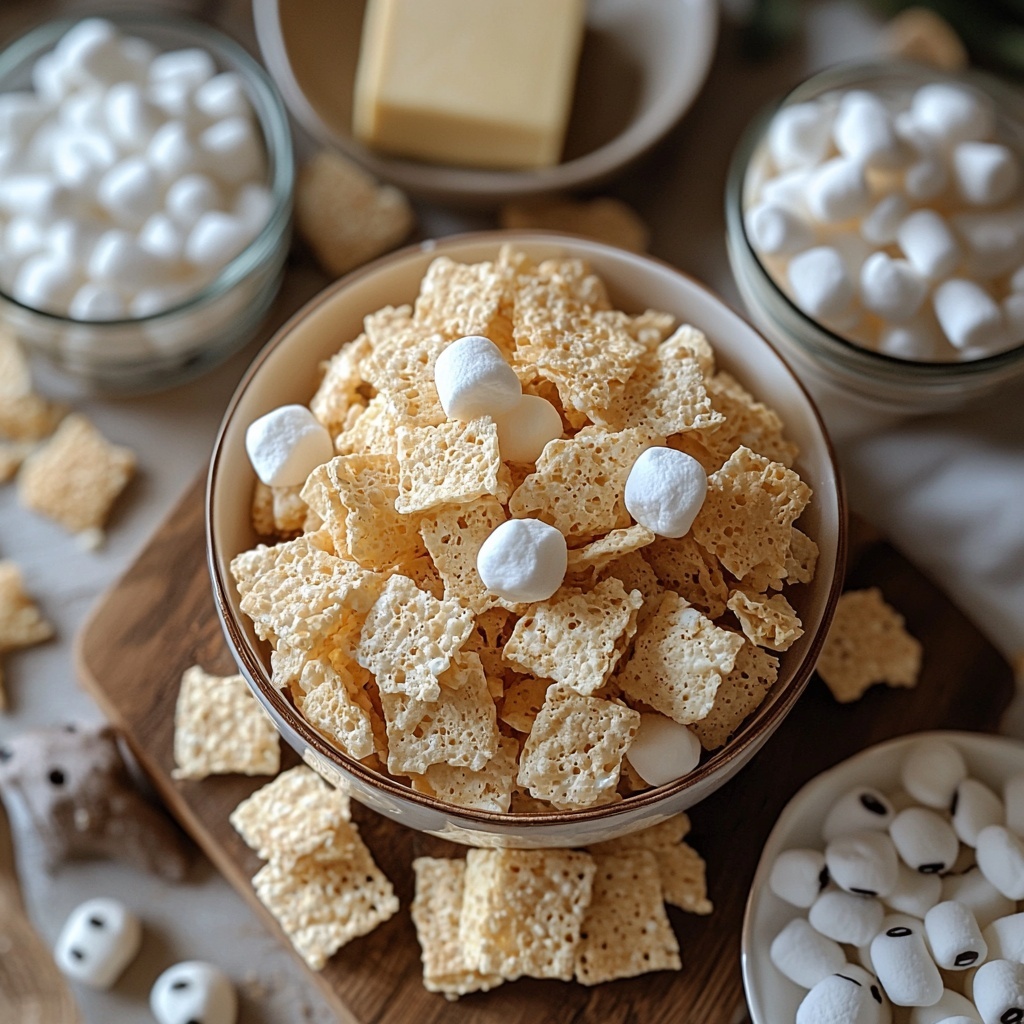
This Mummy Rice Krispie Treats Recipe calls for a handful of simple, everyday ingredients that work harmoniously to create that quintessential soft, crunchy, and sweet texture that everyone loves. Each component serves its purpose, from the buttery richness that helps bind everything to the candy eyeballs that bring your little mummies to life.
- 3 Tbsp butter: Adds flavorful richness and helps melt the marshmallows smoothly.
- 5 1/2 cups mini marshmallows (or 1 bag): The sweet, gooey base that ties your treats together.
- 6 cups Rice Krispies cereal: Provides that iconic crispy crunch, the star of these treats.
- 8 oz white chocolate (melted): Creates a beautiful mummy-like drizzled design with creamy sweetness.
- 20 candy eyeballs (or mini chocolate chips): Adds a spooky and fun finishing touch to your mummies.
How to Make Mummy Rice Krispie Treats Recipe
Step 1: Melt Butter and Marshmallows
Start by melting 3 tablespoons of butter in a saucepan over medium heat. Once melted, add the mini marshmallows and stir continuously until they’re fully melted and smooth. This process creates the sticky, irresistible base that holds everything together.
Step 2: Mix in Rice Krispies
Remove the melted marshmallow mixture from the heat and gently fold in 6 cups of Rice Krispies cereal. Stir carefully to ensure every crispy kernel is evenly coated with the gooey marshmallow magic, giving you that perfect balance of chewy and crunchy.
Step 3: Press into Pan and Cool
Transfer the mixture into a greased 9×13 inch baking pan. Press it firmly and evenly with a spatula or your hands to create a solid, yet soft block. Let it cool for about 10 minutes so it firms up but stays nicely pliable for decorating.
Step 4: Drizzle White Chocolate for Mummy Wrappings
While the treats cool, gently melt 8 ounces of white chocolate in a microwave-safe bowl, heating in short bursts to avoid burning. Drizzle the melted white chocolate over the cooled Rice Krispie layer in crisscross mummy-like lines, creating a wrapping effect that’s both cute and spooky.
Step 5: Add Candy Eyeballs and Set
Before the white chocolate sets, place 20 candy eyeballs strategically to give your mummies their signature eerie gaze. If you don’t have candy eyes on hand, mini chocolate chips can do the trick as well. Allow everything to set completely before cutting into individual squares.
How to Serve Mummy Rice Krispie Treats Recipe
Garnishes
For an extra pop of festive flair, sprinkle some crushed Halloween-themed sprinkles or edible glitter around your mummy Rice Krispie treats. This adds texture and a dash of sparkle that makes your dessert table look as fun as the treats taste.
Side Dishes
If you’re planning a Halloween party spread, pair these mummies with tangy apple slices or a bowl of spiced cider. The sweet crunchiness of the Rice Krispie treats complements the fresh fruit and warm beverages for a well-rounded seasonal snack experience.
Creative Ways to Present
Try placing the mummy treats on a rustic wooden board lined with parchment paper, surrounded by mini pumpkins or faux cobweb decorations to enhance the Halloween vibe. Alternatively, serve them in clear cellophane bags tied with orange or black ribbons for a cute take-home party favor.
Make Ahead and Storage
Storing Leftovers
After enjoying your first batch, store any leftovers in an airtight container at room temperature. They’ll stay fresh and chewy for up to three days, keeping their classic texture and fun mummy look intact.
Freezing
If you want to keep your Mummy Rice Krispie Treats Recipe going longer, wrap individual squares tightly in plastic wrap, then place them in a freezer-safe container. Frozen treats stay delicious for up to 6 weeks, and thawing them is a breeze.
Reheating
For warming up frozen mummies, let them thaw at room temperature for about an hour. If you want to refresh the softness, pop them in the microwave for 10 to 15 seconds. Just be careful not to melt the candy eyes or white chocolate decorations!
FAQs
Can I use regular marshmallows instead of mini marshmallows?
Absolutely! While mini marshmallows melt more quickly and evenly, regular marshmallows work just fine. You might need to chop them into smaller pieces for faster melting and easier mixing.
What can I substitute for candy eyeballs?
If candy eyeballs aren’t available, mini chocolate chips or small dots of melted chocolate piped onto wax paper and chilled until firm make excellent stand-ins for spooky eyes.
Is it necessary to use white chocolate for the mummy design?
White chocolate works best because it mimics the look of bandages and contrasts nicely over the treats. However, you can use vanilla candy melts or colored melting chocolates for fun variations.
Can I make these treats gluten-free?
Yes! Just make sure to use a gluten-free version of puffed rice cereal like Rice Krispies Gluten-Free, and double-check the other ingredients for gluten content to keep these mummies safe for everyone.
How do I keep my Rice Krispie treats from sticking to my hands when pressing into the pan?
Grease your hands lightly with butter or cooking spray before pressing the mixture down. This helps prevent the sticky marshmallow from clinging to your fingers, making the process much easier.
Final Thoughts
There’s something truly magical about this Mummy Rice Krispie Treats Recipe that makes it an instant hit at any gathering. It’s straightforward to make, downright adorable, and perfectly nostalgic, blending simple ingredients in a playful way that’s bound to bring smiles all around. I encourage you to whip up a batch and enjoy sharing these spooky snacks with your favorite people — I promise it’s as fun to make as it is to eat!
Print
Mummy Rice Krispie Treats Recipe
- Prep Time: 15 minutes
- Cook Time: 10 minutes
- Total Time: 25 minutes
- Yield: 24 servings
- Category: Dessert
- Method: Stovetop
- Cuisine: American
Description
These fun and festive Mummy Rice Krispie Treats are perfect for Halloween parties or a spooky snack. Crispy cereal coated in melted marshmallows is shaped into squares, then decorated with drizzled white chocolate and candy eyeballs to create adorable mummy faces. Easy to make and sure to be a hit with kids and adults alike!
Ingredients
Base
- 3 Tbsp butter
- 5 1/2 cups mini marshmallows (or 1 bag)
- 6 cups Rice Krispies cereal
Topping
- 8 oz white chocolate, melted
- 20 candy eyeballs (or mini chocolate chips)
Instructions
- Melt Butter and Marshmallows: In a saucepan over medium heat, melt the butter. Once melted, add the mini marshmallows and stir continuously until the marshmallows are completely melted and the mixture becomes smooth.
- Mix in Rice Krispies: Remove the saucepan from heat. Quickly stir in the Rice Krispies cereal until all the cereal is evenly coated with the marshmallow mixture.
- Press into Pan: Grease a 9×13 inch baking pan. Transfer the mixture into the pan and press down firmly and evenly. Allow it to cool for about 10 minutes so it sets properly.
- Melt White Chocolate: Melt the white chocolate in a microwave-safe bowl using short intervals, stirring between to prevent burning, until smooth.
- Decorate with Drizzle and Eyes: Drizzle the melted white chocolate over the cooled Rice Krispie layer in a mummy-like pattern to mimic wrappings. While the chocolate is still wet, place candy eyeballs evenly spaced on top. Let the treats set completely before cutting them into squares for serving.
Notes
- Use a spatula or greased hands to press the mixture firmly into the pan to avoid sticking.
- If candy eyeballs are unavailable, mini chocolate chips or dots of melted chocolate can be used as eyes.
- White chocolate can be melted gently in a double boiler to avoid scorching.
- For extra flavor, consider adding a teaspoon of vanilla extract with the marshmallows.
- Store treats in an airtight container at room temperature for up to 3 days to maintain freshness.


