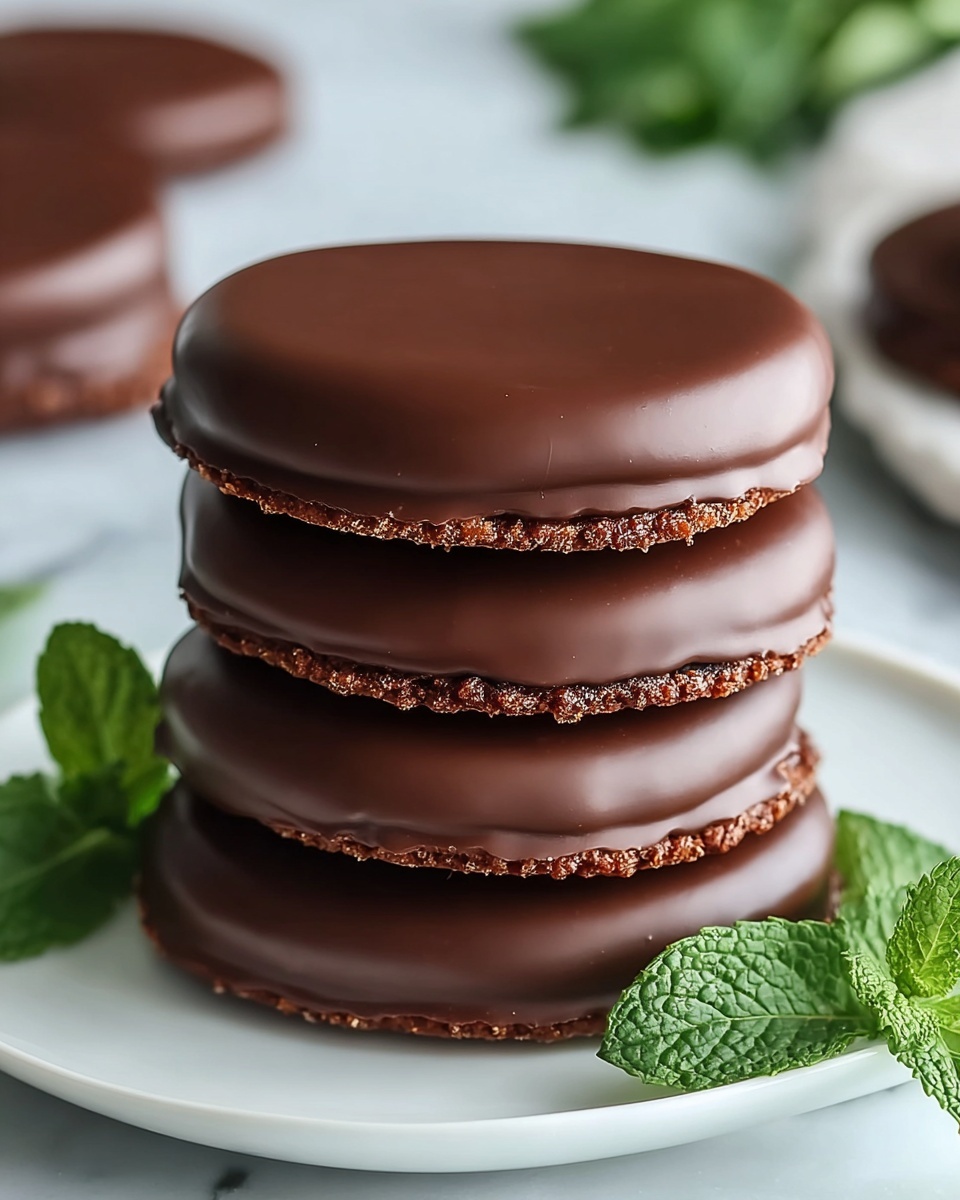
If you’ve ever dreamed of creating bakery-worthy treats in your own kitchen, this Easy Homemade Thin Mint Cookies for a Flavor-Packed Treat Recipe is going to bring that dream to life. These cookies combine the delicate crunch of a thin biscuit with the invigorating freshness of mint and the luscious embrace of chocolate, making every bite a celebration of flavor. The beauty of this recipe lies not just in its irresistible taste but in how accessible it is for any home baker eager to whip up something truly special without fuss or fancy equipment.
Ingredients You’ll Need
Gathering the right ingredients is the first secret to success, and this recipe relies on simple pantry staples that each play a crucial role in building perfect texture and flavor. From the soft butter that tenderizes to the cocoa powder that layers rich chocolate notes, every component works in harmony.
- All-purpose flour: Provides structure to the cookies, allowing them to stay thin yet sturdy.
- Cocoa powder: Infuses a rich chocolate flavor that’s deeply satisfying and not overpowering.
- Baking soda: Helps the cookies rise just enough to maintain a delicate chew rather than a cakey texture.
- Salt: Enhances overall flavor, balancing the sweetness and intensifying the chocolate tones.
- Granulated sugar: Provides the essential sweetness and helps achieve crisp edges.
- Brown sugar: Adds moisture and a gentle caramel flavor, keeping cookies tender inside.
- Unsalted butter: Softened for mixing, it contributes richness and a smooth mouthfeel.
- Egg: Binds the ingredients together and helps with the structure.
- Peppermint extract: Provides the minty flavor that’s the hallmark of Thin Mints.
- Semisweet chocolate chips: For coating the cookies, offering that glossy, decadent finish.
- Vegetable oil: Used to thin the melted chocolate for easier dipping and a smoother coating.
How to Make Easy Homemade Thin Mint Cookies for a Flavor-Packed Treat Recipe
Step 1: Preheat and Prepare
Begin by warming your oven to 350°F (175°C) and lining two baking sheets with parchment paper. This simple preparation ensures your cookies bake evenly and lift off the pan effortlessly, avoiding any sticking disasters.
Step 2: Mix Dry Ingredients
In a medium bowl, whisk together the all-purpose flour, cocoa powder, baking soda, and salt. This step is crucial for evenly distributing the cocoa and raising agent, ensuring every cookie has uniform flavor and texture.
Step 3: Cream Butter and Sugars
In a large mixing bowl, beat the softened unsalted butter with granulated sugar and brown sugar until the mixture turns light and fluffy. This aeration creates a tender cookie crumb and helps the peppermint flavor shine through.
Step 4: Add Egg and Peppermint Extract
Mix in the egg and peppermint extract to the creamed butter mixture until fully incorporated, giving the dough that signature mint flair and helping bind it all together perfectly.
Step 5: Combine Dry and Wet Ingredients
Gradually add the dry mixture to the wet ingredients, stirring on low speed until just combined. Avoid overmixing to keep your cookies delicate and thin rather than tough.
Step 6: Fold in Chocolate Chips
Gently fold in the semisweet chocolate chips using a spatula, spreading little bursts of chocolate throughout each cookie for that extra treat in every bite.
Step 7: Shape the Cookies
Drop rounded balls of dough onto the baking sheets, spacing them out so the cookies can spread without sticking together. This prevents overcrowding and ensures crisp edges.
Step 8: Bake to Perfection
Bake for 10 to 12 minutes until the cookie edges become firm but the centers stay soft. This timing is key to achieving that delightful Thin Mint texture—crisp yet tender.
Step 9: Cool Before Coating
Allow the cookies to cool on the baking sheets for 5 minutes before transferring to a wire rack to cool completely. This cooling step prepares the cookies for the luxurious chocolate dipping.
Step 10: Prepare the Chocolate Coating
In a microwave-safe bowl, melt the chocolate chips with the vegetable oil in short bursts, stirring between intervals until smooth and silky. The oil helps the chocolate coat the cookies evenly.
Step 11: Dip the Cookies
Dip each cooled cookie into the melted chocolate, letting the excess drip back into the bowl. This creates a perfect, thin chocolate layer that adds shine and richness.
Step 12: Chill to Set
Place the chocolate-coated cookies on parchment paper and refrigerate for about 30 minutes to let the chocolate harden properly, locking in that glossy finish and fantastic snap.
Step 13: Enjoy Your Masterpiece
Your Easy Homemade Thin Mint Cookies for a Flavor-Packed Treat Recipe is now ready to be devoured! Store any leftovers in an airtight container to keep their freshness intact.
How to Serve Easy Homemade Thin Mint Cookies for a Flavor-Packed Treat Recipe

Garnishes
Sprinkle crushed peppermint candies or dust with a fine layer of cocoa powder just before serving to elevate the presentation and amplify the minty aroma. A light sea salt sprinkle can also add an unexpected pop of flavor that complements the sweetness beautifully.
Side Dishes
Pair these cookies with a warm cup of hot chocolate or a peppermint mocha to echo the cookie’s flavors and create a festive pairing. Alternatively, a scoop of vanilla ice cream alongside these Thin Mints can turn your snack into a decadent dessert.
Creative Ways to Present
Arrange the cookies in a festive tin or a decorative box lined with parchment paper for gifting. You can also sandwich a small dollop of mint-infused whipped cream between two cookies for a creamy twist on this classic treat.
Make Ahead and Storage
Storing Leftovers
Keep your Thin Mint Cookies fresh by storing them in an airtight container at room temperature. They will stay delicious for up to a week, maintaining the perfect balance of crispness and chew.
Freezing
These cookies freeze exceptionally well. Place them in a single layer on a baking sheet to freeze initially, then transfer to a sealed freezer bag or container. They can be frozen for up to 3 months without losing flavor or texture.
Reheating
For that fresh-from-the-oven warmth, gently reheat the cookies in a low oven for a few minutes or microwave briefly. This will soften the chocolate coating slightly and revive the tender cookie texture, making each bite just as delightful as when freshly baked.
FAQs
Can I substitute peppermint extract with fresh mint?
Fresh mint has a different flavor profile and moisture content, which can alter the cookie’s texture and taste. Peppermint extract delivers consistent, concentrated flavor essential for this recipe, so it’s best to stick with the extract for authentic Thin Mint flavor.
Why are my cookies not thin enough?
Make sure you use the precise amount of flour and avoid overmixing your dough, which can add more structure and thickness. Also, gently flatten the cookie balls slightly before baking if you want them extra thin.
Can I use dark chocolate instead of semisweet for coating?
Absolutely! Dark chocolate will add a richer and slightly more bitter edge, which pairs wonderfully with the mint flavor. Just ensure it melts smoothly by adding a bit of vegetable oil as directed.
How do I prevent the chocolate coating from melting too fast?
Once dipped, chilling the cookies in the refrigerator sets the chocolate firmly. Keep them stored in a cool place and avoid warm environments to prevent the coating from softening or melting.
Are these cookies suitable for freezing after dipping in chocolate?
Yes, you can freeze chocolate-coated Thin Mint Cookies. Place them on a parchment-lined tray to freeze individually, then transfer them to an airtight container. Thaw at room temperature before serving for the best texture.
Final Thoughts
There’s something truly magical about creating these Easy Homemade Thin Mint Cookies for a Flavor-Packed Treat Recipe that brings both nostalgia and joy with every bite. They are simple to make yet elegantly delicious, promising a wonderful experience whether baking for special occasions or a quiet night in. I encourage you to try this recipe and share it with friends and family—the warm smiles and satisfied sighs that follow are all part of the fun.
Print
Easy Homemade Thin Mint Cookies for a Flavor-Packed Treat Recipe
- Prep Time: 15 minutes
- Cook Time: 12 minutes
- Total Time: 57 minutes
- Yield: 24 cookies
- Category: Dessert/Cookies
- Method: Baking
- Cuisine: American
- Diet: Vegetarian
Description
These Easy Homemade Thin Mint Cookies offer a delightful blend of rich chocolate and refreshing peppermint flavors. Perfectly crisp on the edges with a soft center, these cookies are coated in a smooth semisweet chocolate glaze that provides an irresistible, flavor-packed treat that’s sure to satisfy your sweet tooth.
Ingredients
Dry Ingredients
- 1.5 cups All-purpose flour
- 0.5 cups Cocoa powder
- 0.5 teaspoon Baking soda
- 0.25 teaspoon Salt
Wet Ingredients
- 1 cup Granulated sugar
- 0.5 cup Brown sugar
- 0.5 cup Unsalted butter (softened)
- 1 large Egg
- 1 teaspoon Peppermint extract
For Coating
- 1 cup Semisweet chocolate chips
- 2 tablespoons Vegetable oil
Instructions
- Preheat Oven: Preheat your oven to 350°F (175°C) and line two baking sheets with parchment paper to prevent sticking and ensure even baking.
- Mix Dry Ingredients: In a medium bowl, whisk together the all-purpose flour, cocoa powder, baking soda, and salt until fully combined.
- Cream Butter and Sugars: In a large mixing bowl, cream the softened unsalted butter with granulated sugar and brown sugar until the mixture becomes light and fluffy, which helps create a tender cookie texture.
- Add Egg and Peppermint Extract: Incorporate the egg and peppermint extract into the creamed mixture, mixing thoroughly until smooth and uniform in texture.
- Combine Dry and Wet Ingredients: Gradually add the dry ingredients to the wet ingredients, mixing on low speed just until combined to avoid overdeveloping gluten for a tender cookie.
- Fold in Chocolate Chips: Gently fold in the semisweet chocolate chips using a spatula, ensuring even distribution without breaking the chips.
- Form Dough Balls: Drop rounded balls of cookie dough onto the prepared baking sheets, spacing them adequately to allow for spreading during baking.
- Bake Cookies: Bake in the preheated oven for 10-12 minutes, until the cookie edges are firm but the centers remain slightly soft for a chewy texture.
- Cool Cookies: Let the cookies cool on the baking sheets for 5 minutes before transferring them to a wire rack to cool completely, allowing them to set and maintain shape.
- Melt Chocolate Coating: Melt the semisweet chocolate chips and vegetable oil together in the microwave, stirring every 30 seconds until smooth and glossy.
- Dip Cookies: Dip each cooled cookie into the melted chocolate, letting excess chocolate drip off for an even coating.
- Set Coating: Refrigerate the dipped cookies for about 30 minutes to allow the chocolate coating to fully set and harden.
- Serve and Store: Enjoy your Thin Mint Cookies immediately or store leftovers in an airtight container to keep them fresh and flavorful.
Notes
- Make sure the butter is softened at room temperature for easier creaming with sugars.
- Do not overmix the dough once the dry ingredients are added to keep cookies tender.
- For a thicker chocolate coating, you may double the semisweet chocolate chips and adjust the oil accordingly.
- Store cookies in an airtight container at room temperature for up to 5 days or refrigerate for longer freshness.
- Use parchment paper or silicone baking mats to prevent sticking and for easy cleanup.

