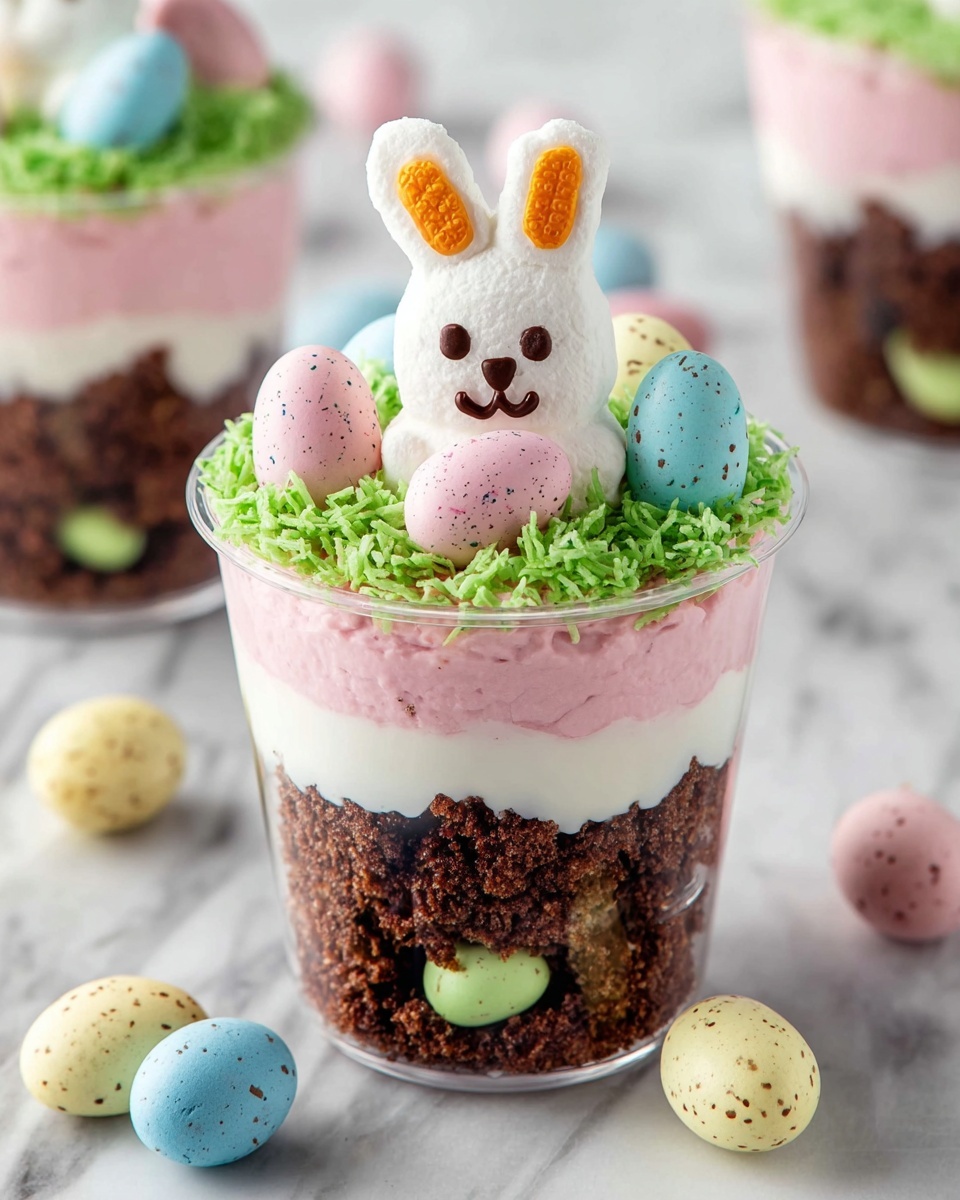
If you are on the hunt for a delightful and playful dessert that captures the joy of spring celebrations, this Easter Dirt Cups Recipe is an absolute winner. With its creamy layers of colorful pudding, the crunchy surprise of Oreo crumbs, and the whimsical touch of candy eggs and Peeps on top, these dirt cups bring fun and flavor to any Easter gathering. They are easy to make, visually stunning, and sure to bring smiles to kids and adults alike. Let me walk you through everything you need to create this charming treat that tastes as good as it looks!
Ingredients You’ll Need
Putting together these Easter Dirt Cups is a breeze with just a handful of ingredients, each playing a crucial role in the taste, texture, and festive appearance. From the creamy vanilla pudding base to the crunchy, crumbly Oreos and bright, colorful toppings, every element enhances the experience.
- Vanilla instant pudding mix (3.9 oz.): The smooth and sweet foundation that sets the base flavor for the cups.
- Cold milk (2 cups): Needed to bring the pudding mix to life with a creamy texture.
- Cool Whip (8 oz., thawed): Adds fluffiness and lightness, making the pudding incredibly silky.
- Oreo cookies (finely crushed, filling removed): The critical “dirt” component that gives you that iconic crunchy, chocolatey layer.
- Food coloring (various colors): To create those bright, playful pudding layers that scream Easter cheer.
- Shredded coconut: Used to mimic grass once it’s dyed with food coloring for that outdoor garden vibe.
- Candy eggs: Sweet, colorful, and perfect for adding pops of interest and texture on top.
- Peeps: Adorable marshmallow chicks or bunnies that add height and character to your dirt cups.
How to Make Easter Dirt Cups Recipe
Step 1: Whip Up the Vanilla Pudding
Begin by whisking the vanilla instant pudding mix into cold milk for about 2 minutes until everything is combined and smooth. Then, let the pudding stand for 5 minutes. This resting step is key—it gives the pudding time to thicken and develop that creamy texture we all love.
Step 2: Divide and Color the Pudding
Split the pudding mixture evenly into two bowls. This is where the magic happens—add your chosen food coloring to each bowl. I love using bright spring shades like pink and purple, but feel free to get creative with your favorite Easter colors. These colorful layers make the dessert visually irresistible.
Step 3: Fold in the Cool Whip
Carefully fold the thawed Cool Whip into each bowl of colored pudding. This step lightens your pudding, making it fluffy and luscious, which contrasts beautifully with the crunchy cookie layers to come.
Step 4: Start Layering with Crushed Oreos
Grab your mason jars or serving cups and add about one tablespoon of finely crushed Oreo cookies right to the bottom. These crushed cookies without the filling form the essential “dirt” layer, bringing a delightful crunch and that familiar chocolate taste.
Step 5: Add the First Pudding Layer
Next, spoon a scoop of one of your colored pudding mixes on top of the Oreo crumbs. Spread it evenly to create a nice smooth layer that will look beautiful when you serve it.
Step 6: Repeat the Layers
Keep building your Easter Dirt Cups Recipe by repeating the Oreo cookie crumbs and colored pudding layers. Alternate colors so they stack in a pretty pattern. Finish by topping with a final layer of crushed Oreos to keep the “dirt” theme strong.
Step 7: Chill to Set
Refrigerate the assembled cups for at least 1 hour. This chilling step lets the flavors meld, the pudding firm up, and prepares your dirt cups to be the perfect treat when served.
Step 8: Dye the Shredded Coconut
While waiting, take the shredded coconut and put it into a container with a lid. Add a few drops of food coloring and just enough water to moisten the coconut so it absorbs the color evenly. Shake it up until it’s all tinted like fresh Easter grass.
Step 9: Decorate the Dirt Cups
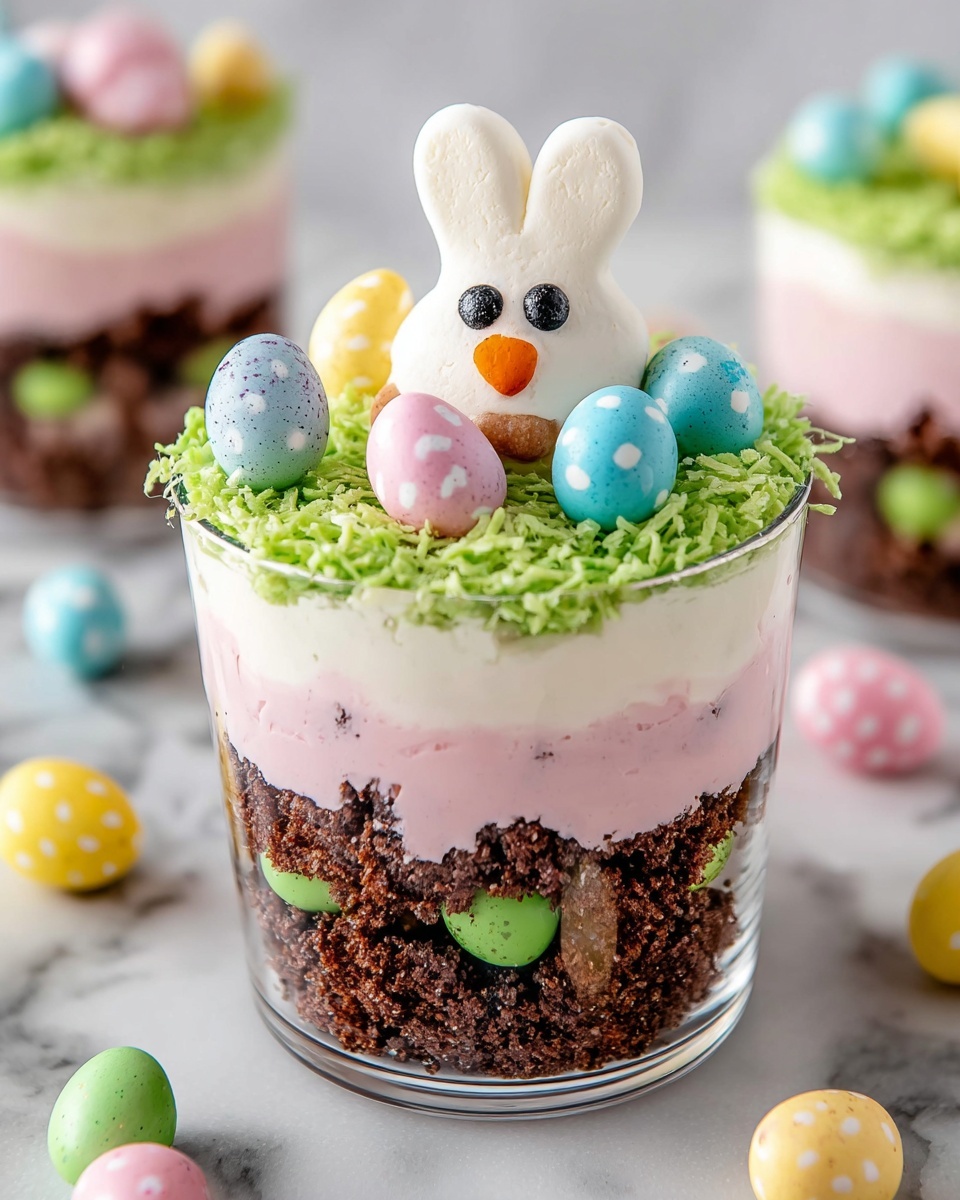
Right before serving, sprinkle the colored shredded coconut generously over the top of each cup. Then, hand place candy eggs and Peeps marshmallow figures on this grassy coconut layer for a whimsical, festive finish.
How to Serve Easter Dirt Cups Recipe
Garnishes
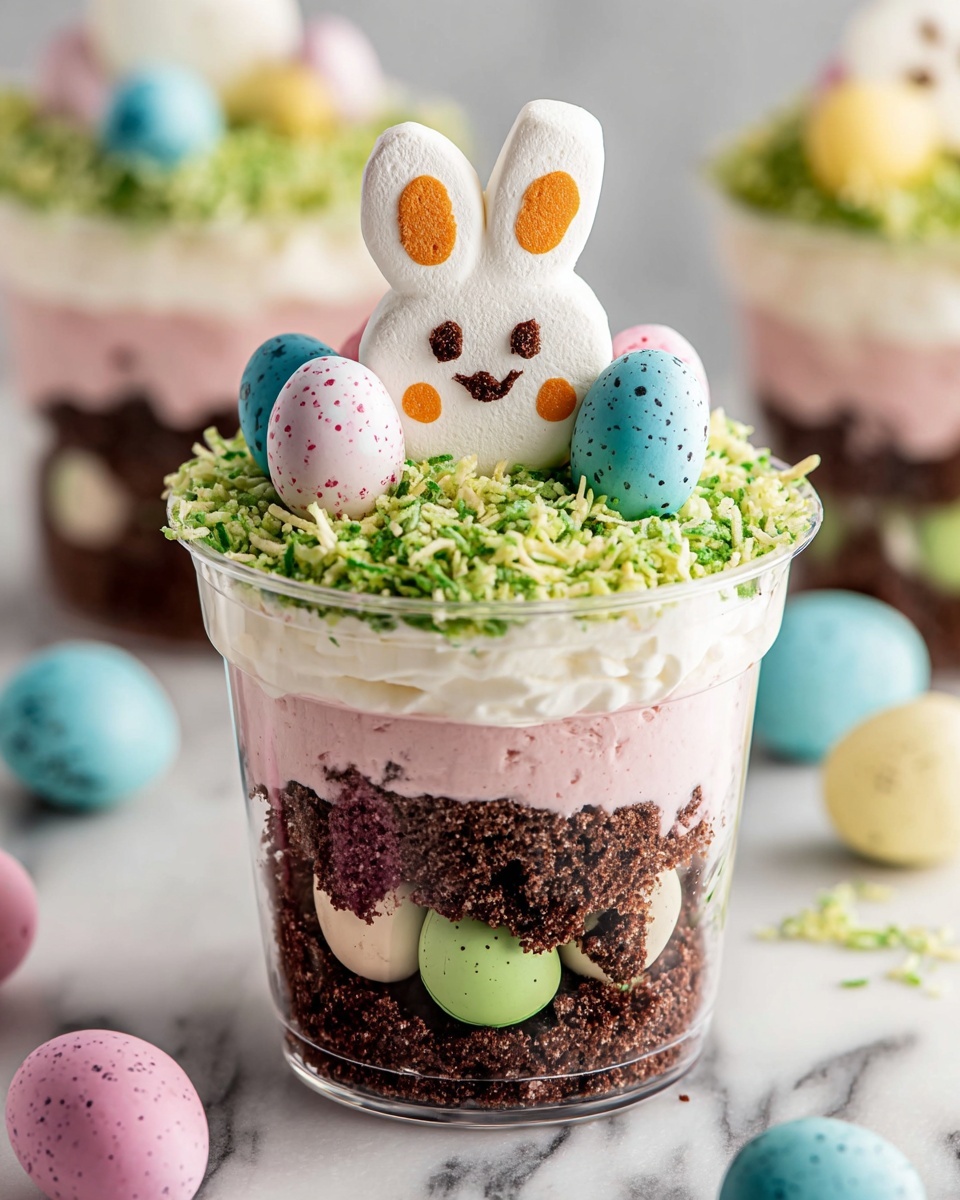
The garnishes are what truly bring Easter Dirt Cups to life! The shredded coconut dyed in pastel hues resembles fresh grass, providing a perfect base for topping with candy eggs and Peeps. These add texture, color, and a dash of seasonal fun that instantly makes your dessert party-ready.
Side Dishes
Pairing your dirt cups with light and refreshing side treats such as fruit salad, carrot sticks with hummus, or even a citrusy sorbet can complement the richness of the pudding and balance the sweetness beautifully. It’s an easy way to make your Easter table feel complete and thoughtful.
Creative Ways to Present
You can get really creative by serving your Easter Dirt Cups Recipe in different kinds of clear jars, mini flower pots, or even hollowed-out oranges for a natural and festive twist. Add little decorative signs or Easter-themed picks to jazz up each cup, turning dessert into a centerpiece everyone will admire.
Make Ahead and Storage
Storing Leftovers
If you have leftover Easter Dirt Cups, keep them covered tightly in the refrigerator to maintain freshness. They hold up well for up to 2 days, though for the best texture and flavor, enjoying them within 24 hours is ideal.
Freezing
Because of the pudding and Cool Whip, these dirt cups do not freeze well as their texture tends to get watery and grainy upon thawing. It’s best to make them fresh or at most one day ahead to keep that perfect creamy consistency.
Reheating
These are best served cold and should not be reheated. The pudding and whipped topping are designed for a cool, refreshing treat, especially perfect for spring gatherings where a chilled dessert is just right.
FAQs
Can I use homemade pudding instead of instant pudding?
Absolutely! Homemade vanilla pudding works wonderfully and gives you control over sweetness and texture, but instant pudding is great for convenience and consistent results.
What can I use if I don’t have Cool Whip?
You can substitute whipped heavy cream or whipped topping of your choice. Just make sure it is well chilled and fluffy so it blends nicely with the pudding.
How do I get the Oreo crumbs so fine?
The easiest method is placing the cookies in a sealed plastic bag and crushing them with a rolling pin or using a food processor for a quicker, uniform crumb.
Can I make these dirt cups vegan?
Yes! Choose a vegan pudding mix, dairy-free milk alternatives, and a plant-based whipped topping. Just double-check that your Oreos and candy are vegan-friendly.
Is it okay to prepare these a day in advance?
Definitely, making your Easter Dirt Cups Recipe a day early actually helps the flavors meld and the pudding to set beautifully, just keep them refrigerated and add garnishes right before serving.
Final Thoughts
My goodness, these Easter Dirt Cups Recipe treats never fail to brighten up any celebration with their playful look and delicious layers. They’re not only incredibly fun to make but also endlessly versatile to customize with your favorite colors and candies. Whether you’re planning a family gathering or a festive party, dive in and whip up these cheerful cups—you’ll be so glad you did!
Print
Easter Dirt Cups Recipe
- Prep Time: 20 minutes
- Cook Time: 0 minutes
- Total Time: 1 hour 20 minutes
- Yield: 18 dirt cups
- Category: Dessert
- Method: No-Cook
- Cuisine: American
- Diet: Vegetarian
Description
Easter Dirt Cups are a fun and festive no-bake dessert perfect for spring celebrations. Layers of creamy vanilla pudding tinted with vibrant colors alternate with crushed Oreo cookies, creating a whimsical ‘dirt’ effect. Topped with colorful shredded coconut, candy eggs, and Peeps marshmallows, these cups are both playful and delicious, ideal for parties or family gatherings.
Ingredients
Pudding Mixture
- 1 package (3.9 oz.) vanilla instant pudding mix
- 2 cups cold milk
- 1 container (8 oz.) Cool Whip, thawed
- Food coloring (various colors, such as purple and pink)
Dirt and Toppings
- 1 package Oreo cookies (finely crushed, filling removed)
- Shredded coconut
- Candy eggs
- Peeps marshmallows
Instructions
- Prepare pudding: In a medium bowl, whisk together the vanilla instant pudding mix and cold milk for about 2 minutes until smooth. Let stand for 5 minutes to allow the pudding to set properly.
- Color the pudding: Divide the set pudding into two separate bowls. Add food coloring to each bowl to create your desired colors, such as purple in one and pink in the other.
- Fold in Cool Whip: Gently fold the thawed Cool Whip into the colored pudding mixtures in each bowl to create a creamy, fluffy texture.
- Start layering: Place one tablespoon of finely crushed Oreo cookies at the bottom of each mason jar or serving cup to form the ‘dirt’ base.
- Add pudding layer: Spoon a layer of one colored pudding mixture over the crushed cookies.
- Alternate layers: Repeat layering, alternating between colored pudding and crushed Oreo cookies, finishing with a layer of crushed cookies on top.
- Chill the cups: Refrigerate the dirt cups for at least 1 hour to allow them to fully set and the flavors to meld.
- Color the coconut: Place shredded coconut in a lidded container. Add a few drops of food coloring and a small amount of water, then shake until the coconut is evenly colored, resembling grass or foliage.
- Garnish and serve: Just before serving, top each dirt cup with the colored shredded coconut, candy eggs, and Peeps marshmallows for a festive, Easter-themed presentation.
Notes
- For best results, remove the Oreo filling before crushing to enhance texture and flavor contrast.
- You can use any food coloring colors you prefer for the pudding and coconut to match your party theme.
- Make sure the Cool Whip is fully thawed before folding it into the pudding mixture to maintain smoothness.
- These cups can be prepared a day ahead and stored covered in the refrigerator to save time.
- Use clear mason jars or cups for a visually appealing layered effect.


