
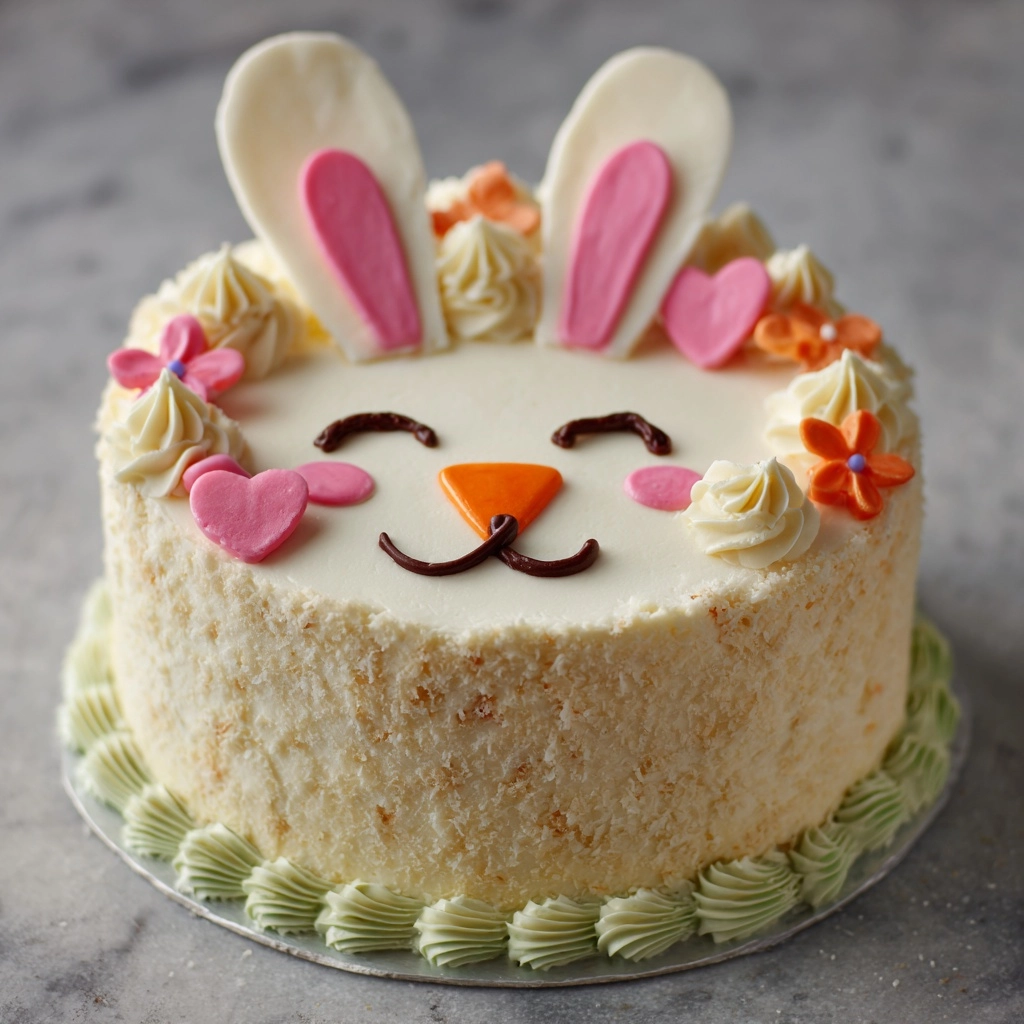
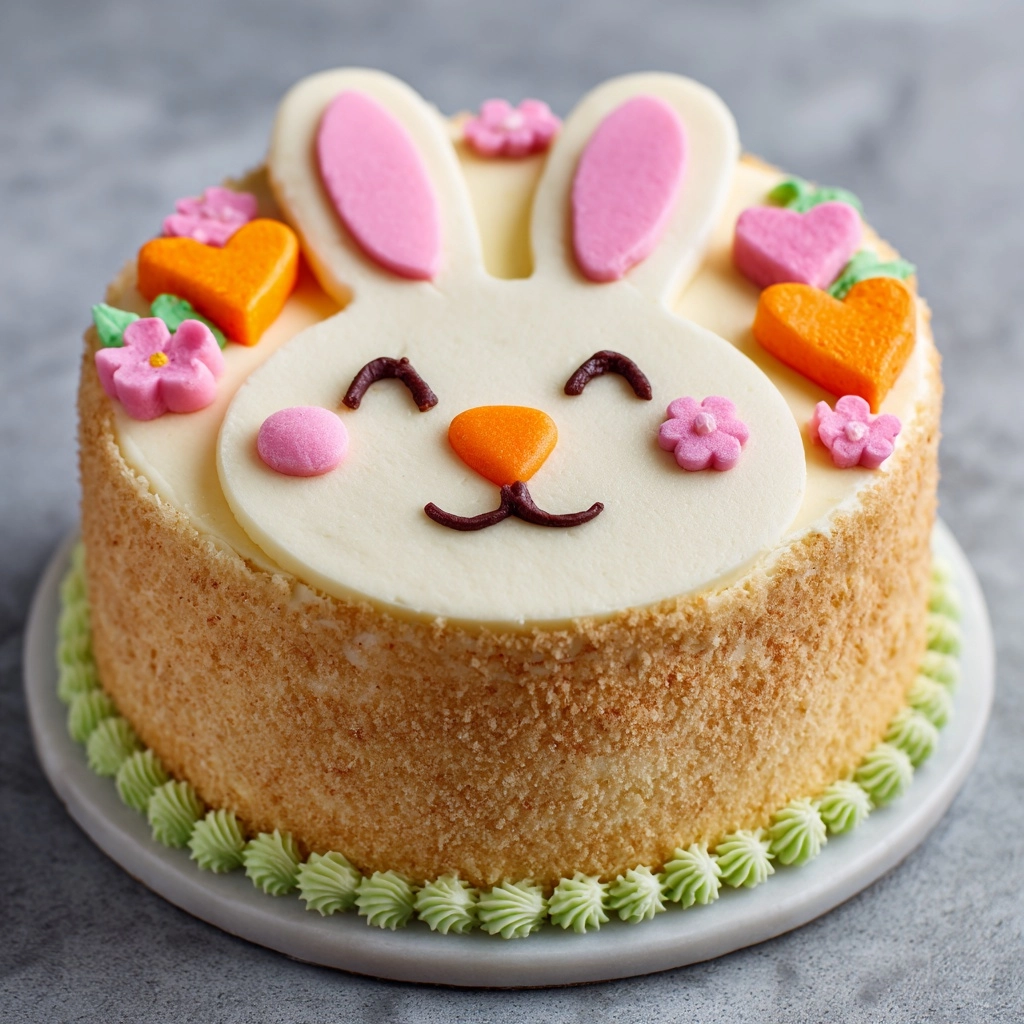
If you’re searching for a charming and delightful centerpiece to brighten up your spring celebration, the Easter Bunny Cake Recipe is just what you need. This adorable cake brings together fluffy, moist layers covered in sweet, coconut “fur” and decorated with fun marshmallow cheeks, jelly bean features, and colorful accents. It’s sweet, festive, and guaranteed to make smiles appear on both kids’ and adults’ faces alike. Plus, it’s simpler to prepare than it looks, making it a perfect baking project to share with family or friends.
Ingredients You’ll Need
Gathering the right ingredients is a breeze with this recipe, and each plays a crucial role in creating the perfect texture, flavor, and festive look. From the cake base to the detailed decorations, these simple staples come together beautifully to build the Easter Bunny cake everyone will adore.
- White or yellow cake mix: Provides a light, fluffy canvas that bakes perfectly and pleases every palate.
- Sweetened shredded coconut: Mimics bunny fur with its soft texture and adds a slight chewiness.
- Vanilla or cream cheese frosting: Acts as both the “glue” and luscious coating that adds creaminess and sweetness.
- Pink food coloring: Just a touch creates charming accents on the bunny’s ears.
- Black jelly beans: Perfectly sized for the bunny’s bright, shiny eyes.
- Pink jelly bean: A cute, edible nose that adds color and character.
- Large marshmallow: When halved, forms the adorable rosy cheeks.
- Mini marshmallows: Tiny teeth that enhance the bunny’s sweet smile.
- Graham crackers or paper cutouts: Craft the bunny’s ears, giving structure and extra fun detail.
- Colored sprinkles or candy (optional): Provides a customizable splash of vibrant decoration to finish your bunny.
How to Make Easter Bunny Cake Recipe
Step 1: Bake the Cake Layers
Start by preparing your cake mix according to the package directions. Divide the batter evenly into two 8-inch round pans and bake until golden and a toothpick comes out clean. Let these cool completely — this step is key to ensuring your bunny holds its shape when you assemble it.
Step 2: Shape the Bunny’s Head and Ears
Place one full cake round on your serving plate; this will be the bunny’s head. Take the second round, cut it carefully in half, and position the halves on either side of the head with the cut edges down, forming the bunny ears. Use a bit of frosting to secure them so they stay perfectly in place.
Step 3: Apply Crumb Coat and Chill
Spread a thin layer of frosting over the entire bunny, covering the head and ears. This crumb coat traps any loose cake crumbs and creates a smooth surface. Chill the cake for 15 to 20 minutes to set the frosting, making the next layer easier to apply.
Step 4: Frost and Add Coconut “Fur”
Now apply a generous second layer of frosting all over, ensuring every nook and cranny is covered. Then gently press the sweetened shredded coconut onto the frosting, mimicking soft bunny fur. This step adds texture and whimsy, making your bunny come alive.
Step 5: Decorate the Bunny’s Face
Tint a small amount of frosting with pink food coloring and paint the inside of the ears to add a lovely blush. Attach the black jelly beans as eyes, the pink jelly bean as the nose, and place the halved large marshmallows on either side for chubby cheeks. Use mini marshmallows to create cute little bunny teeth, and sprinkle on any additional candy or sprinkles you like for that extra festive flair.
How to Serve Easter Bunny Cake Recipe
Garnishes
Adding a few thoughtful garnishes can elevate your Easter Bunny Cake Recipe to wow factor. Fresh mint leaves, edible flowers, or pastel-colored candies scattered around the plate can create a festive presentation that’s as lovely as the cake itself. These little touches invite guests to gather around and admire your handiwork before diving in.
Side Dishes
Pair the cake with light and fresh sides to balance out the sweetness. Think fruit salads with juicy berries or citrus segments, or a crisp spring vegetable platter with a creamy dip. These options complement the cake well and keep the dessert moment feeling fresh and bright.
Creative Ways to Present
For added fun, set the Easter Bunny Cake on a flower-adorned cake stand or use a pastel-colored plate to enhance the holiday colors. You can also place the bunny in a nest of shredded paper grass or edible coconut grass dyed green. Encourage kids to join in decorating around the bunny with chocolate eggs or mini carrot candies for an interactive experience everyone will treasure.
Make Ahead and Storage
Storing Leftovers
If you have any cake left, cover it lightly with plastic wrap or store it in an airtight container to keep the frosting fresh and the coconut from drying out. It will stay delicious for up to three days at room temperature or about a week if refrigerated.
Freezing
You can freeze assembled cake for longer keeping, but it’s best to freeze before decorating to preserve the texture and appearance. Wrap the cake tightly in plastic wrap and then aluminum foil to prevent freezer burn. Thaw it gradually in the refrigerator overnight before frosting and decorating.
Reheating
This cake is best enjoyed cool or at room temperature, so reheating is usually unnecessary. If your kitchen is chilly, simply let the slice sit at room temperature for 20 minutes before serving to bring out the flavors and soften the frosting slightly.
FAQs
Can I use homemade cake instead of a boxed mix?
Absolutely! Feel free to use your favorite homemade vanilla or yellow cake recipe. Just be sure to bake it in two 8-inch pans so the bunny shape works perfectly.
What if I don’t have shredded coconut? Can I substitute something else?
While shredded coconut gives a fantastic furry look, you could try white sprinkles or crushed white chocolate chips as a creative alternative for texture and visual effect.
Can this Easter Bunny Cake Recipe be made gluten-free?
Yes! Use a gluten-free cake mix and double-check that all decorations, especially the graham crackers or candy, are gluten-free to accommodate dietary needs.
What’s the best way to color shredded coconut?
Simply add a few drops of food coloring to the coconut in a sealed plastic bag and shake until evenly tinted. Pastel shades work beautifully for a festive touch.
Can I make the bunny ears out of something other than graham crackers?
Definitely! You can cut ears from sturdy cardboard for display purposes or bake thin almond flour cookies shaped like ears for a tasty and edible alternative.
Final Thoughts
This Easter Bunny Cake Recipe really brings the holiday to life with its whimsical design and scrumptious flavor. It’s the kind of recipe that turns baking into a joyful, shared experience, and the smiles it brings are truly priceless. Whether you’re baking with kids or surprising your loved ones, this cake is sure to create lasting memories. Give it a try—you’ll be so glad you did!
Print
Easter Bunny Cake Recipe
- Prep Time: 30 minutes
- Cook Time: 25 minutes
- Total Time: 1 hour (plus cooling time)
- Yield: 10–12 servings
- Category: Dessert
- Method: Baking
- Cuisine: American
- Diet: Vegetarian
Description
This delightful Easter Bunny Cake is a festive and fun dessert perfect for celebrating the holiday. It features a fluffy white or yellow cake base, frosted and adorned with sweet shredded coconut fur, jelly bean eyes and nose, marshmallow cheeks and teeth, and decorative ears. Easy to assemble and great for involving kids in decorating, this cake brings a charming bunny face to your dessert table.
Ingredients
Cake
- 1 box white or yellow cake mix (plus ingredients listed on box)
Frosting and Decoration
- 1 container (16 oz) vanilla or cream cheese frosting
- Pink food coloring
- 1 1/2 cups sweetened shredded coconut
- 2 black jelly beans (for eyes)
- 1 pink jelly bean (for nose)
- 1 large marshmallow (cut in half for cheeks)
- 2 mini marshmallows (for teeth)
- 2 graham crackers or paper cutouts (for ears)
- Colored sprinkles or candy (optional, for decoration)
Instructions
- Prepare the Cake: Follow the instructions on the cake mix box to prepare the batter. Pour the batter evenly into two greased 8-inch round cake pans and bake as directed. Once baked, allow the cakes to cool completely before assembling.
- Assemble the Bunny Shape: Place one whole cake layer on a serving tray as the bunny’s head. Cut the second cake layer in half. Position the two halves on either side of the head, cut side down, to form the bunny ears. Use a little frosting to secure the ears in place.
- Apply Crumb Coat: Spread a thin layer of frosting over the entire assembled cake to lock in crumbs. Chill the cake for 15 to 20 minutes to set the crumb coat.
- Final Frosting Layer: Apply a second, thicker layer of frosting evenly over the head and ears, smoothing out the surface completely.
- Add Coconut Fur: Gently press the sweetened shredded coconut over the entire frosted cake to create a fluffy bunny fur effect.
- Color and Decorate Ears: Tint a small amount of frosting with pink food coloring and use it to decorate the inner parts of the bunny ears for a realistic look.
- Attach Facial Features: Press the black jelly beans onto the face for eyes and place the pink jelly bean for the nose. Use the two halves of a large marshmallow as cheeks and position two mini marshmallows for teeth beneath the nose.
- Optional Decoration: Add colored sprinkles or candy decorations as desired to enhance the festive appearance of the bunny cake.
Notes
- Color the shredded coconut with pastel food coloring for an extra festive touch.
- This cake is kid-friendly; involve children in the decorating process for fun family activity.
- You can substitute the white or yellow cake mix with chocolate cake mix for a richer flavor.

