If you are craving a seafood sandwich that delivers crispy, crunchy texture with flaky, tender fish inside, you’re going to love this Crispy Fried Cod Sandwich Recipe. It’s a true taste sensation with perfectly seasoned cod fillets coated in a golden, crunchy crust and nestled in a soft bun with fresh lettuce, juicy tomato, and that optional creamy tartar sauce that brings everything together beautifully. This recipe is straightforward but packs a serious punch in flavor and texture. It’s perfect for an easy lunch, a delightful dinner, or any time you want to impress friends with something both comforting and special.

Ingredients You’ll Need
Every ingredient in this Crispy Fried Cod Sandwich Recipe plays a crucial role. They are simple yet essential, creating layers of flavor and texture: from the spices that season the flour to the crunch of the panko breadcrumbs, and the fresh veggies that add color and crispness to each bite.
- 1 lb cod fillets: The star of the dish, providing mild, flaky fish perfect for frying.
- 1 cup all-purpose flour: Forms the first crispy coating and holds the seasoning.
- 1 teaspoon salt: Enhances all the flavors and seasons the fish perfectly.
- 1/2 teaspoon black pepper: Adds a subtle bite and depth.
- 1 teaspoon paprika: Brings mild smokiness and beautiful color to the coating.
- 1/2 teaspoon garlic powder: Infuses a fragrant savoriness.
- 1/2 teaspoon onion powder: Complements the garlic and lifts the overall flavor.
- 1/4 teaspoon cayenne pepper: Provides just the right hint of heat.
- 1 cup buttermilk: Tenderizes the fish and helps the breadcrumbs stick.
- 1 large egg: Acts as a binding agent for the breading layers.
- 1 cup panko breadcrumbs: Gives that legendary crunchy texture everyone craves.
- Vegetable oil (for frying): Ensures the cod fries evenly to a golden crisp.
- 4 sandwich buns: Soft and toasted for a satisfying sandwich base.
- Lettuce leaves: Adds freshness and a pleasant crunch.
- Tomato slices: Juicy and bright, balancing the richness.
- Tartar sauce (optional): Creamy and tangy, perfect to elevate the sandwich.
How to Make Crispy Fried Cod Sandwich Recipe
Step 1: Prepare the Fish
Start by patting your cod fillets dry with paper towels. Removing excess moisture is key to achieving that irresistible crispy crust rather than soggy breading. Dry fish also helps the flour and breadcrumbs stick better, setting you up for perfect frying.
Step 2: Mix the Seasoned Flour
Combine the flour, salt, black pepper, paprika, garlic powder, onion powder, and cayenne pepper in a shallow dish. This spice blend infuses the coating with multiple layers of deliciousness — smoky, savory, and with just a touch of heat. Give it a quick whisk to blend everything evenly.
Step 3: Whisk the Wet Mix
In a separate shallow bowl, whisk together the buttermilk and egg until combined. This mixture tenderizes the cod and creates an adhesive layer that will make the panko breadcrumbs cling beautifully, ensuring every bite is crunchy.
Step 4: Get the Bread Crumbs Ready
Place the panko breadcrumbs in a third shallow dish. These larger, flakier crumbs are what give this sandwich its amazing texture, far superior to regular breadcrumbs in crunchiness.
Step 5: Coat the Cod Fillets
Now for the fun part: dredge each cod fillet first in the seasoned flour, ensuring it is completely coated. Then dip it into the buttermilk-egg mixture, letting any excess drip off. Finally, press the fillet firmly into the panko breadcrumbs, coating both sides generously for maximum crisp.
Step 6: Heat the Oil
Pour about an inch of vegetable oil into a large skillet or deep fryer, heating it over medium-high heat. The oil should reach about 350°F (175°C) for the perfect fry. Too cool and your crust will soak up the oil; too hot and the crust burns before the fish cooks.
Step 7: Fry the Cod
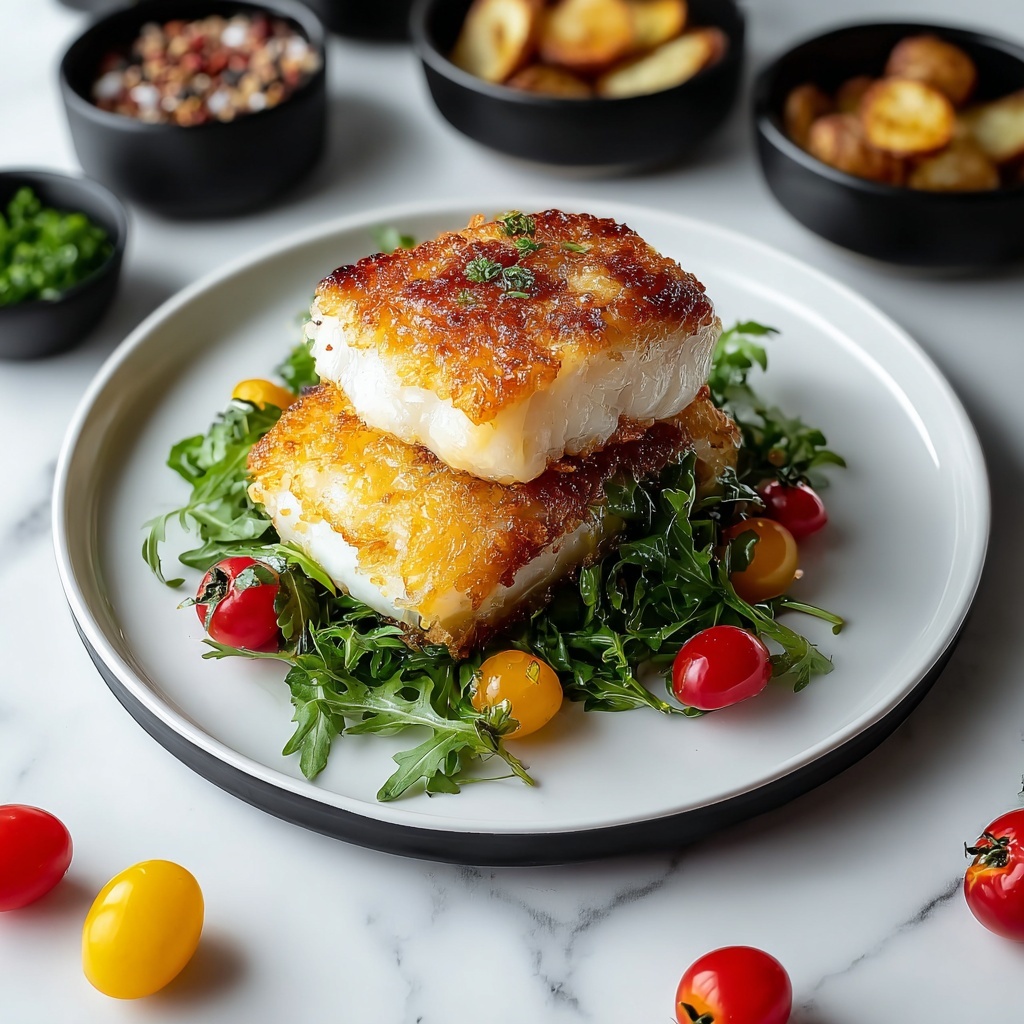
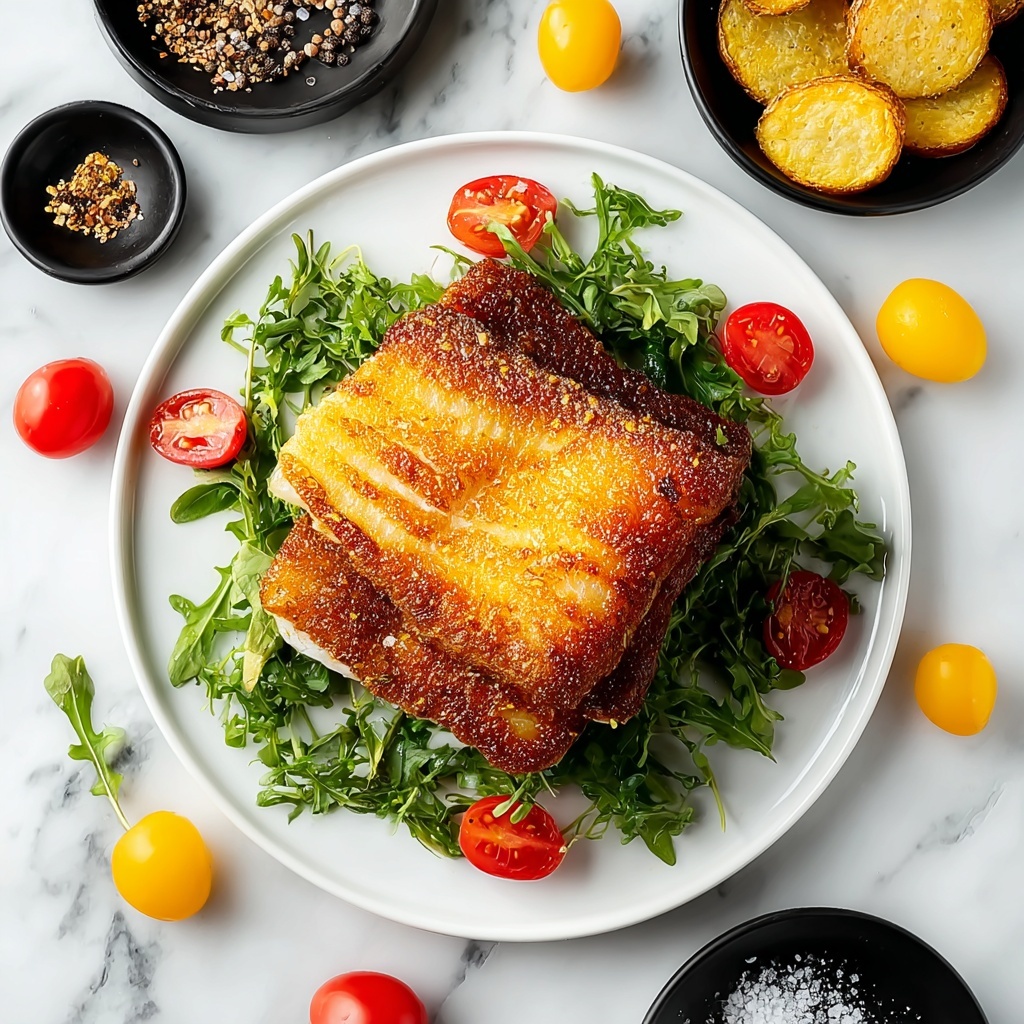
Lower the breaded fillets carefully into the hot oil and cook them for about 3 to 4 minutes per side. You’ll know it’s perfect when the crust is a gorgeous golden brown and crisp, and the fish inside flakes easily with a fork.
Step 8: Drain and Rest
Transfer the fried cod to a paper-towel-lined plate to drain any excess oil. This step keeps the coating from getting greasy and helps maintain that delightful crunch when you eat it.
Step 9: Toast the Buns
While the fish is resting, lightly toast your sandwich buns in the skillet or on a griddle. Toasting adds a lovely warmth and slight crunch to the buns that complements the crispy cod beautifully.
Step 10: Assemble the Sandwich
Spread tartar sauce on the bottom half of each toasted bun if you’re using it. Add a crisp lettuce leaf, a couple of tomato slices, then place your crispy fried cod fillet on top. Crown it with the toasted top bun and get ready for a bite of pure deliciousness.
How to Serve Crispy Fried Cod Sandwich Recipe
Garnishes
Fresh, vibrant garnishes like crisp lettuce and juicy tomatoes elevate the sandwich by adding refreshing, crunchy textures and a burst of color. A little tartar sauce adds the creamy tang that brightens every bite perfectly.
Side Dishes
Classic sides like crispy French fries or crunchy coleslaw make perfect companions, but a light cucumber salad or some seasoned sweet potato fries are also fantastic choices to round out your meal while keeping it balanced and exciting.
Creative Ways to Present
If you want to wow your guests, try serving your Crispy Fried Cod Sandwich Recipe open-faced on artisan buns topped with pickled red onions or a zesty slaw. Alternatively, wrap them up in parchment paper with a sprinkle of fresh herbs for a handheld picnic-friendly twist.
Make Ahead and Storage
Storing Leftovers
If you have leftover fried cod or sandwich components, store them separately in airtight containers in the refrigerator. The fried cod stays best if you re-crisp it later, and the fresh veggies hold up well when kept chilled.
Freezing
You can freeze the breaded, uncooked cod fillets by placing them on a tray to flash freeze, then packaging them tightly. When ready to cook, fry from frozen, adding an extra minute or two to the cooking time.
Reheating
To keep the crispiness, reheat the fried cod in an oven or air fryer at medium temperature until warm and crunchy again. Avoid microwaving, as it will make the coating soggy. Toast fresh buns and add new garnishes for a sandwich that tastes freshly made.
FAQs
Can I use other types of fish for this Crispy Fried Cod Sandwich Recipe?
Absolutely! While cod is ideal for its mild flavor and flaky texture, you can substitute with haddock, pollock, or tilapia. Just make sure the fillets aren’t too thin so they hold up well to frying.
What can I use instead of buttermilk?
If you don’t have buttermilk on hand, mix 1 cup milk with 1 tablespoon lemon juice or white vinegar and let it sit for 5 minutes. This homemade buttermilk substitute works perfectly to tenderize the fish and help the breading adhere.
Can I bake the cod instead of frying?
For a healthier option, you can bake the breaded cod at 425°F (220°C) on a wire rack for about 15-20 minutes until golden and crisp. It won’t be quite as crunchy as frying, but still delicious and lighter.
Is it necessary to use panko breadcrumbs?
Panko gives an extra light, airy crunch that regular breadcrumbs can’t quite match. If you don’t have panko, use plain breadcrumbs mixed with crushed cornflakes or crackers for added texture.
How long can I keep leftover sandwiches?
Since the breading softens over time, it’s best to eat the sandwiches fresh. If you need to store leftovers, keep the components separate and assemble just before eating to maintain the best texture and flavor.
Final Thoughts
This Crispy Fried Cod Sandwich Recipe is one of those dishes that brings pure joy with every bite — crunchy, flavorful, and simply satisfying. Once you try it, I bet it will become a favorite go-to for your seafood cravings. So, gather your ingredients, roll up your sleeves, and dive into making this fantastic sandwich that’s just waiting to brighten your mealtime!
Print
Crispy Fried Cod Sandwich Recipe
- Prep Time: 15 minutes
- Cook Time: 10 minutes
- Total Time: 25 minutes
- Yield: 4 sandwiches
- Category: Sandwich
- Method: Frying
- Cuisine: American
Description
This Crispy Fried Cod Sandwich recipe features tender cod fillets coated in a flavorful seasoned breadcrumb crust and fried to golden perfection. Served on toasted buns with fresh lettuce, tomato, and optional tartar sauce, it makes a delicious and satisfying meal perfect for seafood lovers craving a classic, crispy fish sandwich.
Ingredients
For the Cod:
- 1 lb cod fillets
- 1 cup all-purpose flour
- 1 teaspoon salt
- 1/2 teaspoon black pepper
- 1 teaspoon paprika
- 1/2 teaspoon garlic powder
- 1/2 teaspoon onion powder
- 1/4 teaspoon cayenne pepper
- 1 cup buttermilk
- 1 large egg
- 1 cup panko breadcrumbs
- Vegetable oil (for frying)
For the Sandwich Assembly:
- 4 sandwich buns
- Lettuce leaves
- Tomato slices
- Tartar sauce (optional)
Instructions
- Prepare the cod fillets: Pat the cod fillets dry with paper towels to remove any excess moisture to ensure the coating will stick well.
- Mix the seasoned flour: In a shallow dish, whisk together the all-purpose flour, salt, black pepper, paprika, garlic powder, onion powder, and cayenne pepper for a well-balanced seasoning blend.
- Combine buttermilk and egg: In another shallow dish, whisk the buttermilk and egg until fully combined to create a coating base for the fish.
- Prepare the breadcrumbs: Place the panko breadcrumbs in a third shallow dish ready for breading the fillets.
- Bread the cod fillets: Dredge each fillet first in the seasoned flour, coating evenly, then dip it into the buttermilk-egg mixture, and finally press firmly into the panko breadcrumbs, coating both sides thoroughly for maximum crispiness.
- Heat the oil: Pour about 1 inch of vegetable oil into a large skillet or deep fryer and heat over medium-high heat until it reaches 350°F (175°C), the ideal temperature for frying.
- Fry the cod fillets: Carefully lower the breaded fillets into the hot oil, frying each side for 3 to 4 minutes or until golden brown and crispy. Avoid overcrowding the pan for even cooking.
- Drain the fried fish: Remove the cooked fillets and place them on a paper towel-lined plate to absorb excess oil and maintain crispiness.
- Toast the buns: While the fish drains, lightly toast the sandwich buns in the skillet or on a griddle until they develop a lightly golden, crisp surface.
- Spread tartar sauce: Optionally, spread tartar sauce on the bottom halves of each toasted bun for a creamy, tangy complement.
- Add lettuce: Place a fresh lettuce leaf on top of the tartar sauce to add crunch and freshness.
- Add tomato slices: Layer one or two slices of ripe tomato over the lettuce for juiciness and flavor.
- Assemble the sandwich: Place a crispy fried cod fillet atop the tomato slices.
- Top the sandwich: Cover with the top halves of the toasted buns to complete the sandwich.
- Serve and enjoy: Serve the crispy fried cod sandwiches immediately while warm and enjoy the perfect combination of textures and flavors.
Notes
- Be sure to dry the cod fillets thoroughly before breading to ensure the coating adheres properly.
- Maintain the oil temperature around 350°F to avoid greasy or undercooked fish.
- For extra flavor, you can add a squeeze of lemon juice over the fish before assembling.
- Tartar sauce is optional but adds a great tangy contrast to the crispy fish.
- Use fresh sandwich buns for the best texture and taste.
- Do not overcrowd the frying pan; fry in batches if necessary for even cooking and maintaining oil temperature.


