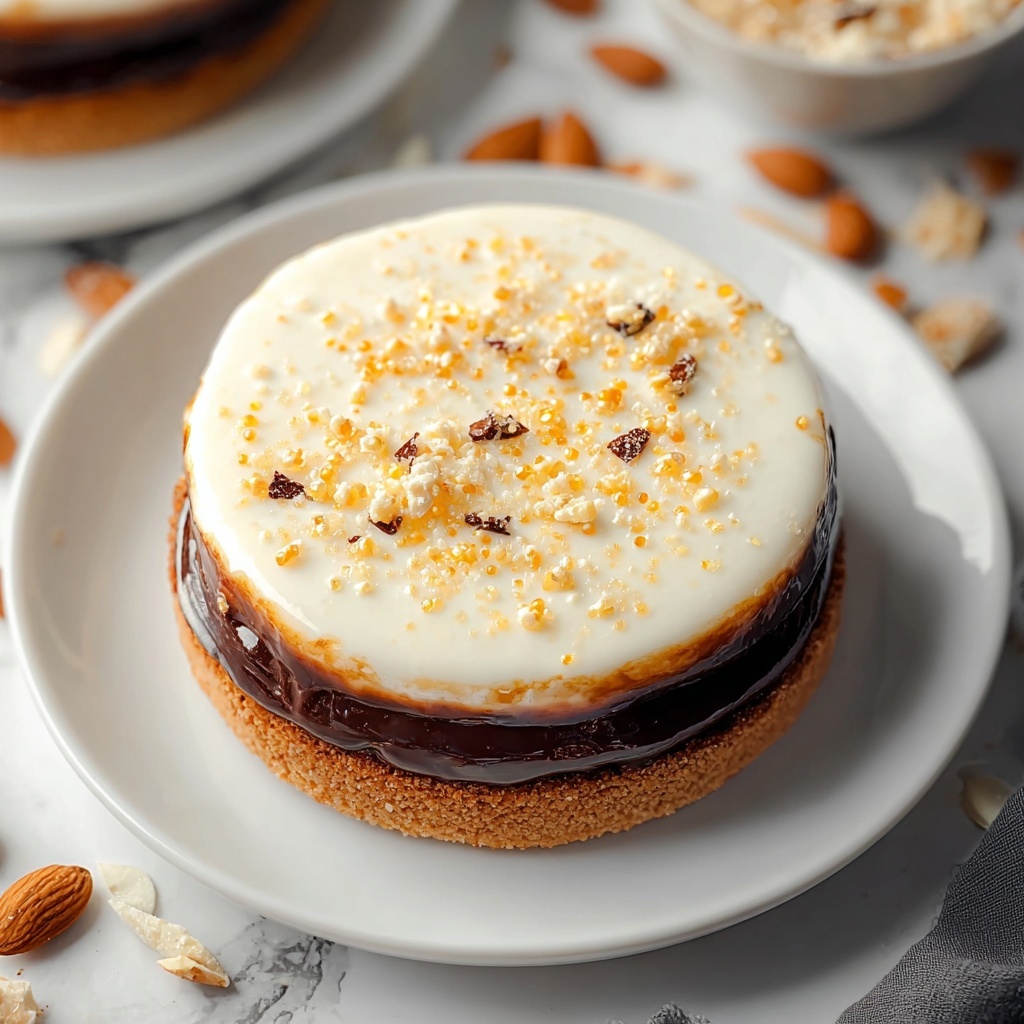
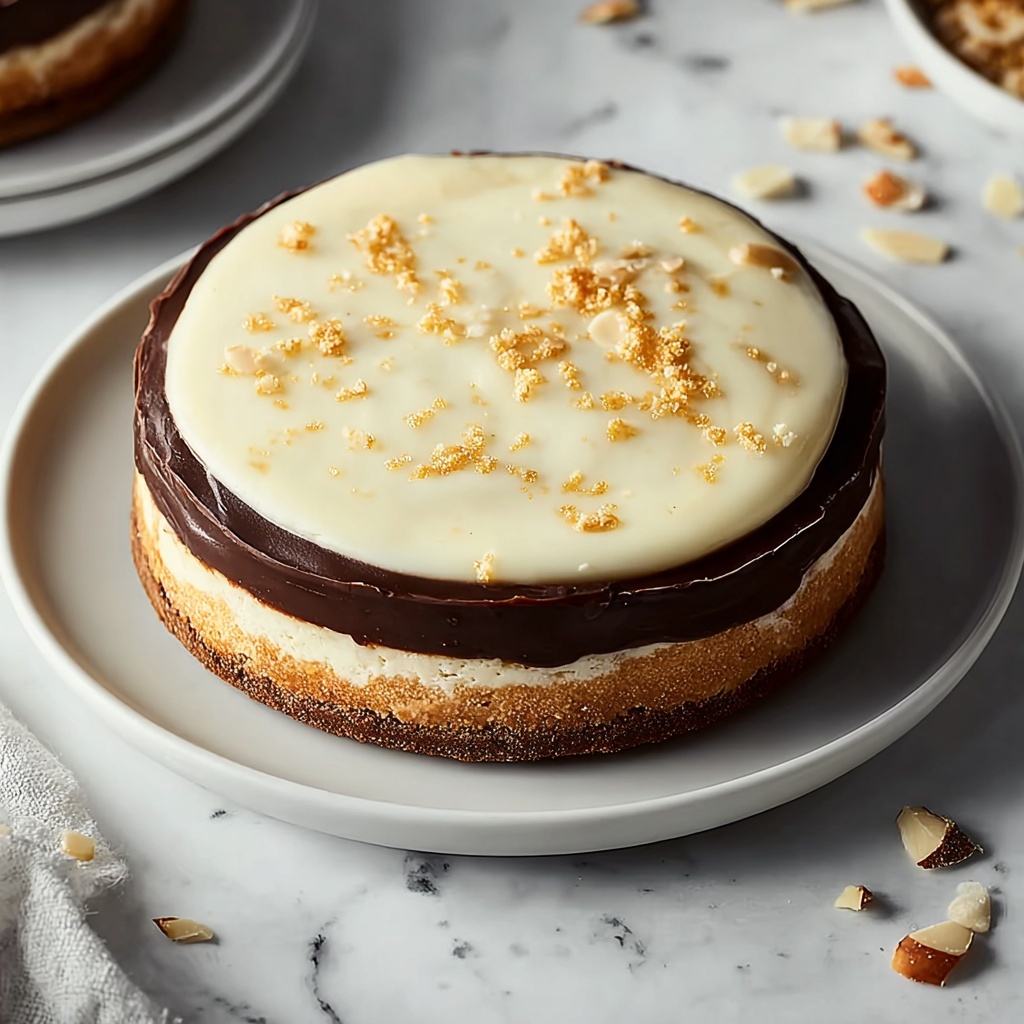
If you’re a fan of classic desserts with a fun twist, you’re going to absolutely love this Boston Cream Pie Cookies Recipe. Imagine the luscious, creamy filling and rich chocolate topping of a Boston cream pie transformed into a delightful bite-sized cookie. These cookies perfectly capture the essence of the beloved cake in a buttery, tender cookie form, topped with a glossy, irresistible chocolate glaze. Whether you want to impress guests or treat yourself, this recipe brings together simple ingredients to create an unforgettable sweet treat that feels both nostalgic and exciting.
Ingredients You’ll Need
This Boston Cream Pie Cookies Recipe relies on straightforward, pantry-friendly ingredients, each playing a key role in building flavor and texture. From the fluffy butter-sugar base to the rich chocolate glaze, every element combines to recreate the classic pie experience in cookie form.
- 2 1/2 cups all-purpose flour: The backbone of the cookie dough, providing structure without overwhelming density.
- 1 teaspoon baking powder: Ensures your cookies have a light, tender crumb.
- 1/2 teaspoon salt: Balances sweetness and enhances the overall flavor.
- 1 cup unsalted butter, softened: Adds richness and moisture for that melt-in-your-mouth texture.
- 1 cup granulated sugar: Sweetens the dough and helps with creaming for fluffiness.
- 2 large eggs: Bind the dough and contribute to the cookie’s soft and chewy quality.
- 2 teaspoons vanilla extract: Infuses the dough with warm, aromatic notes.
- 1/4 cup whole milk: Adds moisture to achieve the perfect dough consistency.
- 1/2 cup heavy cream: Essential for the luscious chocolate glaze’s smooth texture.
- 4 ounces semi-sweet chocolate: The star ingredient of the glaze, delivering that classic Boston cream pie finish.
- 1 tablespoon light corn syrup: Gives the chocolate glaze its shine and silky consistency.
How to Make Boston Cream Pie Cookies Recipe
Step 1: Prep Your Oven and Dry Ingredients
Start by preheating your oven to 350°F (175°C). Line two baking sheets with parchment paper so your cookies bake evenly and don’t stick. Then whisk together your all-purpose flour, baking powder, and salt in a medium bowl — this ensures your dry ingredients are evenly distributed, which is crucial for perfectly textured cookies.
Step 2: Cream Butter and Sugar
In a large mixing bowl, cream the softened butter and granulated sugar using an electric mixer on medium speed. Beat them until the mixture is light and fluffy, which usually takes about 3 to 4 minutes. This step traps air in your dough, giving your cookies a tender, delicate crumb reminiscent of Boston cream pie’s soft cake layers.
Step 3: Add Eggs and Vanilla
Next, add the eggs one at a time, mixing well after each addition. This helps combine the ingredients smoothly for a cohesive dough. Then stir in the vanilla extract, which will imbue your cookies with that unmistakably warm and inviting flavor that pairs perfectly with the chocolate topping.
Step 4: Combine Wet and Dry Ingredients
Now, gradually add the flour mixture to the butter-egg mixture, stirring on low speed just until it comes together. Avoid overmixing to keep your cookies tender. Once the flour is incorporated, pour in the whole milk and mix briefly until the dough forms nicely without any dry spots. This blend adds the ideal moisture balance for soft, pillowy cookies.
Step 5: Shape and Bake the Cookies
Drop tablespoons of dough onto the parchment-lined baking sheets, spacing them about 2 inches apart to allow room for spreading. Bake the cookies for 12 to 15 minutes or until the edges turn lightly golden. A toothpick inserted into the center should come out clean, signaling that your cookies are perfectly baked with that classic Boston cream pie softness baked in.
Step 6: Cooling and Preparing the Glaze
After baking, let the cookies cool on the sheets for five minutes to set their shape before transferring them to wire racks to cool completely. Meanwhile, prepare the chocolate glaze by combining semi-sweet chocolate and light corn syrup in a heatproof bowl. Warm the heavy cream on the stovetop just until it begins to simmer, then pour it over the chocolate mixture. Let it sit for a few minutes to soften the chocolate before whisking until smooth and glossy.
Step 7: Glazing the Cookies
Once your cookies have cooled, spread or drizzle the shiny chocolate glaze over each one evenly. Take your time here — the glaze is what beautifully mimics the classic Boston cream pie chocolate finish. Allow them to set for 15 to 20 minutes so the glaze firms up just right before diving in.
How to Serve Boston Cream Pie Cookies Recipe
Garnishes
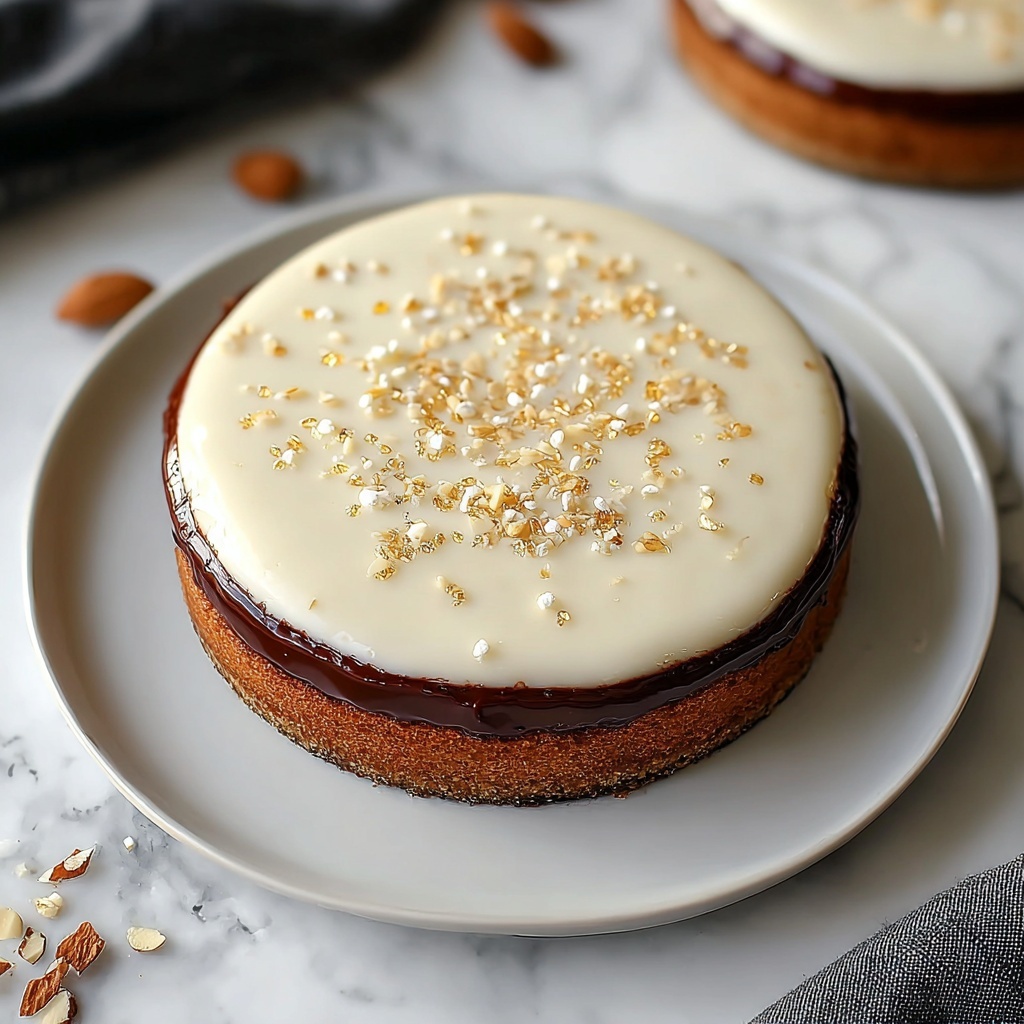
To enhance the visual appeal and add a little extra flavor pop, consider garnishing your Boston Cream Pie Cookies with a sprinkle of finely chopped toasted nuts or a light dusting of powdered sugar. These subtle touches add texture contrast and make these cookies even more irresistible when serving guests.
Side Dishes
These cookies pair wonderfully with a cup of strong black coffee or a creamy latte, as the bittersweet chocolate glaze complements the richness of your favorite brew. You might also serve them alongside a scoop of vanilla or coffee ice cream for an indulgent dessert experience that echoes the creamy filling inside the cookies.
Creative Ways to Present
For a fun dessert platter, arrange your Boston Cream Pie Cookies in a circle with small dollops of whipped cream in the center. Alternatively, sandwich two cookies together with a generous layer of pastry cream or custard for a playful twist that highlights the pie-inspired filling concept even more creatively. Presentation that invites curiosity often gets rave reviews!
Make Ahead and Storage
Storing Leftovers
Boston Cream Pie Cookies keep beautifully stored in an airtight container at room temperature for up to 3 days. Keep them away from direct sunlight and humidity, which can affect the chocolate glaze and soften the cookie texture more than desired. If you want to enjoy them fresh, let stored cookies come back to room temperature before serving.
Freezing
These cookies freeze well before glazing. Scoop and shape them, then freeze on a baking sheet until solid before transferring to a freezer-safe container or bag. When ready to bake, pop them straight into a preheated oven; just add a couple of extra minutes to the bake time. Freeze the baked and glazed cookies separately if desired, wrapping them tightly to preserve the glaze’s shine and texture.
Reheating
If you prefer your Boston Cream Pie Cookies slightly warmed, especially to soften the glaze and intensify the chocolate aroma, pop them in a 300°F oven for about 5 minutes. Avoid microwaving as it can make the cookies too soft or the glaze oily. This gentle reheating restores a just-baked feel perfectly.
FAQs
Can I substitute another type of chocolate for the glaze?
Absolutely! While semi-sweet chocolate is classic for this Boston Cream Pie Cookies Recipe, you can experiment with dark, milk, or even white chocolate to suit your taste. Just be mindful that sweeter chocolates will alter the overall sweetness and may require adjustments in other elements.
Is it necessary to use heavy cream for the glaze?
Heavy cream is key to achieving a smooth, shiny glaze that sets well and mimics the lusciousness of a Boston cream pie. Using lighter creams or milk can result in a thinner glaze that won’t hold its shape as beautifully.
Can I make the dough ahead of time?
Yes! The dough can be made and refrigerated for up to 2 days before baking. This can actually enhance flavor as the ingredients meld together. Just bring the dough to room temperature before scooping to ensure even baking.
Why do my cookies sometimes spread too much while baking?
Overly soft or warm dough, or butter that’s too melted, can cause spreading. Make sure your butter is just softened and your dough is chilled a bit if your kitchen is warm. Also, avoid using more liquid than called for to maintain the right consistency.
How do I get a smooth chocolate glaze without lumps?
Make sure to pour the hot cream over chopped chocolate and let it sit a few minutes before whisking gently. This melting process helps create a silky, lump-free glaze. Using good-quality chocolate can make a noticeable difference as well.
Final Thoughts
This Boston Cream Pie Cookies Recipe is truly a fabulous way to take a timeless dessert in a fresh, fun direction. The combination of tender cookie, creamy vanilla notes, and glossy chocolate glaze is utterly irresistible. Give this recipe a try — I promise it’ll become a treasured favorite you reach for again and again when you want something delightfully nostalgic yet perfectly portable!
Print
Boston Cream Pie Cookies Recipe
- Prep Time: 0h 20m
- Cook Time: 0h 12m
- Total Time: 0h 32m
- Yield: Approximately 24 cookies
- Category: Dessert
- Method: Baking
- Cuisine: American
Description
Indulge in these delightful Boston Cream Pie Cookies featuring a soft, buttery cookie base topped with a smooth, glossy chocolate glaze reminiscent of the classic Boston cream pie dessert. These cookies combine a tender vanilla-flavored dough with a rich chocolate finish, perfect for any occasion.
Ingredients
Dry Ingredients
- 2 1/2 cups all-purpose flour
- 1 teaspoon baking powder
- 1/2 teaspoon salt
Wet Ingredients
- 1 cup unsalted butter, softened
- 1 cup granulated sugar
- 2 large eggs
- 2 teaspoons vanilla extract
- 1/4 cup whole milk
Chocolate Glaze
- 1/2 cup heavy cream
- 4 ounces semi-sweet chocolate
- 1 tablespoon light corn syrup
Instructions
- Preheat Oven: Preheat your oven to 350°F (175°C) and line two baking sheets with parchment paper to prepare for baking.
- Mix Dry Ingredients: In a medium bowl, whisk together the all-purpose flour, baking powder, and salt until well combined to ensure even distribution of leavening agents.
- Cream Butter and Sugar: In a large mixing bowl, use an electric mixer on medium speed to cream the softened butter and granulated sugar until the mixture is light and fluffy, about 3 to 4 minutes, creating a smooth base.
- Add Eggs: Add the eggs one at a time to the butter-sugar mixture, mixing well after each addition for proper incorporation and structure.
- Incorporate Vanilla: Stir in the vanilla extract until fully combined to infuse the dough with flavor.
- Combine Dry and Wet Ingredients: Gradually add the flour mixture to the wet ingredients, mixing on low speed until just combined to avoid overmixing.
- Add Milk: Pour in the whole milk and continue mixing until the dough comes together smoothly, making sure there are no dry spots.
- Scoop Dough: Using about a tablespoon of dough for each cookie, scoop onto the prepared baking sheets, spacing them about 2 inches apart to allow for spreading.
- Bake Cookies: Bake in the preheated oven for 12 to 15 minutes until cookie edges are lightly golden and a toothpick inserted in the center comes out clean, indicating doneness.
- Cool Cookies: Remove the cookies from the oven and let them cool on the baking sheets for 5 minutes before transferring to wire racks to cool completely for best texture.
- Prepare Chocolate Glaze: Place the semi-sweet chocolate and light corn syrup in a heatproof bowl while cookies cool.
- Heat Cream: Heat the heavy cream in a small saucepan over medium heat until it just begins to simmer, then immediately pour it over the chocolate and corn syrup mixture.
- Whisk Glaze: Let the mixture sit for 2 to 3 minutes to soften the chocolate, then whisk until completely melted and the glaze is smooth and glossy for a perfect finish.
- Apply Glaze: Once the cookies have fully cooled, drizzle or spread the chocolate glaze evenly over the top of each cookie to replicate the Boston cream flavor profile.
- Set Glaze: Allow the chocolate glaze to set for about 15 to 20 minutes before serving, ensuring the glaze is firm yet soft.
Notes
- Use room temperature butter for easier creaming and better cookie texture.
- Do not overmix the dough once flour is added to keep cookies tender.
- Allow cookies to cool completely before glazing to prevent melting.
- Store cookies in an airtight container at room temperature for up to 3 days to maintain freshness.
- For a richer flavor, use high-quality semi-sweet chocolate for the glaze.


