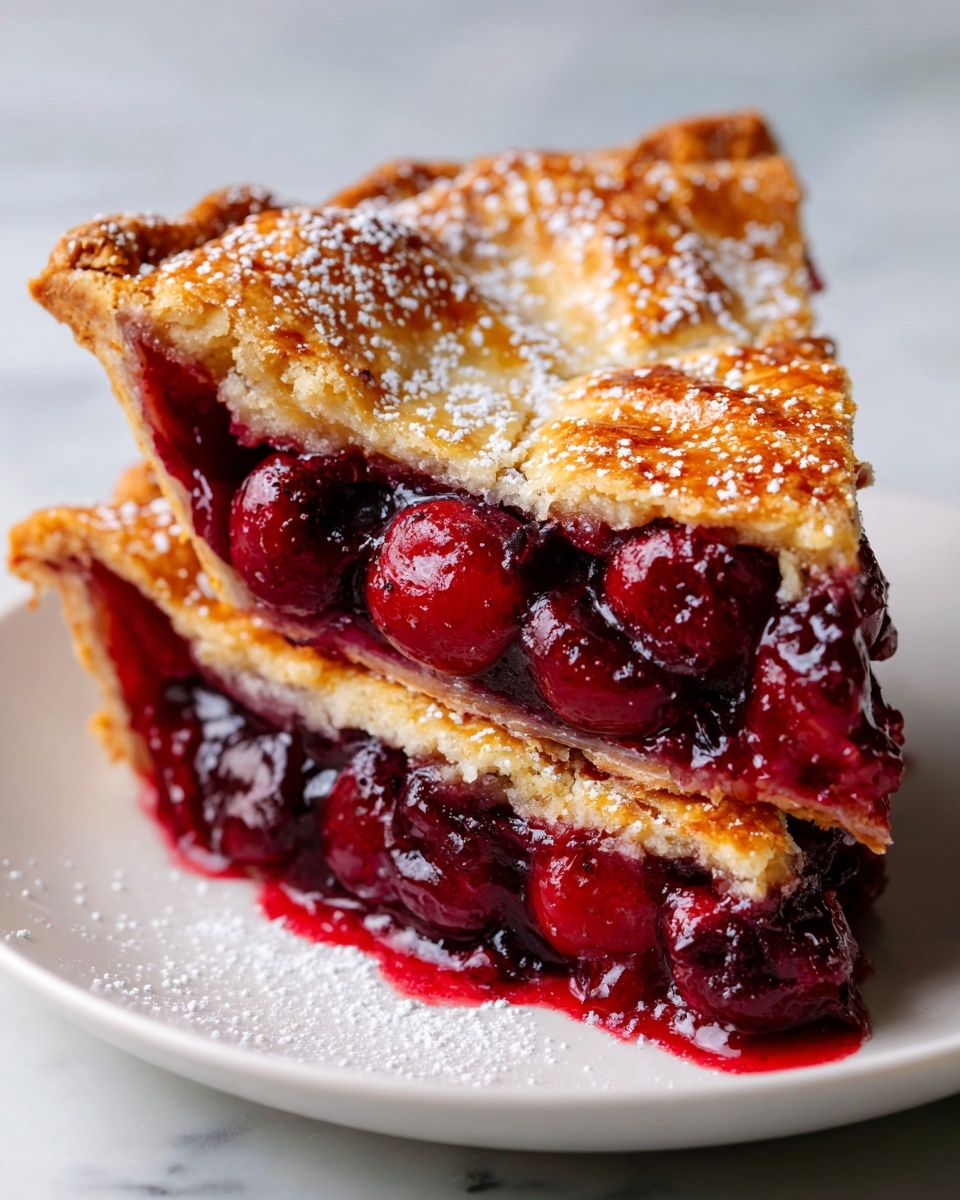
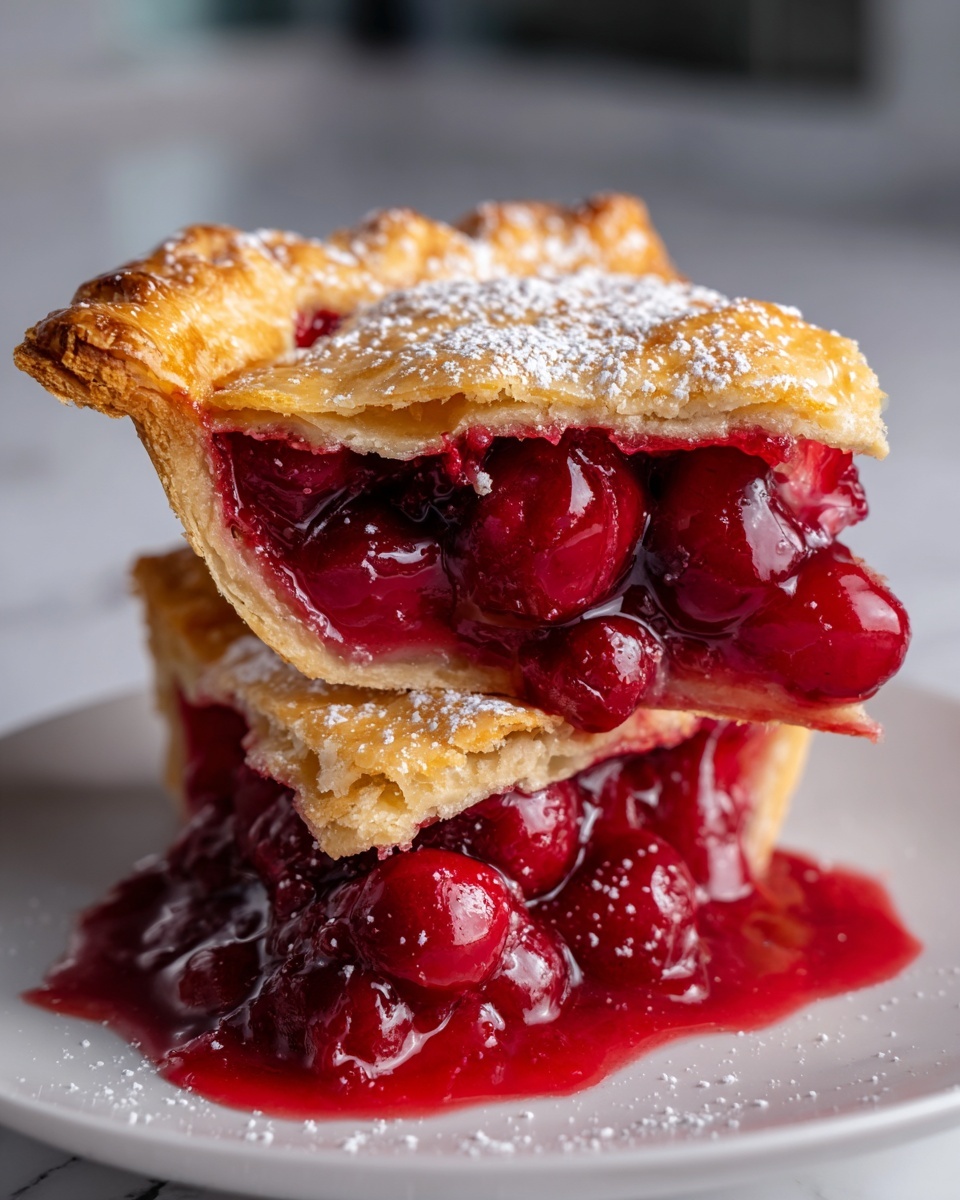
If you’re looking for a delightful treat that’s both easy to make and wonderfully satisfying, this Cherry Pie Bites Recipe is going to become your new favorite. These little bursts of cherry goodness wrapped in flaky crescent dough deliver the perfect combination of sweet, tart, and buttery flavors in every bite. Whether you’re serving them at a casual get-together or just craving a quick indulgence at home, these pie bites bring all the warmth and comfort of a classic cherry pie but in a fun, bite-sized form that’s impossible to resist.
Ingredients You’ll Need
Whipping up these Cherry Pie Bites calls for a handful of simple ingredients that each play an important role in building layers of flavor and texture. From the luscious cherry pie filling to the flaky crescent dough, every element combines to create that perfect golden-baked bite.
- Cherry pie filling: The juicy center packed with tart cherries gives these bites their signature flavor.
- Crescent roll dough: Flaky and buttery, this dough wraps around the filling to create a golden crust.
- Granulated sugar: Adds sweetness and helps create a crisp, sugary topping.
- Ground cinnamon: Infuses warmth and a cozy spice that complements the cherries beautifully.
- Powdered sugar: Used for a delicate dusting, adding a pretty finish and a touch of sweetness.
How to Make Cherry Pie Bites Recipe
Step 1: Preheat and Prepare
Start by preheating your oven to 375°F (190°C). Getting the oven nice and hot upfront ensures that your pie bites will bake evenly and develop that inviting golden crust we’re aiming for.
Step 2: Shape the Dough
Unroll the crescent roll dough on a clean surface and carefully separate it into the individual triangle shapes. These triangles are the perfect base to cradle your cherry filling and make rolling a breeze.
Step 3: Add the Cherry Filling
Place a generous spoonful of cherry pie filling at the widest end of each dough triangle. Don’t be shy here — this juicy filling is what makes these bites unforgettable.
Step 4: Roll Them Up
Starting at the wider end where the filling rests, gently roll each triangle toward the pointed end, encasing the cherry filling snugly inside. This helps keep the filling sealed and ready to burst with flavor once baked.
Step 5: Sugar and Spice Topping
Mix the granulated sugar and ground cinnamon together, then sprinkle this sweet and fragrant mix all over the rolled dough. This step adds a delightful crunch and a hint of spice to every bite.
Step 6: Bake to Perfection
Place your prepared bites on a baking sheet and pop them into the oven for 12 to 15 minutes. Watch closely as they turn a beautiful golden brown, signaling they’re perfectly baked and ready to enjoy.
Step 7: Cool and Finish
Allow your Cherry Pie Bites to cool for a few minutes — this helps the filling set just a bit so it won’t spill out. Then, dust them lightly with powdered sugar for a charming, sweet finish.
How to Serve Cherry Pie Bites Recipe

Garnishes
To make your Cherry Pie Bites even more enticing, try adding a small scoop of vanilla ice cream or a dollop of whipped cream on the side. A few fresh cherries or a sprinkle of chopped nuts can add a nice texture contrast and a burst of color.
Side Dishes
These bites shine as a dessert but can also pair delightfully with a fresh fruit salad or a cup of hot coffee or tea. The balance of warm, flaky pastry and sweet cherries makes for a cozy finish to any meal.
Creative Ways to Present
For parties, arrange your Cherry Pie Bites Recipe on a pretty platter lined with parchment paper and add little flags or toothpicks to make them easy to grab. Serving warm with a drizzle of chocolate sauce or honey can elevate the experience, making it feel extra special.
Make Ahead and Storage
Storing Leftovers
If you have any leftovers, store them in an airtight container at room temperature for up to two days. This keeps the crust flaky and the filling juicy without sogginess.
Freezing
You can freeze baked Cherry Pie Bites by placing them in a single layer on a baking sheet until firm, then transferring to a freezer-safe container. Frozen, they keep well for up to a month and can be reheated whenever a craving strikes.
Reheating
To enjoy these bites warm after storage, reheat them in a preheated oven at 350°F (175°C) for about 5-7 minutes. This helps restore the crispiness of the crust and warms the cherry filling nicely.
FAQs
Can I use fresh cherries instead of canned pie filling?
While fresh cherries can be delicious, canned pie filling is pre-sweetened and thickened, which helps keep the filling from leaking during baking. If using fresh cherries, you may want to cook them down with sugar and a thickener before filling the dough.
Is crescent roll dough the only dough option?
Crescent roll dough is ideal for its buttery, flaky texture and ease of use, but puff pastry dough can also work beautifully for Cherry Pie Bites if you prefer an even flakier crust.
How can I prevent the filling from leaking out?
Don’t overfill the dough triangles, and make sure to roll them tightly. Sealing the edges well can also prevent any juicy cherry filling from escaping during baking.
Can I make these bites gluten-free?
Yes! Look for gluten-free crescent roll dough options or puff pastry dough available in some specialty stores or make your own gluten-free dough for a delicious alternative.
What’s a good substitute for powdered sugar dusting?
If you don’t have powdered sugar on hand, a light drizzle of honey or a quick brush of apricot jam after baking can add sweetness and shine to your Cherry Pie Bites.
Final Thoughts
There’s something irresistibly joyful about sharing these Cherry Pie Bites Recipe with friends and family. Their simple ingredients, quick preparation, and delicious results make them a perfect dessert for any occasion. I can’t wait for you to make these little delights and experience that satisfying blend of flakey crust and sweet cherry filling — your taste buds will thank you!
Print
Cherry Pie Bites Recipe
- Prep Time: 10 minutes
- Cook Time: 15 minutes
- Total Time: 25 minutes
- Yield: 8 servings
- Category: Dessert
- Method: Baking
- Cuisine: American
Description
Delightful cherry pie bites made with crescent roll dough filled with sweet cherry pie filling, dusted with cinnamon sugar, and topped with powdered sugar. Perfect as a quick and easy dessert or snack.
Ingredients
Ingredients
- 1 can of cherry pie filling (approx. 21 oz)
- 1 package of crescent roll dough (8 oz)
- 1/4 cup granulated sugar
- 1/2 teaspoon ground cinnamon
- Powdered sugar for dusting (about 1-2 tablespoons)
Instructions
- Preheat the oven: Preheat your oven to 375°F (190°C) to ensure it’s at the perfect temperature for baking the cherry pie bites evenly.
- Prepare the dough: Roll out the crescent roll dough on a flat surface and separate it into the individual triangles as indicated in the package.
- Add the filling: Place a spoonful of cherry pie filling at the wider end of each crescent dough triangle, making sure not to overfill to prevent leakage during baking.
- Roll the bites: Starting from the wider end, carefully roll each triangle towards the narrow point to encase the cherry filling inside the dough.
- Apply cinnamon sugar: In a small bowl, combine granulated sugar and ground cinnamon, then sprinkle this mixture evenly over the rolled-up dough pieces for a sweet and spiced coating.
- Bake: Place the rolled bites on a baking sheet lined with parchment paper or a silicone mat. Bake for 12-15 minutes, or until they turn golden brown and the dough is cooked through.
- Cool and dust: Allow the cherry pie bites to cool for a few minutes after baking. Before serving, dust them lightly with powdered sugar for an extra touch of sweetness and visual appeal.
Notes
- Do not overfill the crescent roll dough to avoid spills during baking.
- Use a parchment-lined baking sheet to prevent sticking and ensure easy cleanup.
- These bites are best served warm but can be enjoyed at room temperature as well.
- For extra flair, try adding a small slice of almond or a drop of vanilla extract to the filling.
- Store any leftovers in an airtight container for up to 2 days; reheat in the oven to maintain crispness.


