
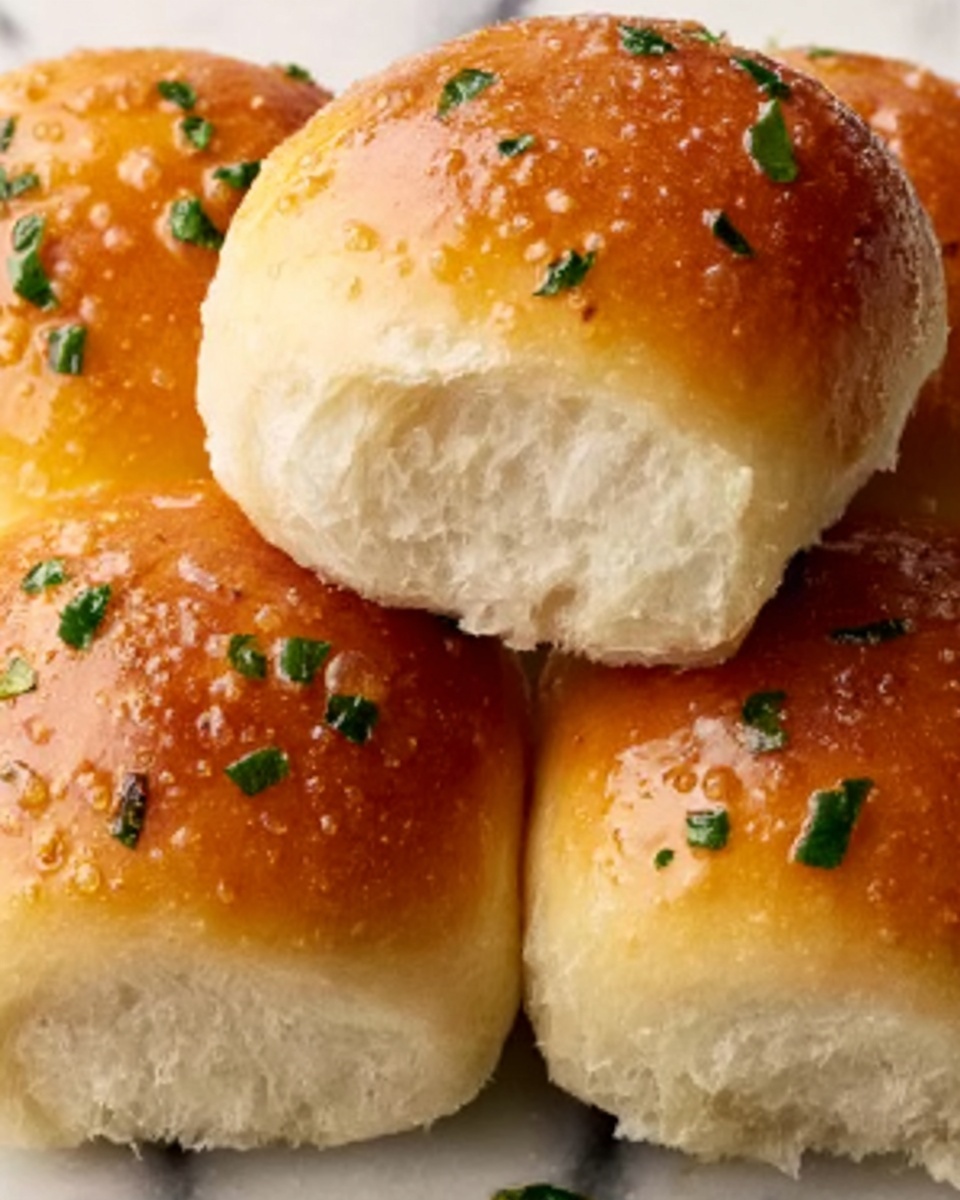
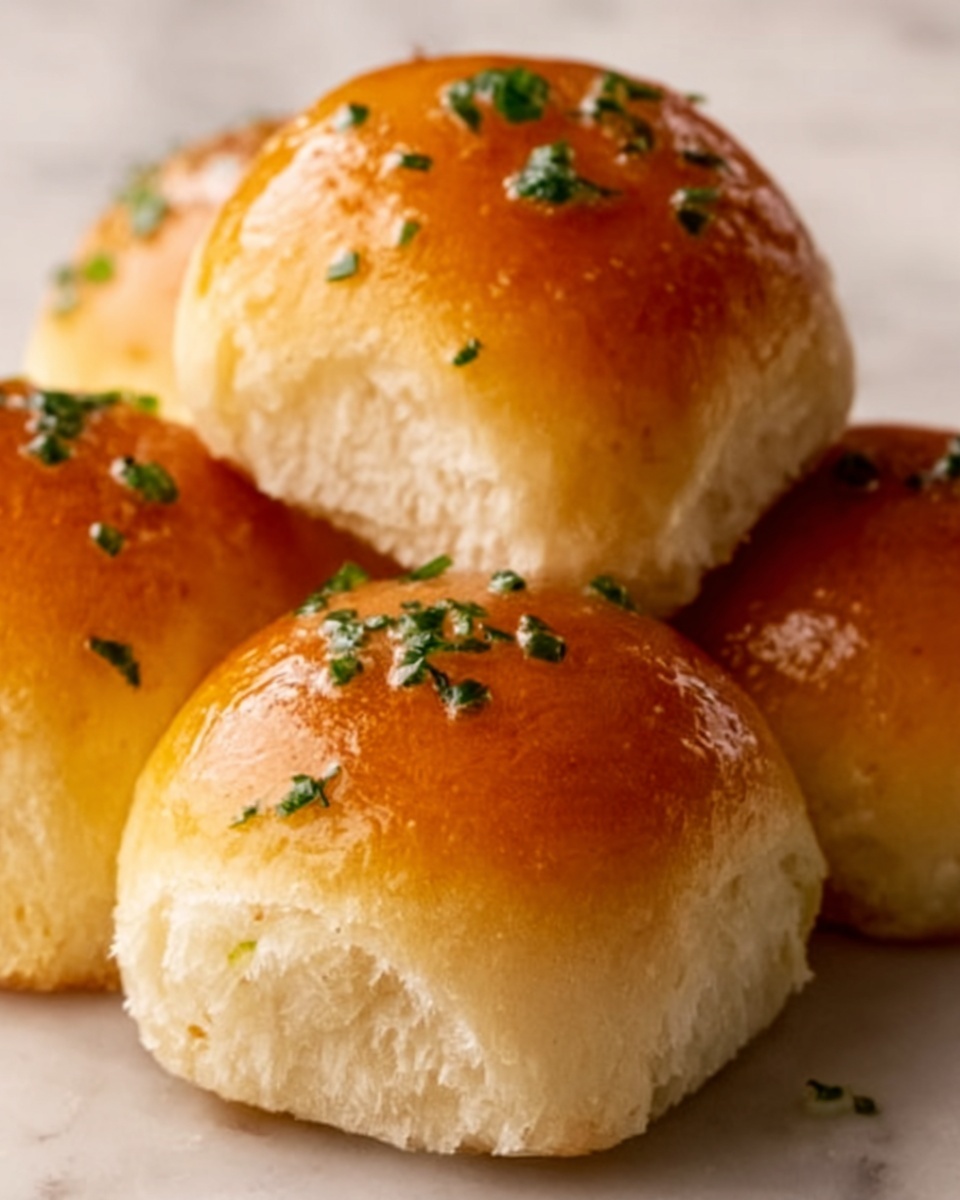
If you have ever wanted soft, fluffy, and utterly irresistible bread rolls without the fuss of waiting for yeast to rise, then you are in for a treat with Momma’s Easy No Yeast Dinner Rolls Recipe. This gem from the heart of home cooking comes together swiftly with simple pantry staples, yet it delivers a warmth and comfort that’s perfect for any dinner table. Whether you’re new to baking or just short on time, these rolls rise to the occasion, literally and figuratively, making every meal feel like a special gathering.
Ingredients You’ll Need
The beauty of Momma’s Easy No Yeast Dinner Rolls Recipe lies in its straightforward and approachable ingredients, each chosen for its role in creating delicious texture, flavor, and that golden, inviting look you crave. You won’t find any complicated spices or obscure items here—just the essentials that help these rolls rise and shine fresh from your oven.
- 2 cups all-purpose flour: The base of your dough, providing structure and softness to the rolls.
- 2 teaspoons baking powder: This is your quick-acting leavening agent ensuring your rolls puff up beautifully without yeast.
- 1 teaspoon salt: Balances flavor and brings out the warmth of the buttery notes.
- 1 tablespoon sugar: Adds a touch of sweetness that complements the buttery richness and helps with browning.
- 2/3 cup milk: Moistens the dough and gives it that tender, rich crumb.
- 1/4 cup unsalted butter, melted: Infuses moisture and a luscious buttery flavor throughout.
- 1 egg, beaten: Binds ingredients and contributes to the roll’s golden color and soft bite.
- Optional – 1 tablespoon honey or maple syrup: For a subtle sweetness that adds depth and a hint of warmth.
How to Make Momma’s Easy No Yeast Dinner Rolls Recipe
Step 1: Preheat and Prepare
Start your journey by heating your oven to 375°F (190°C). Greasing your baking dish or lining it with parchment paper will keep your rolls from sticking and make cleanup a breeze. Getting this step right ensures a smooth baking experience and perfect rolls every time.
Step 2: Mix the Dry Ingredients
In a large mixing bowl, whisk together your all-purpose flour, baking powder, salt, and sugar. This even distribution is crucial because it guarantees that every roll you bite into has a consistent flavor with the perfect lift and crumb structure.
Step 3: Blend the Wet Ingredients
In another bowl, combine your milk, melted butter, and beaten egg. If you’re using honey or maple syrup for that extra layer of sweetness, now’s the time to stir it in. This mixture sets the tone for the softness and richness of your rolls.
Step 4: Combine Wet and Dry
Pour the wet ingredients into the dry, stirring gently with a spoon or spatula just until they come together. It’s okay if the dough looks a bit lumpy — overmixing can make your rolls tough, and we want them soft and inviting!
Step 5: Shape Your Rolls
Using a spoon, scoop out small portions of dough (about 1 to 2 tablespoons each), then roll them gently into balls with your hands. Arrange the dough balls closely in your prepared baking dish. The proximity helps give the rolls soft sides while they bake into that gorgeous golden brown on top.
Step 6: Bake to Perfection
Pop those rolls into your preheated oven and bake for 15 to 20 minutes. You’ll know they are done when their tops turn a lovely golden brown and a toothpick inserted into the center comes out clean. The aroma at this stage is simply irresistible.
Step 7: Serve Warm and Buttered
Let the rolls cool just a bit — warm enough to enjoy but cool enough to hold without burning your fingers. A quick brush of melted butter on top can elevate them even further, adding a glossy shine and extra touch of indulgence.
How to Serve Momma’s Easy No Yeast Dinner Rolls Recipe
Garnishes
While these rolls stand out on their own, a sprinkle of fresh herbs like chopped rosemary or thyme right after baking can add aromatic charm. A dusting of flaky sea salt or brushing with garlic butter transforms them instantly into conversation starters.
Side Dishes
Momma’s Easy No Yeast Dinner Rolls Recipe pairs beautifully with hearty stews, creamy soups, and vibrant salads. Think of serving them alongside a rich beef stew or a comforting bowl of tomato bisque; they soak up sauces wonderfully and are perfect for mopping up every last bit.
Creative Ways to Present
Instead of simply placing these rolls on a plate, try stacking them in a rustic basket lined with a colorful napkin for a cozy, inviting centerpiece. You can also slice them open for mini sandwiches, stuffing with your favorite deli meats or cheeses for a delightful lunch twist.
Make Ahead and Storage
Storing Leftovers
Leftover rolls from Momma’s Easy No Yeast Dinner Rolls Recipe keep beautifully when stored in an airtight container at room temperature for up to two days. This helps maintain softness without drying out, so they’re ready for a quick snack or meal accompaniment.
Freezing
If you want to get ahead, these rolls freeze wonderfully. Just wrap them tightly in plastic wrap and place in a freezer-safe bag for up to three months. When you’re ready to enjoy, thaw overnight in the fridge or at room temperature for a few hours.
Reheating
To revive the lovely freshness of your rolls, heat them in a warm oven (around 300°F or 150°C) for 5 to 7 minutes. A quick brush of butter after reheating brings back that fresh-baked magic in every bite.
FAQs
Can I make Momma’s Easy No Yeast Dinner Rolls Recipe without dairy?
Absolutely! You can substitute the milk with any plant-based milk like almond or oat milk, and swap the butter for a dairy-free alternative. The rolls might have a slightly different flavor but will still be soft and delicious.
Why do these rolls not require yeast?
Instead of yeast, this recipe uses baking powder, a chemical leavening agent, to make the dough rise. It works quickly and means there’s no need for rising time, making the rolls ready to enjoy much faster.
Can I add herbs or cheese to the dough?
Yes! Adding chopped herbs like parsley or shredded cheese into the dough before baking is a great way to customize your rolls and add extra flavor that suits your meal.
What if I want sweeter dinner rolls?
Feel free to increase the sugar amount slightly or add honey or maple syrup as suggested in the recipe to give that gentle sweetness that pairs perfectly with butter or jam.
How do I know when the rolls are done baking?
Look for golden brown tops and use a toothpick to check the center of a roll. If it comes out clean or with just a few crumbs, your rolls are perfectly baked and ready to enjoy.
Final Thoughts
There is something profoundly satisfying about pulling warm, homemade rolls from the oven, especially when they come together as effortlessly as Momma’s Easy No Yeast Dinner Rolls Recipe. Whether you’re serving them at a family dinner or craving a cozy snack, these rolls are pure comfort baked into every bite. I encourage you to try this recipe—it just might become your go-to for quick, delicious bread that makes every meal feel like home.
Print
Momma’s Easy No Yeast Dinner Rolls Recipe
- Prep Time: 10 minutes
- Cook Time: 20 minutes
- Total Time: 30 minutes
- Yield: 8 servings
- Category: Bread
- Method: Baking
- Cuisine: American
Description
Momma’s Easy No Yeast Dinner Rolls are soft, fluffy, and quick to prepare, perfect for a delicious homemade bread without the wait for yeast rising. These no-yeast rolls use baking powder as a leavening agent and come together with simple pantry ingredients, making them an ideal complement to any meal.
Ingredients
Dry Ingredients
- 2 cups all-purpose flour
- 2 teaspoons baking powder
- 1 teaspoon salt
- 1 tablespoon sugar
Wet Ingredients
- 2/3 cup milk
- 1/4 cup unsalted butter, melted
- 1 egg, beaten
- Optional: 1 tablespoon honey or maple syrup (for a touch of sweetness)
Instructions
- Preheat the Oven: Preheat your oven to 375°F (190°C). Grease a baking dish or line it with parchment paper to prevent the rolls from sticking and ensure even baking.
- Mix the Dry Ingredients: In a large bowl, whisk together the flour, baking powder, salt, and sugar until fully combined to evenly distribute the leavening and seasoning.
- Add Wet Ingredients: In a separate bowl, combine the milk, melted butter, and beaten egg. If you choose to add honey or maple syrup, stir it into the wet mixture now to incorporate sweetness and moisture.
- Combine Wet and Dry Ingredients: Pour the wet ingredients into the dry ingredients and gently stir with a spoon or spatula until just combined. Avoid overmixing to keep the rolls light and fluffy; some lumps in the dough are fine.
- Form the Rolls: Scoop small spoonfuls of dough—about 1-2 tablespoons each—and roll them into balls using your hands. Place the rolls close together in the prepared baking dish to encourage soft sides.
- Bake the Rolls: Place the baking dish in the oven and bake the rolls for 15-20 minutes, or until the tops are golden brown and a toothpick inserted in the center comes out clean, signaling that they’re fully cooked.
- Serve: Allow the rolls to cool slightly before serving. For extra flavor, optionally brush the warm rolls with a little melted butter on top. Enjoy them fresh and warm as a perfect side to your meal.
Notes
- Do not overmix the dough to keep the rolls soft and tender.
- Optional honey or maple syrup adds a slight sweetness but can be omitted for a savory version.
- For softer crust, cover the rolls loosely with foil halfway through baking.
- Use parchment paper or grease the dish well to prevent sticking.
- Serve warm for best texture and flavor.
- These rolls freeze well; store in an airtight container and reheat before serving.


