
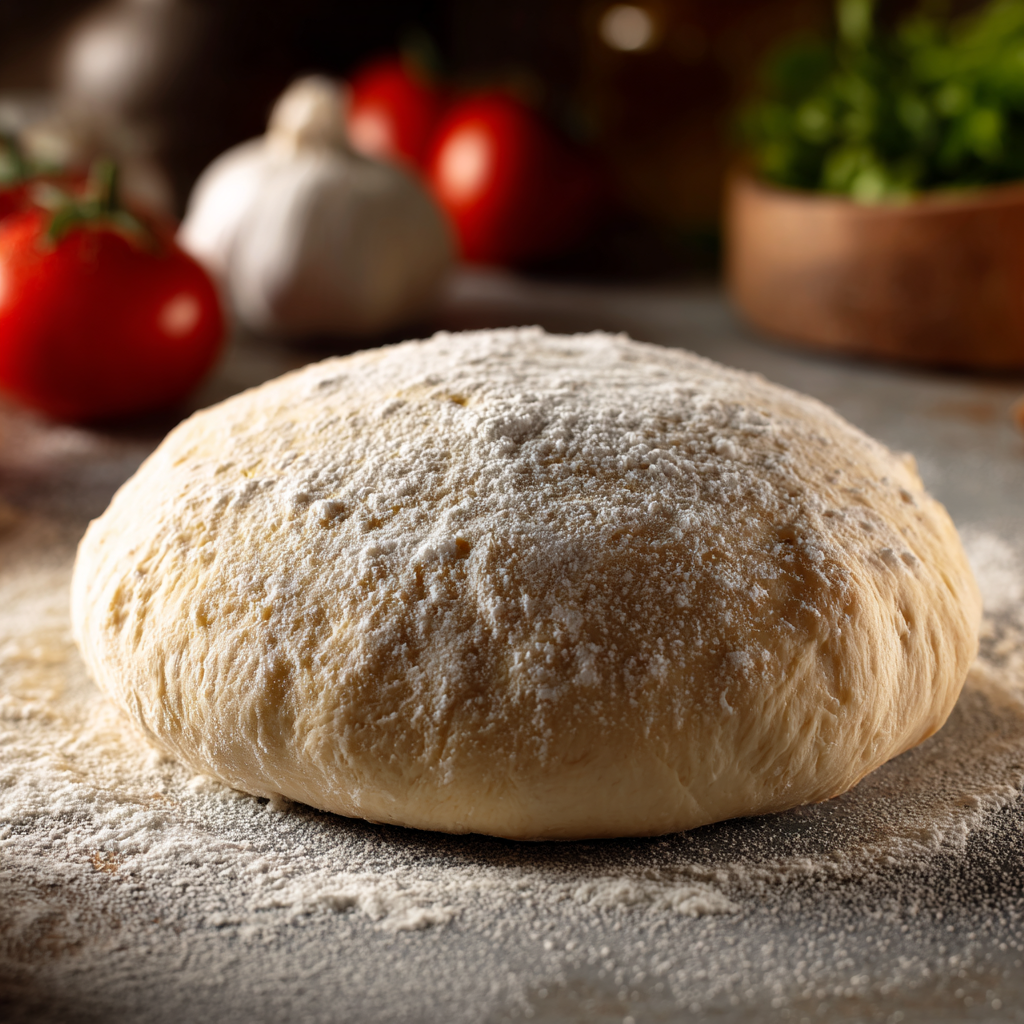
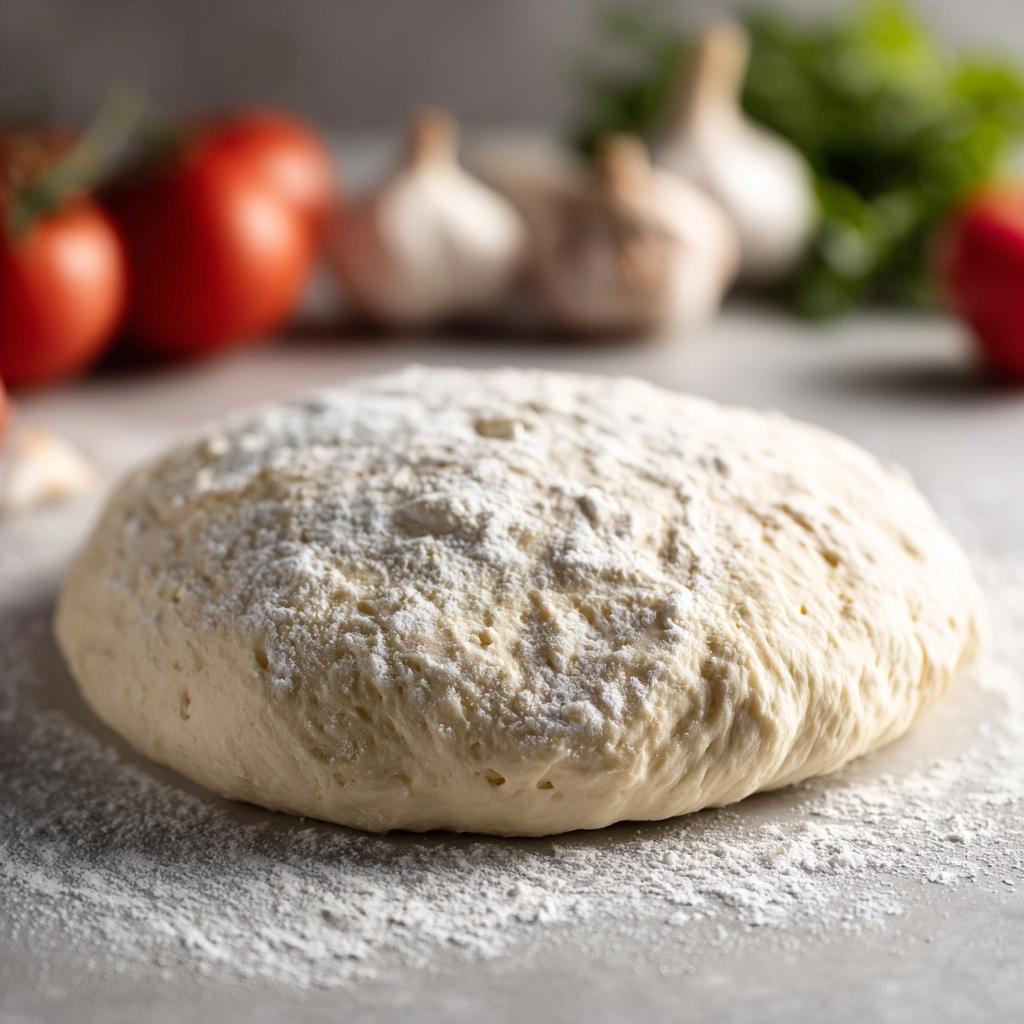
If you’re craving homemade pizza but can’t afford to spend hours in the kitchen, this Busy Days Pizza Dough is your new best friend. Coming together in under an hour and requiring just a handful of pantry staples, it delivers a soft, pillowy crust with a crispy bite—perfect for loading up with your favorite toppings or throwing together a speedy weeknight dinner. Whether you’re a pizza pro or a total beginner, this dough is truly unstoppable on those busy days when only comfort food will do.
Ingredients You’ll Need
The beauty of Busy Days Pizza Dough lies in its simplicity: every ingredient has a job to do, and together, they create a fail-proof and delicious base. These uncomplicated pantry staples work magic for taste, texture, and that perfect golden color.
- Active Dry Yeast: This is the secret to creating a chewy, airy crust that rises beautifully every time.
- Sugar: Just a pinch activates the yeast, jumpstarting the dough’s lift and lending a hint of sweetness.
- Warm Water (about 110°F): Warming up the yeast and sugar together ensures the yeast blooms quickly and evenly.
- All-Purpose Flour: The base of our dough, offering structure and chew without making things too dense.
- Salt: Essential for balancing flavors and bringing out the natural aromas of the crust.
- Olive Oil: A touch of richness keeps the dough supple, moist, and adds a subtle, classic flavor.
How to Make Busy Days Pizza Dough
Step 1: Activate the Yeast
Start things off by combining warm water, sugar, and active dry yeast in a small bowl. Stir gently and let the mixture rest for 5 to 10 minutes until it’s nice and foamy. This tells you that your yeast is alive and ready to make the dough rise—don’t skip this moment of kitchen magic!
Step 2: Mix the Dry Ingredients
While the yeast wakes up, grab a large mixing bowl and whisk together the all-purpose flour and salt. This quick blend ensures your Busy Days Pizza Dough is evenly seasoned and the crust comes out flavorful throughout.
Step 3: Form and Knead the Dough
Pour the foamy yeast mixture and olive oil into your bowl of flour and salt. Stir until a shaggy dough forms—don’t worry about perfection here! Once roughly combined, turn everything out onto a lightly floured surface and knead for about 5 minutes. The dough will become smooth, stretchy, and lightly tacky to the touch; this is where the magic happens.
Step 4: Let It Rise
Place the kneaded dough in a lightly oiled bowl, turning once to coat the surface. Cover it with a damp towel or plastic wrap and let it rise in a warm spot for 30 to 45 minutes, until it doubles in size. This step gives your Busy Days Pizza Dough its signature airy, bubbly texture and ensures a tender crumb when baked.
Step 5: Shape and Top the Dough
Once the dough has puffed up, punch it down gently to release extra air, then roll it out to fit your favorite pizza pan or baking sheet. Now’s the time for the fun part: pile on your favorite sauces, cheeses, and toppings. This dough is a perfect canvas for classic margherita pizzas, veggie-loaded pies, or whatever you’re craving.
Step 6: Bake to Perfection
Slide your topped pizza into a preheated 475°F oven and bake for 12 to 15 minutes. The crust will turn a gorgeous golden brown and crisp up along the edges, while your toppings get bubbly and irresistibly melty. For a crispier base, try baking directly on a hot pizza stone or pre-heated baking sheet.
How to Serve Busy Days Pizza Dough
Garnishes
Polish off your hot pizza with a drizzle of extra virgin olive oil, a scattering of fresh basil, or a pinch of flaky sea salt. A little grated parmesan or chile flakes can take the pie from good to unforgettable—don’t be afraid to get creative with those finishing touches.
Side Dishes
Busy Days Pizza Dough pairs perfectly with crisp salads, garlicky roasted vegetables, or a simple antipasto platter. Think big bowls of leafy greens, tangy vinaigrette, and maybe some oven-roasted tomatoes or marinated olives to round out the meal.
Creative Ways to Present
Try serving mini personal pizzas for a fun family dinner or assembling a DIY pizza night with different topping bowls. You can even shape the dough into calzones or breadsticks—this recipe is forgiving enough for all your spontaneous pizza creativity.
Make Ahead and Storage
Storing Leftovers
If you have any unbaked Busy Days Pizza Dough left over, simply wrap it tightly in plastic wrap and place it in the refrigerator for up to 24 hours. This make-ahead option ensures a fresh, ready-to-roll dough for tomorrow’s dinner—or even a weekend lunch.
Freezing
To freeze, shape the dough into a ball, wrap securely in plastic wrap, and then in aluminum foil or a zip-top bag. Pop it into the freezer for up to 3 months. When ready to use, thaw overnight in the fridge, then bring to room temperature before shaping.
Reheating
If you’ve baked your pizza and want to enjoy leftovers, reheat slices in a hot oven (around 400°F) for 5 to 7 minutes. This brings back the fresh-baked crispness and keeps the crust from getting soggy, so every bite is just as delicious as the first.
FAQs
Can I use instant yeast instead of active dry yeast?
Yes! Instant yeast works beautifully in Busy Days Pizza Dough. You can skip the blooming step and mix it right in with your flour if you’re short on time—just keep an eye on the dough as it may rise a bit faster.
Is it possible to make this dough with whole wheat flour?
Absolutely. For added flavor and nutrition, swap half the all-purpose flour for whole wheat. Your crust will be slightly denser and nuttier—a delicious twist on the classic Busy Days Pizza Dough.
How thin should I roll the dough?
This one’s all about preference! For a slightly chewy, pizzeria-style crust, roll the dough to about 1/4-inch thick. If you love a thinner, crispier pizza, go a bit thinner—but keep an eye on it as it bakes.
Can I prepare Busy Days Pizza Dough ahead of time?
Yes! Make your dough up to 24 hours in advance and refrigerate it until you’re ready to bake. It’ll develop even more flavor as it rests, making busy days a breeze when dinnertime rolls around.
What if my dough doesn’t rise?
Double-check that your yeast isn’t expired and that your water was warm (not hot or cold). If your kitchen is chilly, let the dough rise near the oven or on top of the fridge where it’s warmer. Properly proofed yeast is key for that perfect pillowy texture!
Final Thoughts
Nothing brings people together like a fresh, homemade pizza, and this Busy Days Pizza Dough is your ticket to simple, joyful meals. With its easy process and foolproof results, you’ll be tempted to make pizza night a regular thing—so gather your favorite toppings, invite your loved ones, and enjoy every delicious, golden bite.
Print
Busy Days Pizza Dough Recipe
- Prep Time: 10 minutes
- Cook Time: 15 minutes
- Total Time: 55 minutes (including rise time)
- Yield: 1 large pizza crust (serves 4)
- Category: Main Course
- Method: Baking
- Cuisine: Italian
- Diet: Vegetarian
Description
This Busy Days Pizza Dough recipe is perfect for those hectic days when you crave homemade pizza but don’t have time for a long proofing process. With just a few simple ingredients, you can whip up a delicious pizza crust that is ready to be topped with your favorite ingredients.
Ingredients
Dough:
- 2 1/4 teaspoons active dry yeast (1 packet)
- 1 teaspoon sugar
- 3/4 cup warm water (about 110°F)
- 2 cups all-purpose flour
- 1 teaspoon salt
- 1 tablespoon olive oil
Instructions
- Mix Yeast Mixture: In a small bowl, combine warm water, sugar, and yeast. Let sit until foamy.
- Prepare Dough: Whisk flour and salt in a large bowl. Add yeast mixture and olive oil. Knead until smooth.
- Rise Dough: Place dough in an oiled bowl, cover, and let rise until doubled.
- Shape and Bake: Roll out dough, add toppings, and bake at 475°F until golden.
Notes
- This dough can be refrigerated for up to 24 hours or frozen for up to 3 months.
- For a whole wheat variation, use a mix of all-purpose and whole wheat flour.
Nutrition
- Serving Size: 1/4 of pizza dough
- Calories: 210
- Sugar: 1g
- Sodium: 290mg
- Fat: 4g
- Saturated Fat: 0.5g
- Unsaturated Fat: 3.5g
- Trans Fat: 0g
- Carbohydrates: 38g
- Fiber: 1g
- Protein: 6g
- Cholesterol: 0mg


