
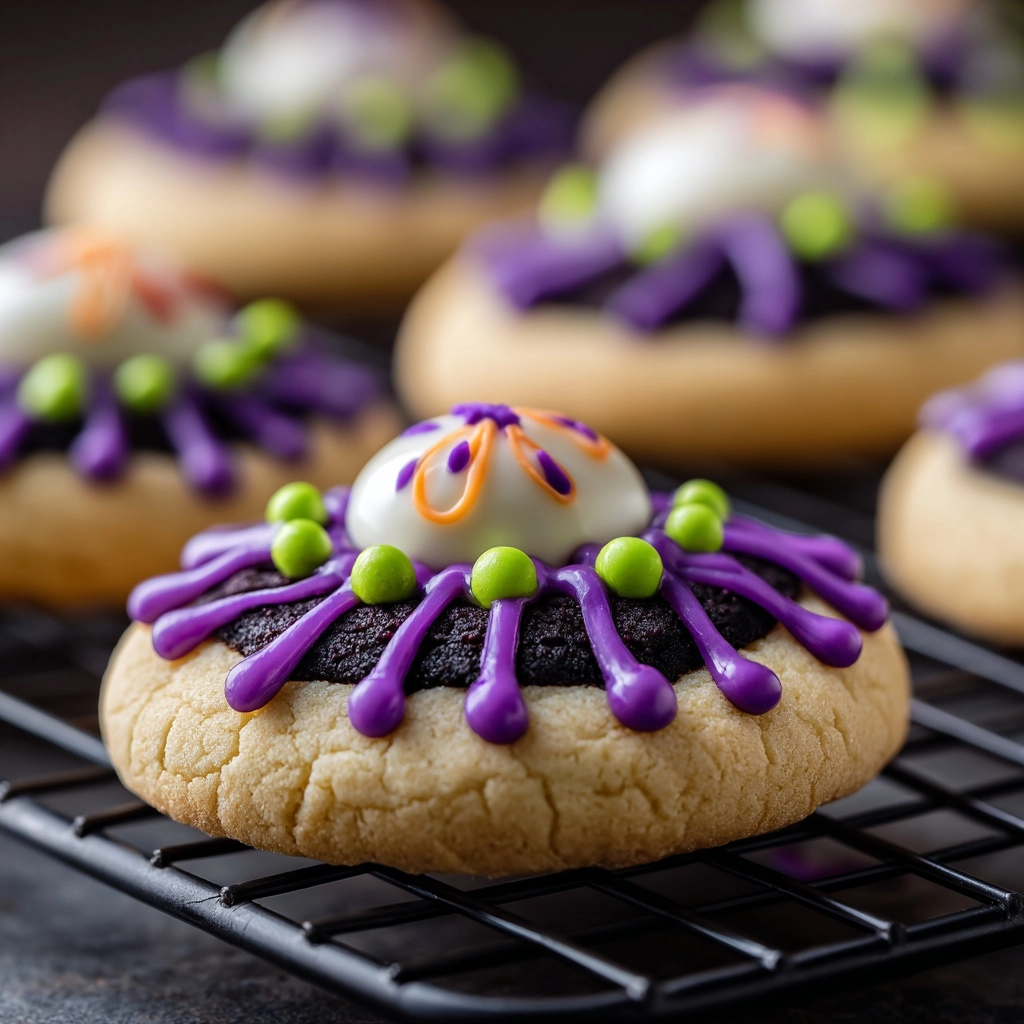
If you are on the hunt for a fun, festive treat that captures the spirit of Halloween with minimal fuss, this Witch Hat Cookies Recipe is an absolute treasure. These charming no-bake delights combine crisp fudge-striped shortbread with glossy chocolate kisses perched perfectly on top, creating the iconic pointy hat shape that’s as adorable as it is delicious. The simplicity of assembly with just a few ingredients makes it a joyous project to tackle with kids, parties, or last-minute holiday celebrations. Plus, with a touch of colorful frosting and sprinkles, they transform into magical little hat-topped snacks that everyone will rave about.
Ingredients You’ll Need
Gathering your ingredients is a breeze, and each one plays a vital role in delivering the perfect balance of taste, texture, and festive flair to your Witch Hat Cookies Recipe.
- Fudge-striped shortbread cookies: These form the crunchy, buttery base with a tempting chocolate stripe that adds extra flavor.
- Chocolate kiss candies: The signature point of the witch’s hat, providing a rich, smooth chocolate contrast on top.
- Vanilla or chocolate frosting: Acts like the glue to hold the hat’s parts together and gives a creamy texture to balance the crunch.
- Optional food coloring: A splash of orange or purple frosting adds festive color and brightens up the presentation beautifully.
- Sprinkles for decoration: Adds whimsy and sparkle, making each witch hat feel extra special and party-ready.
How to Make Witch Hat Cookies Recipe
Step 1: Prepare Your Frosting
Start by tinting your vanilla or chocolate frosting with the food coloring of your choice if you want a playful pop of color. Orange and purple are classic Halloween hues that make the cookies instantly eye-catching. Give the frosting a good stir to ensure the color is even throughout.
Step 2: Flip the Cookies
Turn the fudge-striped shortbread cookies upside down so the chocolate-covered side faces up. This not only makes the base look irresistible but also creates a perfect surface for sticking the kiss candies on top.
Step 3: Add the Frosting Base
Using a piping bag or a spoon, place a dollop of your colored or plain frosting right in the center of each cookie. This little mound will act like glue to keep your chocolate kiss candy from sliding off, so make sure it’s just right: enough to hold but not so much that it oozes over.
Step 4: Place the Chocolate Kiss
Press a chocolate kiss candy carefully onto the frosting dollop. This creates the pointed tip of the witch’s hat. If you want the hat to look extra polished, add a bit more frosting around the base of the kiss cookie to help secure it and create a “hat band.”
Step 5: Decorate and Let Set
Sprinkle your frosting edges or hat bands with colorful sprinkles, edible glitter, or mini candy pieces to give each cookie its own magical personality. Then, let your Witch Hat Cookies Recipe sit for 15 to 20 minutes to allow the frosting to firm up and hold everything perfectly in place.
How to Serve Witch Hat Cookies Recipe

Garnishes
For an added festive touch, dust your cookies lightly with edible glitter or tiny candy pearls. Fresh mint leaves or edible flowers nearby can make a striking presentation on your serving platter, complementing the witchy vibe without overpowering the cookies.
Side Dishes
Pair these cookies with a warm cup of spiced cider or a creamy hot chocolate for the ultimate cozy fall gathering. They also go splendidly alongside a bowl of fresh fruit or roasted pumpkin seeds for a balanced sweet and savory snack spread at any Halloween party.
Creative Ways to Present
Try arranging the Witch Hat Cookies Recipe atop a round cake to create an instant witch’s hat centerpiece, or serve them on a platter with mini broomsticks made from pretzel sticks and string cheese strips for an enchanting edible display. Wrapping each cookie in a clear cellophane bag tied with ribbon makes a lovely party favor as well.
Make Ahead and Storage
Storing Leftovers
These cookies keep beautifully at room temperature in an airtight container for up to three days. The shortbread stays crisp, and the frosting remains firm, so you can enjoy that delightful contrast of textures every time.
Freezing
If you want to make your Witch Hat Cookies Recipe well in advance, freeze the assembled cookies on a baking sheet first, then transfer them to a freezer-safe container. They’ll keep their charm and taste for up to a month. Just thaw at room temperature before serving.
Reheating
Since this is a no-bake recipe, reheating is not necessary or recommended. These cookies are best enjoyed fresh or at room temperature to preserve their crisp and creamy textures.
FAQs
Can I use different cookies instead of fudge-striped shortbread?
Absolutely! While fudge-striped shortbread offers the perfect crunch and chocolate detail, other firm cookie bases like ginger snaps or chocolate wafers can work nicely too, just make sure they’re sturdy enough to hold the kiss candy hats.
What if I don’t have frosting on hand?
You can substitute frosting with cream cheese mixed with a little powdered sugar or even peanut butter if you’re feeling adventurous. The key is a sticky, thick spread that can secure the chocolate kisses firmly.
Are Witch Hat Cookies Recipe suitable for kids to make?
Yes! This recipe is especially kid-friendly with no baking involved. Kids can enjoy decorating the hats with frosting and sprinkles, making it a fantastic hands-on activity for Halloween parties or classroom treats.
Can I make these cookies nut-free?
Definitely. Just double-check the frosting and cookie ingredients to ensure they don’t contain any nut products or have been processed in facilities that handle nuts, and your treats will be safe for those with allergies.
How long does it take for the frosting to set?
Typically, letting the cookies rest for about 15 to 20 minutes at room temperature allows the frosting to firm up well enough to keep the chocolate kisses in place without slipping.
Final Thoughts
If you want an easy, adorable, and utterly tasty treat to brighten up your seasonal celebrations, the Witch Hat Cookies Recipe is a must-try. It combines simplicity with festive fun in a way that feels personal and joyful to share with others. Trust me, once you make these playful little hats, they will become a favorite go-to for Halloween and beyond.
Print
Witch Hat Cookies Recipe
- Prep Time: 15 minutes
- Cook Time: 0 minutes
- Total Time: 15 minutes
- Yield: 24 cookies
- Category: Dessert
- Method: No-Cook
- Cuisine: American
- Diet: Vegetarian
Description
Witch Hat Cookies are a fun and festive no-bake treat perfect for Halloween parties and classroom snacks. Made by topping fudge-striped shortbread cookies with chocolate kiss candies and frosting, these easy-to-make cookies are decorated with colorful frosting and sprinkles to look like spooky witch hats. They require minimal prep time and no baking, making them ideal for quick holiday desserts that kids and adults will love.
Ingredients
Cookies
- 1 package fudge-striped shortbread cookies (about 24 cookies)
Toppings
- 24 chocolate kiss candies (unwrapped)
- 1/3 cup vanilla or chocolate frosting (store-bought or homemade)
Optional Decorations
- Orange or purple food coloring
- Sprinkles for decoration
Instructions
- Prepare the Frosting: If desired, tint the frosting with orange or purple food coloring to give a festive Halloween look.
- Arrange Cookies: Flip the fudge-striped cookies upside down so the chocolate-covered side is facing up, which will serve as the base of the witch hat.
- Apply Frosting: Pipe or spoon a small dollop of frosting in the center of each cookie to act as glue for the chocolate kiss.
- Add Chocolate Kiss: Press a chocolate kiss candy firmly onto the frosting in the center of each cookie, forming the pointed top of the witch hat.
- Decorate: Add more frosting around the base of the kiss if desired, then decorate with sprinkles or other fun edible decorations to complete the witch hat look.
- Set the Frosting: Let the cookies sit for 15–20 minutes to allow the frosting to set and secure the chocolate kiss in place before serving.
- Serve and Enjoy: Once set, these delightful witch hat cookies are ready to be enjoyed at your Halloween gatherings.
Notes
- These are no-bake cookies, making them perfect for quick and easy Halloween treats.
- Use different colored frosting or edible glitter and mini candies for creative variations.
- Ideal for classroom parties, kids’ snacks, or party favors.

