
“`html
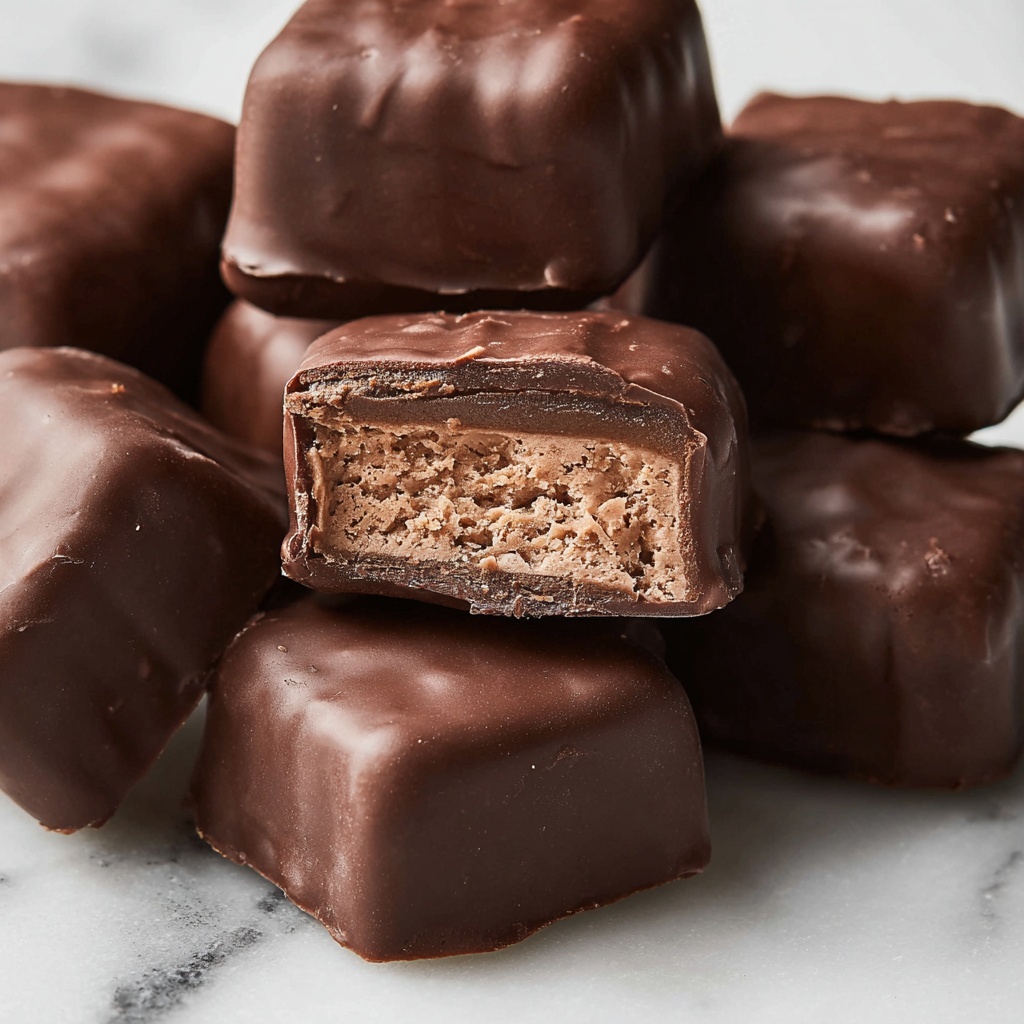
If you’ve been on the lookout for a crowd-pleasing, melt-in-your-mouth treat that’s as fun to make as it is to eat, the Cool Whip Chocolate Candy Bites Recipe is about to become your new best friend in the kitchen. Combining creamy Cool Whip with the rich depth of milk and dark chocolates, these little bites deliver that perfect balance of lightness and indulgence, all wrapped up in a shiny chocolate coating. Whether it’s for a party, a sweet snack, or just because you deserve a little decadence, this recipe is a total winner and surprisingly simple to whip up!
Ingredients You’ll Need
This Cool Whip Chocolate Candy Bites Recipe calls for just a handful of ingredients, each playing a crucial role in making these candies irresistibly creamy, smooth, and chocolaty. The simplicity means you can get started right away, with pantry staples that come together to create something truly special.
- Milk Chocolate morsels (2 packages, 11 oz each): These provide the sweet, creamy base flavor that complements the smooth Cool Whip perfectly.
- Cool Whip, thawed (8 oz tub): Adds a light, fluffy texture that makes the candy bites airy and luscious.
- Ghirardelli dark chocolate melting wafers (24 oz): Used for the final coating, these bring a beautiful, rich bitterness that balances the sweetness.
- Parchment paper: Essential for lining your baking dish and trays, ensuring your candies don’t stick and come out clean.
How to Make Cool Whip Chocolate Candy Bites Recipe
Step 1: Melt the Milk Chocolate Morsels
Start by melting your milk chocolate morsels in a microwave-safe bowl. Heat for one minute, stir, then continue heating in 30-second bursts until fully melted and smooth. Let the chocolate cool to room temperature for about 20 minutes — this step is key to preventing the Cool Whip from melting when you combine the two.
Step 2: Prepare Your Baking Dish
Line an 8-inch square baking dish with parchment paper; this ensures your candy bites peel away effortlessly once set. This simple prep sets you up for easy removal and clean edges on your chocolate squares.
Step 3: Fold Together Chocolate and Cool Whip
In a large bowl, gently fold the cooled melted chocolate into the thawed Cool Whip. You might notice the chocolate stiffening into little bits as you combine them — don’t worry, this is totally normal! Keep folding carefully until the mix is fully combined into a creamy, slightly textured batter.
Step 4: Freeze and Cut
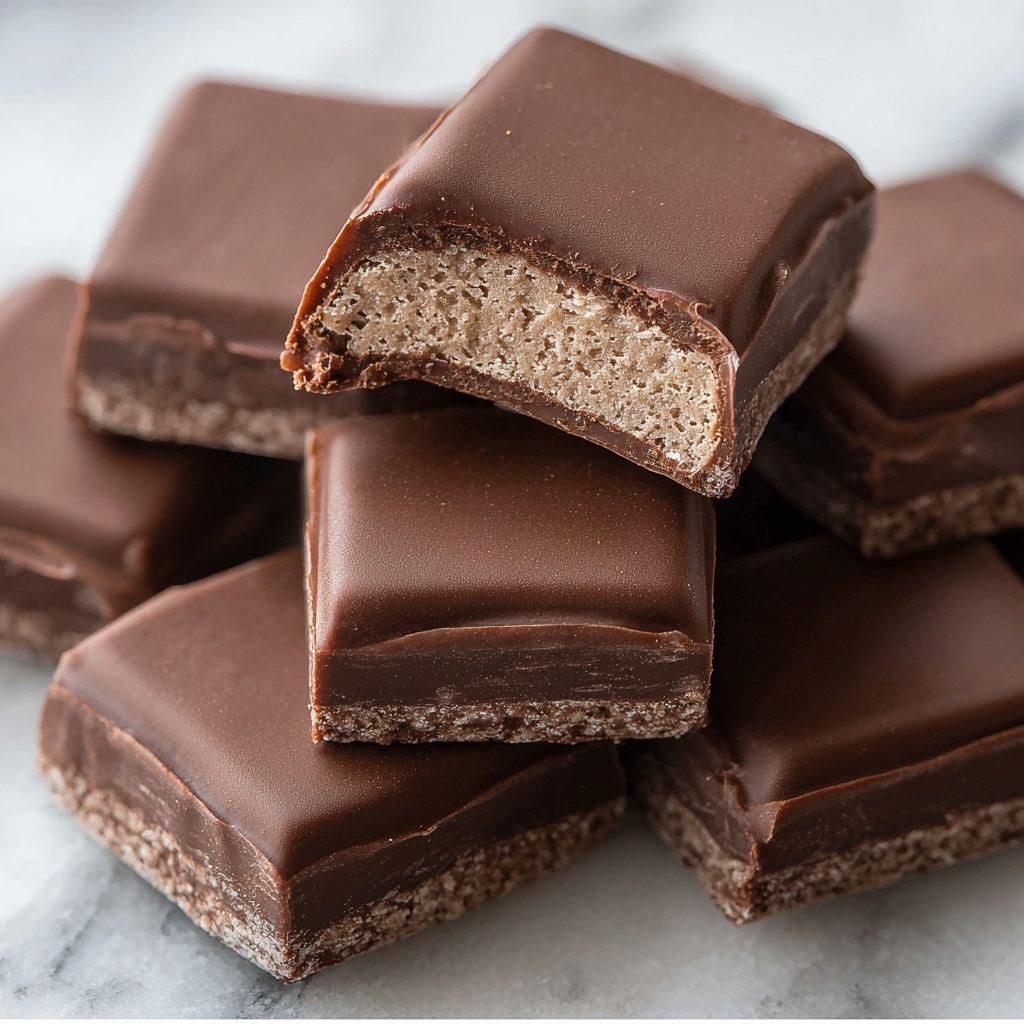
Pour the chocolate-and-Cool Whip mixture into your prepared dish and spread it evenly. Pop it into the freezer for 30 minutes to firm up. After chilling, carefully lift the candy slab from the dish using the parchment paper and cut it into 36 equal squares. Place the pieces on another parchment-lined baking sheet and freeze again for at least 30 minutes to get them nicely set and easier to dip.
Step 5: Melt the Dark Chocolate Wafers
Next, melt the Ghirardelli dark chocolate wafers following the package instructions. This dark chocolate coating will give your candy bites that beautiful glossy finish and a delightful bittersweet contrast.
Step 6: Dip and Set
Remove your frozen candy squares from the freezer one at a time, dipping each into the melted dark chocolate. Place them back onto parchment paper and let the coating set fully. The chocolate will harden quickly thanks to the cold candy inside.
Step 7: Store Until Ready to Serve
Your Cool Whip Chocolate Candy Bites Recipe creations are best enjoyed chilled, so keep them stored in the freezer until you’re ready to indulge. These treats keep well for up to 30 days, perfect for prepping ahead of time or enjoying over several occasions.
How to Serve Cool Whip Chocolate Candy Bites Recipe
Garnishes
Elevate these candy bites by adding a delicate sprinkle of sea salt or crushed freeze-dried raspberries right after dipping in dark chocolate. These simple touches add a punch of flavor and a pop of color, making each bite feel extra special and tempting.
Side Dishes
Serve alongside fresh berries or a cool scoop of vanilla ice cream to create a dessert plate that’s both balanced and luscious. These candy bites also pair beautifully with coffee or a rich red wine for an adult twist on a classic sweet snack.
Creative Ways to Present
For parties, arrange the chocolate candy bites on a decorative platter lined with colorful parchment or edible gold leaf to make them truly stand out. You could even package them in pretty cellophane bags tied with ribbon for sweet gifts your friends will adore.
Make Ahead and Storage
Storing Leftovers
If you have any leftovers, store them in an airtight container in the freezer to maintain optimum texture and flavor. They’ll stay perfect for up to a month, meaning these treats are just as good enjoyed days or weeks after making.
Freezing
This recipe is a freezer-friendly dream. The candy bites need to stay cold to preserve their signature texture and firmness, so freezing is ideal. Just be sure to keep them well covered to avoid any freezer odors seeping in.
Reheating
Since these are best served cold, reheating isn’t necessary. If they’ve softened, simply pop them back in the freezer for 15 to 20 minutes before serving to regain that perfect bite.
FAQs
Can I use a different type of whipped topping?
While Cool Whip is recommended for its stability and creamy texture, you might substitute another whipped topping with similar consistency, but results may vary slightly in texture and taste.
Is it possible to make this recipe without a microwave?
Absolutely! You can melt the chocolate over a double boiler on the stove for better control and less risk of burning the chocolate.
How long can I store these candy bites at room temperature?
It’s best not to store them at room temperature since the Cool Whip inside can soften. Keeping them frozen or refrigerated ensures they hold their shape and texture.
Can I use white chocolate instead of dark chocolate for the coating?
Yes, white chocolate makes a lovely alternative coating and gives a sweeter, creamier finish, though it lacks the slight bitterness that balances the candy bites in the original recipe.
What is the best way to cut the candy into even squares?
Using a sharp knife warmed slightly in hot water makes clean cuts easier without cracking the candy. Cutting when the candy is fully frozen also helps maintain sharp edges.
Final Thoughts
I can’t recommend the Cool Whip Chocolate Candy Bites Recipe enough for anyone craving a decadent yet airy chocolate treat that’s straightforward and fun to make. These bites bring a wonderful combination of texture and flavor that will have everyone asking for seconds and the recipe. So, grab your ingredients, invite a friend or two to help, and dive into this indulgent chocolate adventure—you won’t regret it!
“`
Print
Cool Whip Chocolate Candy Bites Recipe
- Prep Time: 20 minutes
- Cook Time: 2 minutes
- Total Time: 52 minutes
- Yield: 36 candies
- Category: No-Cook
- Method: No-Cook
- Cuisine: American
Description
This Cool Whip Candy Recipe is a delightful no-bake treat combining creamy Cool Whip with rich melted chocolate, frozen into bite-sized squares and dipped in a smooth dark chocolate coating. Perfect as a quick and easy dessert or sweet snack, these candies have a luscious texture and deep chocolate flavor. They set quickly in the freezer and can be stored for a month, making them ideal for parties or holiday gifting.
Ingredients
Chocolate Base
- 2 packages Milk Chocolate morsels (11 oz each)
- 1 tub Cool Whip, thawed (8 oz)
Chocolate Coating
- 24 oz Ghirardelli dark chocolate melting wafers
Instructions
- Melt Chocolate Chips: In a microwave-safe bowl, heat the milk chocolate morsels for 1 minute, then stir. Microwave for an additional 30 seconds and stir again until smooth. If needed, microwave for another 15 seconds. Let the melted chocolate cool to room temperature, about 20 minutes.
- Prepare Baking Dish: Line an 8-inch square baking dish with parchment paper to prevent sticking. Set aside for later use.
- Combine Chocolate and Cool Whip: In a large bowl, gently fold the cooled melted chocolate with the thawed Cool Whip. The chocolate may harden into tiny bits as you mix; continue folding gently until fully combined into a creamy mixture. Pour this mixture into the prepared baking dish.
- Freeze and Cut: Freeze the mixture for 30 minutes until firm. Remove from freezer, lift out using the parchment paper, and cut into 36 evenly sized squares. Place the squares on a parchment-lined baking sheet and return them to the freezer for at least another 30 minutes to set firmly.
- Melt Dark Chocolate Wafers: Melt the Ghirardelli dark chocolate melting wafers according to package directions, ensuring a smooth texture for dipping.
- Dip Candies: Remove the frozen candy squares from the freezer and dip each one into the melted dark chocolate coating. Place the dipped candies back on the parchment paper and allow the chocolate coating to set.
- Store and Serve: Store the coated candies in the freezer until ready to serve. These candies are best enjoyed cold and can be kept frozen for up to 30 days.
Notes
- Ensure the melted milk chocolate cools completely before combining with Cool Whip to prevent melting.
- Gently folding the mixture helps maintain a light, fluffy texture despite the chocolate firming up slightly.
- Use parchment paper to easily lift and remove the candy slab from the baking dish for cutting.
- Work quickly when dipping to keep candies frozen and avoid melting.
- Store candies in an airtight container in the freezer for best quality and longevity.


