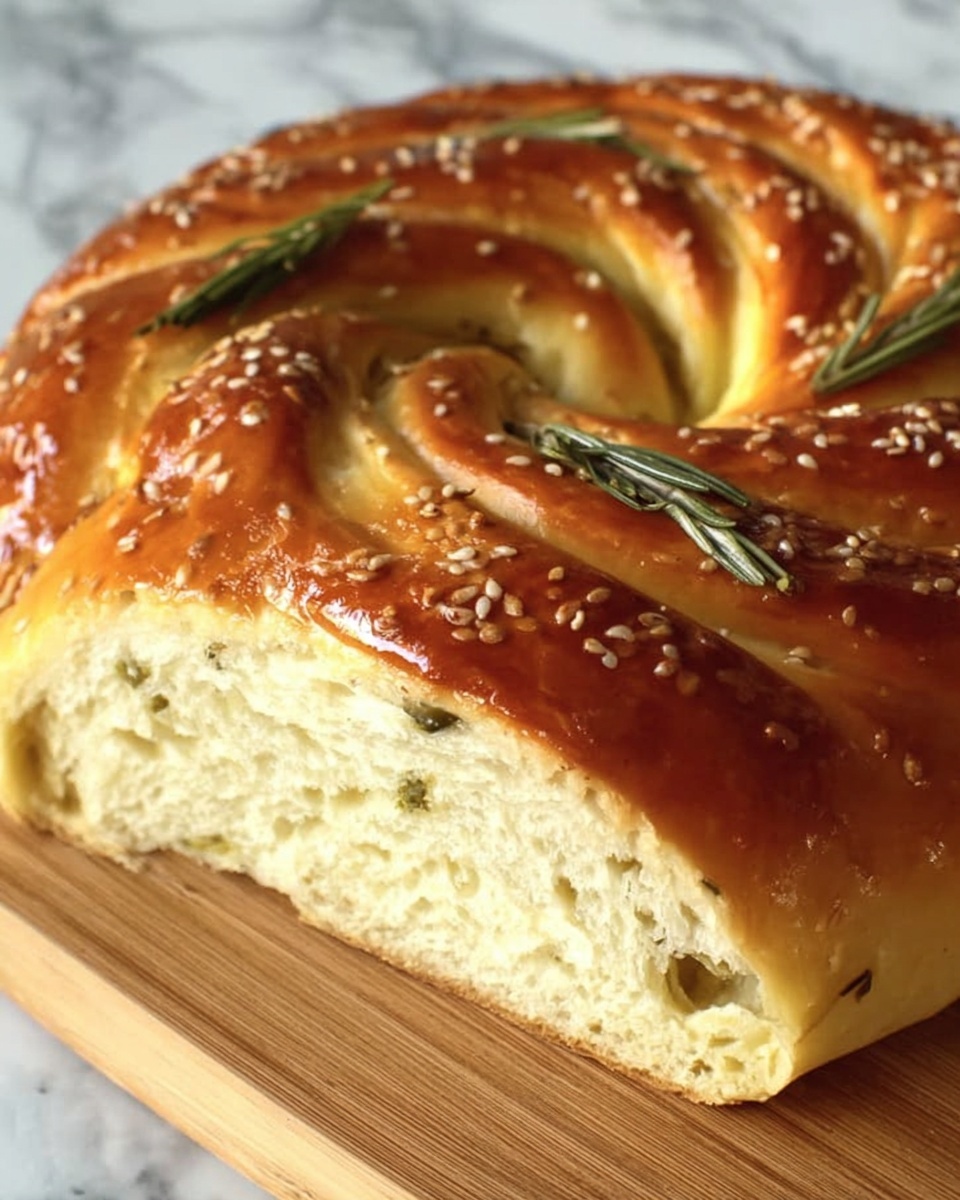
If you love the aroma of freshly baked bread filling your kitchen and crave something with a rustic, hearty crust and a tender, flavorful crumb, you are going to adore this Rustic No Knead Rosemary Garlic Bread Recipe. It’s a wonderfully simple yet impressive bread that combines the earthiness of rosemary with the zing of garlic, perfect for any occasion when you want comfort food that feels artisanal but without the fuss. The beauty lies in the no-knead technique, allowing time and patience to do all the work for you, delivering incredible texture and taste with minimal effort.
Ingredients You’ll Need
These ingredients might be simple, but each one plays an essential role in crafting the perfect loaf. From the flour that creates the structure to the fresh herbs adding bursts of flavor, every element has its job in making this bread delightfully rustic and aromatic.
- 3 cups all-purpose flour: The foundation of the bread, providing structure and chew.
- 3 cloves garlic, minced: Adds rich, savory depth that compliments the rosemary beautifully.
- 1 tablespoon finely chopped fresh rosemary: A fragrant herb that brings a piney, fresh flavor; feel free to add more for extra punch.
- 1 ¼ teaspoons kosher salt: Enhances all the flavors and balances the sweetness of the bread.
- ¾ teaspoon freshly ground black pepper: Adds a subtle spicy note that works perfectly with the garlic and rosemary.
- ½ teaspoon instant yeast: Responsible for the bread’s rise while keeping the preparation easy and fast.
- 1 ½ cups water, at room temperature: Hydrates the flour and activates the yeast to start fermentation.
- 2 tablespoons cornmeal: Helps create a nonstick surface in your skillet and adds a slight crunch to the crust.
How to Make Rustic No Knead Rosemary Garlic Bread Recipe
Step 1: Prepare the Dough
Start by combining the flour, minced garlic, chopped rosemary, kosher salt, black pepper, and instant yeast in a large bowl. This dry mix ensures all your seasonings are evenly dispersed throughout the dough before any liquid is added, which is key for consistent flavor in every bite.
Step 2: Mix in Water
Add the room temperature water gradually, stirring with a wooden spoon or your hand until the mixture forms a wet, sticky dough. It might feel a bit sloppy, but that tackiness is exactly what you want for this no-knead method. This step only takes about 30 seconds, so no need to overwork the dough—that’s the beauty of this recipe.
Step 3: Let It Rise Overnight
Cover the bowl tightly with plastic wrap, then leave it to rest at room temperature for 18 to 24 hours. During this long, slow rise, natural fermentation works its magic, creating bubbles on the surface and developing that signature rustic texture and complex, tangy flavor you’ll love.
Step 4: Prepare the Skillet and Shape the Dough
Lightly oil a 10-inch cast iron skillet or spray with nonstick spray, then sprinkle the bottom with cornmeal to prevent sticking and add a subtle crunch to the crust. On a lightly floured surface, gently scoot the dough out and form it into a round shape without pressing out all the air, ensuring a light texture after baking.
Step 5: Proof the Shaped Dough
Place your round dough into the prepared skillet, cover it with a clean dishtowel, and let it rest again at room temperature for about 2 hours. During this time, the dough will double in size and become more puffy and airy, signaling it’s ready to bake.
Step 6: Bake to Golden Perfection
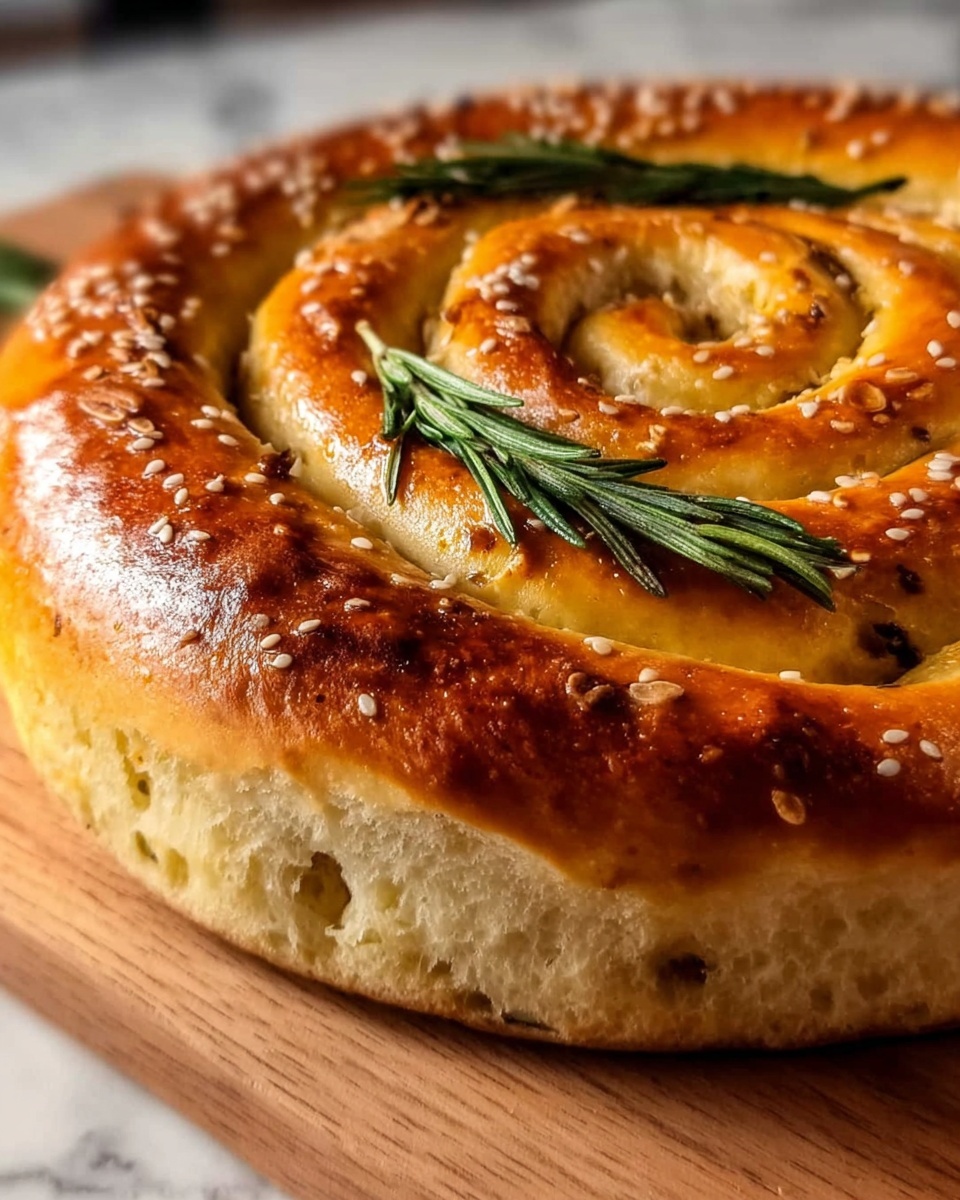
Preheat your oven to 450 degrees Fahrenheit. Once heated, place the skillet with dough directly into the oven and bake for 30 to 40 minutes or until the crust is beautifully golden brown and crisp. The aroma alone will have everyone eagerly waiting to dig in!
How to Serve Rustic No Knead Rosemary Garlic Bread Recipe
Garnishes
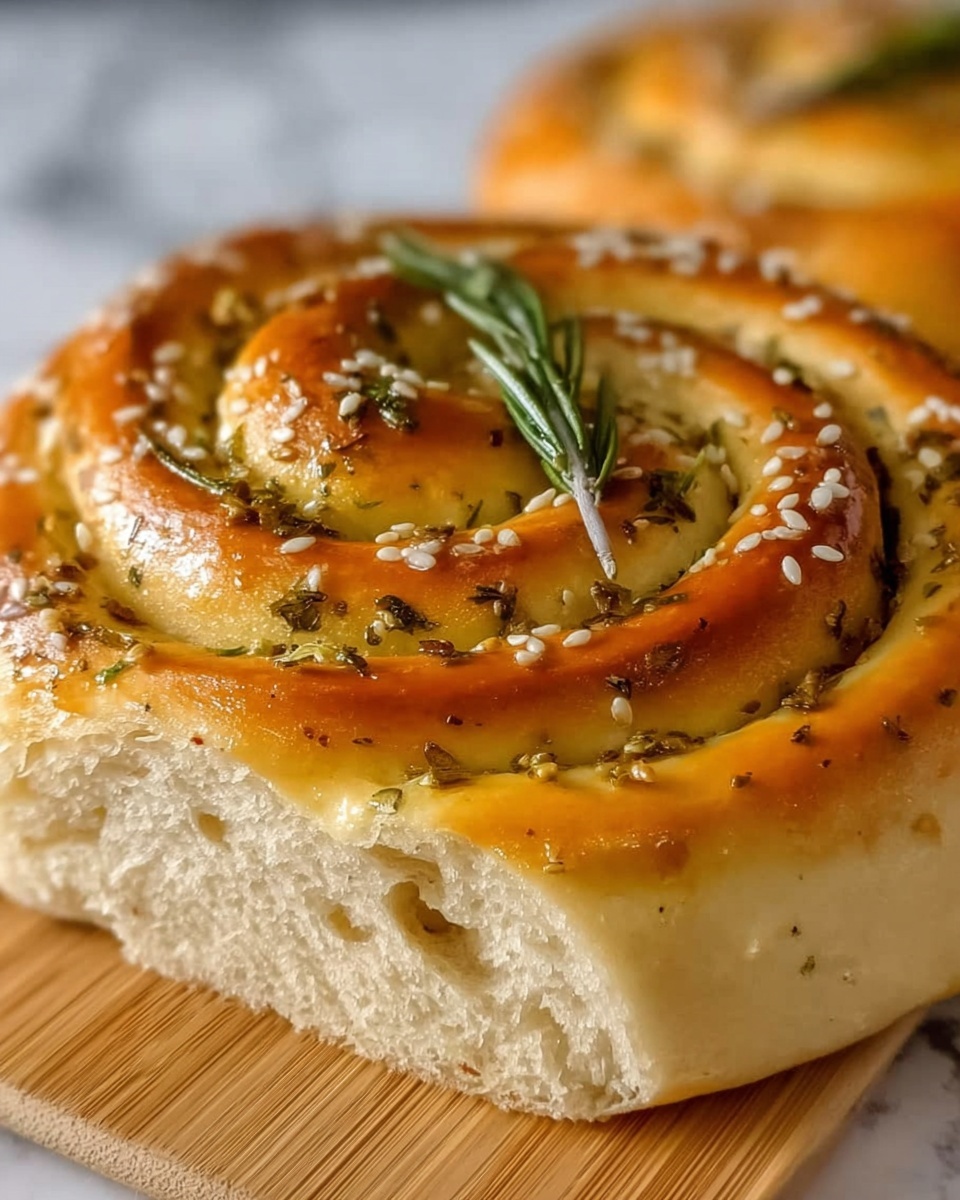
Adding a bit of finishing flair can elevate this Rustic No Knead Rosemary Garlic Bread Recipe even more. Try brushing the warm crust with a little extra olive oil or melted butter mixed with minced garlic for a shiny, irresistible finish. Sprinkling sea salt or additional fresh rosemary on top right after baking also adds a burst of flavor and visual appeal.
Side Dishes
This bread pairs beautifully with so many dishes — think hearty soups like tomato basil or creamy pumpkin, vibrant salads with a lemony vinaigrette, or alongside a cheese and charcuterie board for an elegant touch. It’s a versatile friend that complements both casual dinners and special gatherings.
Creative Ways to Present
For a rustic yet impressive presentation, serve the loaf in a wooden basket lined with a linen napkin to keep it warm. You can also slice and arrange the bread with small bowls of olive oil and balsamic vinegar for dipping, or create individual bruschetta toppings so guests can customize their bites.
Make Ahead and Storage
Storing Leftovers
If you end up with extra bread (which can happen when it’s this good), store it in an airtight container or bread bag at room temperature for up to two days. This keeps the crust crisp and the inside soft. Avoid refrigerating as it can dry the bread out prematurely.
Freezing
You can freeze any leftover loaf or slices by wrapping them tightly in plastic wrap and then foil before placing them in a freezer bag. Frozen bread keeps well for up to three months and makes it easy to enjoy this Rustic No Knead Rosemary Garlic Bread Recipe anytime you wish.
Reheating
To refresh stored bread, remove it from the freezer and unwrap completely. Reheat in a preheated oven at 350 degrees Fahrenheit for about 10-12 minutes. This will restore that delightful crisp crust and soft crumb, almost like it was just baked.
FAQs
Can I use dried rosemary instead of fresh?
Yes, you can substitute dried rosemary, but use about one-third of the fresh amount since dried herbs are more concentrated. Keep in mind fresh rosemary gives a brighter, fresher flavor that’s one of the highlights of this bread.
Do I really not need to knead the dough?
No kneading is required! The long fermentation time allows gluten to develop naturally, so the dough becomes elastic and airy without the hard work. This technique is what makes the recipe so approachable for beginners and busy bakers alike.
Why do I need to use cornmeal in the cast iron skillet?
Cornmeal acts as a natural nonstick agent and adds a slight crunch to the bread’s bottom crust. It also helps the bread release easily from the skillet once it’s baked, making your life easier.
Can I add other herbs or ingredients?
Absolutely! While rosemary and garlic are classic, feel free to experiment by adding thyme, oregano, olives, or even sun-dried tomatoes to customize the flavor. Just keep the dough hydration and fermentation time the same for best results.
Is this recipe suitable for beginners?
Definitely! The Rustic No Knead Rosemary Garlic Bread Recipe is perfect for bakers of all levels. The no-knead method and simple ingredients make it forgiving and straightforward, yet it yields a bread that looks and tastes like it came from a professional bakery.
Final Thoughts
This Rustic No Knead Rosemary Garlic Bread Recipe truly feels like a gift to your kitchen and your taste buds. It’s effortless to prepare but delivers something incredibly satisfying — a loaf bursting with fresh herb aroma, garlicky warmth, and a crust that crunches just right. Give it a try, and I promise you’ll want to bake it again and again, sharing it with loved ones for cozy meals and joyful gatherings.
Print
Rustic No Knead Rosemary Garlic Bread Recipe
- Prep Time: 10 minutes
- Cook Time: 40 minutes
- Total Time: 20 hours 50 minutes
- Yield: 8 servings
- Category: Bread
- Method: Baking
- Cuisine: American
Description
This Rustic No Knead Rosemary Garlic Bread is a simple and flavorful artisan-style loaf perfect for homemade sandwiches or as a side to any meal. With fragrant garlic and fresh rosemary mixed into a wet, sticky dough, it requires minimal effort but yields a crusty, golden-brown bread loaded with aromatic herbs.
Ingredients
Dry Ingredients
- 3 cups all-purpose flour
- 1 ¼ teaspoons kosher salt
- ¾ teaspoon freshly ground black pepper
- ½ teaspoon instant yeast
- 2 tablespoons cornmeal
Herbs and Aromatics
- 3 cloves garlic, minced
- 1 tablespoon finely chopped fresh rosemary (or more, to taste)
Wet Ingredients
- 1 ½ cups water, at room temperature
Instructions
- Prepare the Dough: In a large bowl, combine the all-purpose flour, minced garlic, finely chopped fresh rosemary, kosher salt, freshly ground black pepper, and instant yeast until evenly mixed.
- Add Water and Mix: Pour in the room temperature water. Using a wooden spoon or your hand, mix until a wet, sticky dough forms, which should take about 30 seconds. The dough will be loose and shaggy.
- First Rise: Cover the bowl tightly with plastic wrap and let the dough rest at room temperature for 18 to 24 hours, until the surface is dotted with bubbles indicating fermentation.
- Prepare the Baking Vessel: Lightly oil a 10-inch cast iron skillet or coat it with nonstick spray, then sprinkle the bottom generously with cornmeal to prevent sticking and add texture.
- Shape the Dough: On a lightly floured surface, gently turn out the dough and shape it into a rough round without deflating too much of the bubbles formed.
- Second Proof: Place the shaped dough into the prepared skillet. Cover it with a clean dishtowel and let it stand at room temperature until the dough has doubled in size and does not spring back when poked with a finger, approximately 2 hours.
- Preheat the Oven: Set the oven to 450°F (232°C) to preheat fully before baking the bread.
- Bake the Bread: Place the skillet with the dough in the preheated oven. Bake until the bread turns golden brown and crusty, about 30 to 40 minutes. Remove from oven and cool slightly before slicing.
Notes
- For best results, use a heavy-duty cast iron skillet which retains heat evenly to produce a crispy crust.
- You can adjust the amount of rosemary to your preference for a more or less herbaceous flavor.
- The long fermentation time helps develop flavor and the rustic texture—do not rush it.
- If you prefer, swap kosher salt for sea salt, but keep the quantity the same.
- Store leftover bread in an airtight container at room temperature for up to 3 days, or freeze for longer storage.


