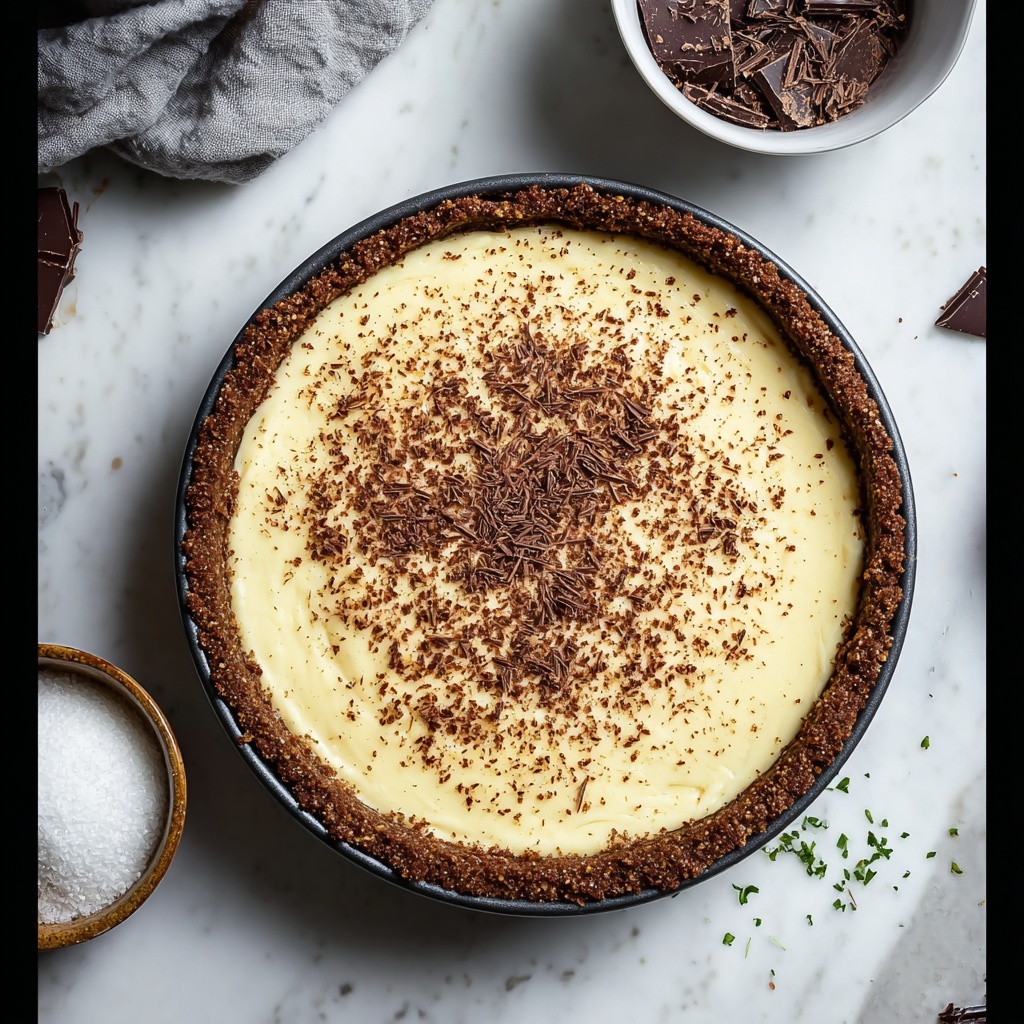
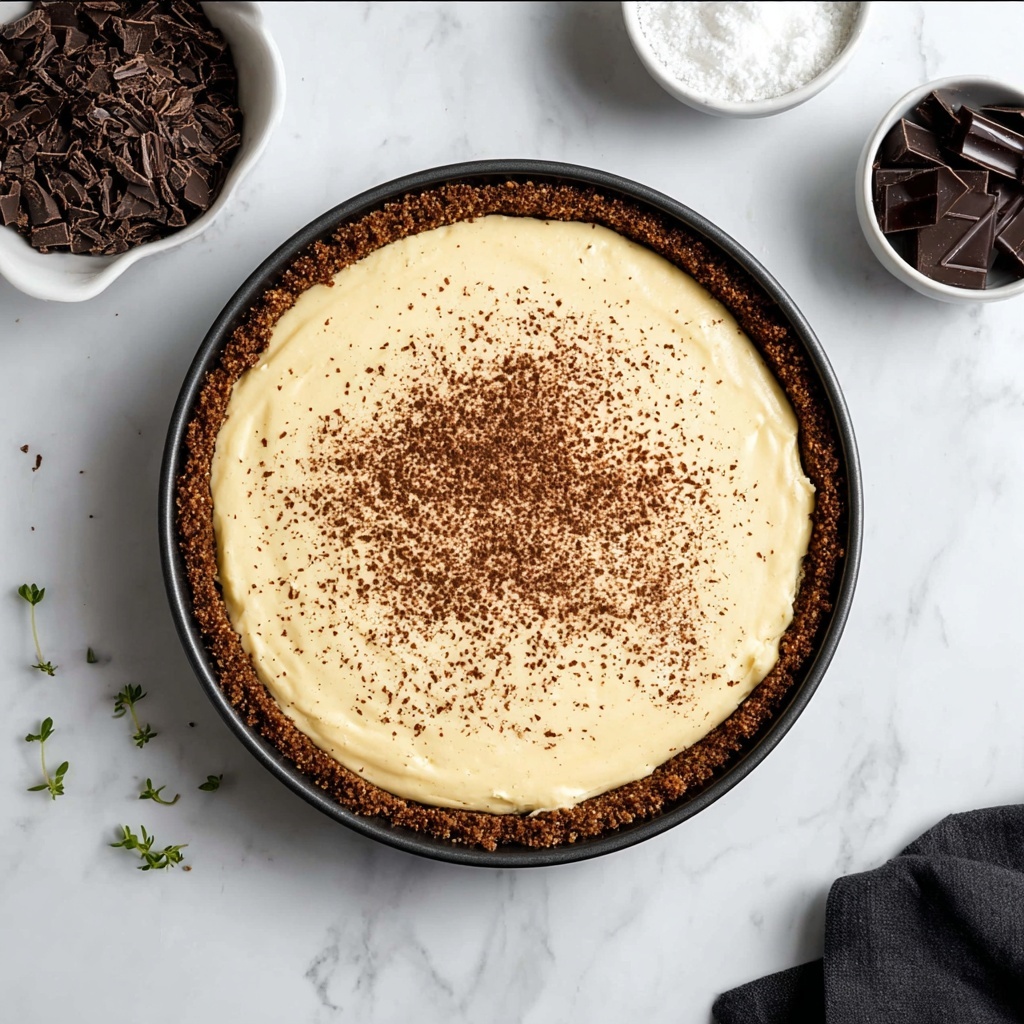
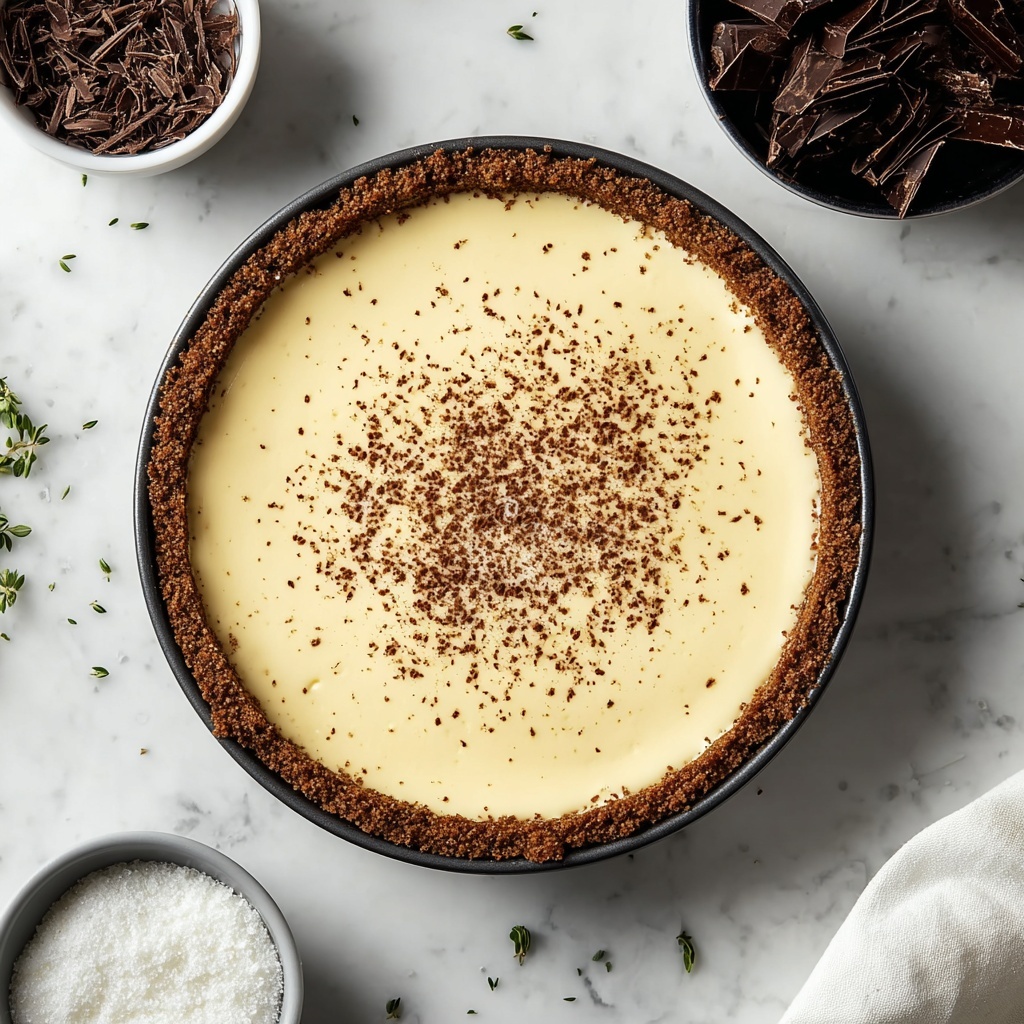
If you have ever dreamed of creating the perfect creamy, smooth dessert that brings a slice of New York’s finest straight to your table, the Classic New York Cheesecake Recipe is your golden ticket. This dessert combines a rich, velvety cream cheese filling with a buttery graham cracker crust, offering a taste experience that’s both indulgent and utterly satisfying. Whether you’re impressing guests or treating yourself to a comforting slice, this cheesecake stands out as a timeless classic that never goes out of style.
Ingredients You’ll Need
Simple ingredients come together beautifully in this recipe, each playing a crucial role in developing the familiar rich texture and luscious flavor that define a truly great cheesecake.
- Graham cracker crumbs: Forms the perfectly buttery, crunchy crust that cradles the cheesecake filling.
- Granulated sugar: Sweetens both the crust and the filling, balancing richness with just enough sweetness.
- Unsalted butter: Adds moisture and binds the crust crumbs for that ideal base texture.
- Cream cheese: The star ingredient, softened to smooth perfection for that iconic creamy filling.
- Vanilla extract: Enhances the cheesecake’s flavor, adding warmth and aromatic depth.
- Sour cream: Adds tanginess and keeps the texture perfectly moist and tender.
- Heavy cream: Contributes to the rich, velvety mouthfeel everyone loves in a New York cheesecake.
- Large eggs: Bind the filling together while allowing it to set without cracking.
- All-purpose flour: Provides subtle structure to help the cheesecake hold its shape seamlessly.
How to Make Classic New York Cheesecake Recipe
Step 1: Prepare the Crust
Start by preheating your oven to 325°F (163°C) and greasing a 9-inch springform pan with butter. Combine graham cracker crumbs with sugar, then stir in melted butter until your mixture resembles sandy crumbs ready to be pressed. Press this mixture firmly into the bottom of your pan to create an even crust. Pop it into the oven for 10 minutes to bake and set the foundation for the cheesecake.
Step 2: Mix the Cream Cheese Batter
In a large bowl, beat the softened cream cheese with an electric mixer until it reaches a velvety smoothness. Gradually add sugar, continuing to mix until fully combined. Then stir in vanilla extract for that signature flavor. Carefully fold in sour cream and heavy cream, ensuring the texture remains silky without any lumps.
Step 3: Incorporate Eggs and Flour
Crack eggs one at a time into a separate bowl to avoid shell pieces, then add them to your cream cheese mixture, beating well after each addition for maximum creaminess. Finally, sprinkle in the flour and mix gently until just combined—overmixing can risk losing that tender crumb you want in your cheesecake.
Step 4: Bake the Cheesecake
Pour your luscious batter over the cooled crust, smoothing the surface with a spatula. Tap the pan lightly to remove air bubbles, then bake for 55 to 60 minutes until the edges are firm but the center still jiggles slightly. Afterward, switch off the oven and leave the cheesecake inside with the door slightly open for one hour — this gradual cooldown helps prevent cracks and keeps the texture dreamy.
Step 5: Chill and Serve
Once out of the oven, let the cheesecake cool at room temperature for about two hours, then cover it tightly with plastic wrap and refrigerate for at least four hours, or ideally overnight. Chilling allows your cheesecake to fully set into that luxurious sliceable perfection everyone craves.
How to Serve Classic New York Cheesecake Recipe
Garnishes
A simple dusting of powdered sugar enhances the cheesecake’s pristine look, but don’t shy away from fresh berries or a tangy fruit compote to add bursts of color and bright contrast. Whipped cream dollops are another classic choice that boost both flavor and presentation without overpowering the signature creamy filling.
Side Dishes
Classic New York cheesecake pairs wonderfully with a cup of rich coffee or a smooth, lightly sweet dessert wine. For a lighter option, try serving fresh fruit or a crisp mint salad to balance the richness and add refreshing notes alongside each bite.
Creative Ways to Present
Consider layering the cheesecake with fruit preserves or swirling chocolate sauce over the top before chilling. Alternatively, make mini cheesecakes in individual ramekins for a charming presentation that delights each guest and makes serving a breeze.
Make Ahead and Storage
Storing Leftovers
Keep your leftover cheesecake tightly wrapped in plastic wrap or transferred to an airtight container in the fridge. Properly stored, it maintains its creamy texture and flavor for up to 5 days, making it a wonderful treat that lasts beyond the initial serving.
Freezing
The Classic New York Cheesecake Recipe freezes beautifully. Wrap it securely in plastic wrap followed by aluminum foil to prevent freezer burn. Freeze for up to 2 months, then thaw overnight in the fridge before serving to preserve its luscious consistency.
Reheating
Usually best served chilled, if you prefer a slightly softer cheesecake, allow slices to come to room temperature for about 30 minutes before indulging. Avoid microwaving as it can cause texture changes and make the cream cheese filling overly soft.
FAQs
Can I use low-fat cream cheese for the Classic New York Cheesecake Recipe?
While you can use low-fat cream cheese, it will affect the texture and richness of your cheesecake. Full-fat cream cheese delivers the best creamy consistency and classic flavor everyone expects from this dessert.
Why does my cheesecake crack on top?
Cracking usually happens when the cheesecake bakes too quickly or cools down too fast. Following the recipe’s step to leave the oven door ajar for an hour helps prevent temperature shocks that cause cracks.
Can I add flavors to the cheesecake batter?
Absolutely! Vanilla is classic, but you can experiment with citrus zest, espresso, or even spices like cinnamon to create unique twists on the Classic New York Cheesecake Recipe.
How thick should the crust be?
A thickness of about 1/2 inch is ideal. Too thin and it won’t provide a sturdy base; too thick and it might overpower the delicate filling.
Is it necessary to use a springform pan?
Yes, a springform pan is highly recommended as it allows for easy removal of the delicate cheesecake without damaging its shape or surface.
Final Thoughts
This Classic New York Cheesecake Recipe is truly a dessert worth making again and again. Its rich flavor, creamy texture, and perfect crust come together to create something that always feels special — whether it’s for a celebration or just a sweet indulgence on a quiet evening. Grab these simple ingredients, follow these heartfelt steps, and get ready to fall in love with cheesecake all over again!
Print
Classic New York Cheesecake Recipe
- Prep Time: 0h 20m
- Cook Time: 1h 0m
- Total Time: 6h 20m
- Yield: 12 servings
- Category: Dessert
- Method: Baking
- Cuisine: American
Description
This Classic New York Cheesecake recipe features a rich and creamy cream cheese filling atop a buttery graham cracker crust. Baked to perfection, it offers a smooth texture with a slight jiggle in the center, making it the quintessential dessert for cheesecake lovers. The recipe includes easy-to-follow steps ensuring a perfectly set cheesecake with a velvety finish.
Ingredients
Crust
- 1 1/2 cups graham cracker crumbs
- 1/4 cup granulated sugar
- 1/2 cup unsalted butter, melted
Filling
- 4 (8 ounce) packages cream cheese, softened
- 1 cup granulated sugar
- 1 teaspoon vanilla extract
- 1/4 cup sour cream
- 1/4 cup heavy cream
- 4 large eggs
- 1/4 cup all-purpose flour
Instructions
- Preheat Oven: Preheat your oven to 325°F (163°C) to prepare for baking the crust and cheesecake.
- Prepare Pan: Grease the bottom and sides of a 9-inch springform pan with butter to prevent sticking.
- Make Crust Mixture: Combine graham cracker crumbs and granulated sugar in a medium bowl.
- Add Butter to Crust: Stir melted butter into the crumb-sugar mixture until fully incorporated.
- Form Crust: Press the crumb mixture evenly into the bottom of the prepared springform pan to create a crust layer.
- Bake Crust: Bake the crust in the preheated oven for 10 minutes, then remove and allow it to cool.
- Beat Cream Cheese: Using an electric mixer, beat softened cream cheese on medium speed until smooth and creamy in a large bowl.
- Add Sugar: Gradually add granulated sugar to the cream cheese, mixing until fully incorporated and smooth.
- Add Vanilla: Mix in vanilla extract until just combined.
- Add Sour Cream and Heavy Cream: Beat in sour cream and heavy cream until the mixture is uniform and creamy.
- Add Eggs: Crack eggs into a separate bowl, then add them one at a time to the mixture, beating well after each addition for proper incorporation.
- Add Flour: Mix in all-purpose flour carefully to fully combine, avoiding overmixing to maintain texture.
- Pour Batter: Pour the cream cheese batter over the cooled graham cracker crust in the springform pan.
- Smooth Batter: Use a spatula to level the top of the batter evenly.
- Remove Air Bubbles: Gently tap the pan on the countertop to release any trapped air bubbles.
- Bake Cheesecake: Bake for 55 to 60 minutes until the edges are set but the center still slightly jiggles when gently shaken.
- Cool in Oven: Turn off the oven and leave the cheesecake inside with the door ajar for 1 hour to gradually cool and prevent cracking.
- Room Temperature Cooling: Remove the cheesecake from the oven and let it cool completely at room temperature for approximately 2 hours.
- Chill: Cover with plastic wrap and refrigerate for at least 4 hours or overnight to fully set and develop flavor.
- Serve: Carefully remove the cheesecake from the springform pan, transfer to a serving platter, slice with a sharp knife, and serve chilled.
Notes
- Ensure the cream cheese is fully softened for a smooth batter and to avoid lumps.
- Do not overmix the batter after adding flour to prevent a dense cheesecake.
- Allowing the cheesecake to cool gradually in the oven helps prevent cracking on the surface.
- Chilling the cheesecake overnight enhances flavor and texture.
- Use a sharp knife and warm it slightly before slicing for clean cuts.


