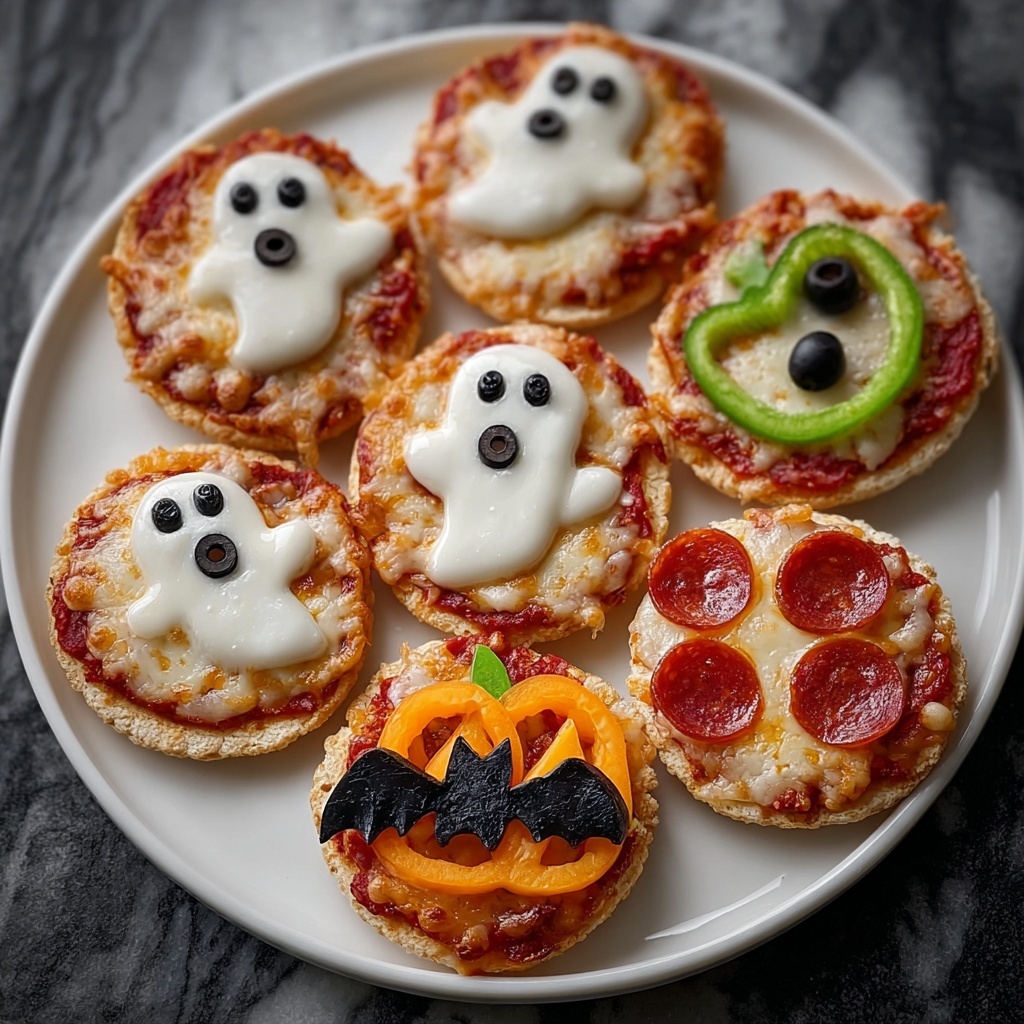
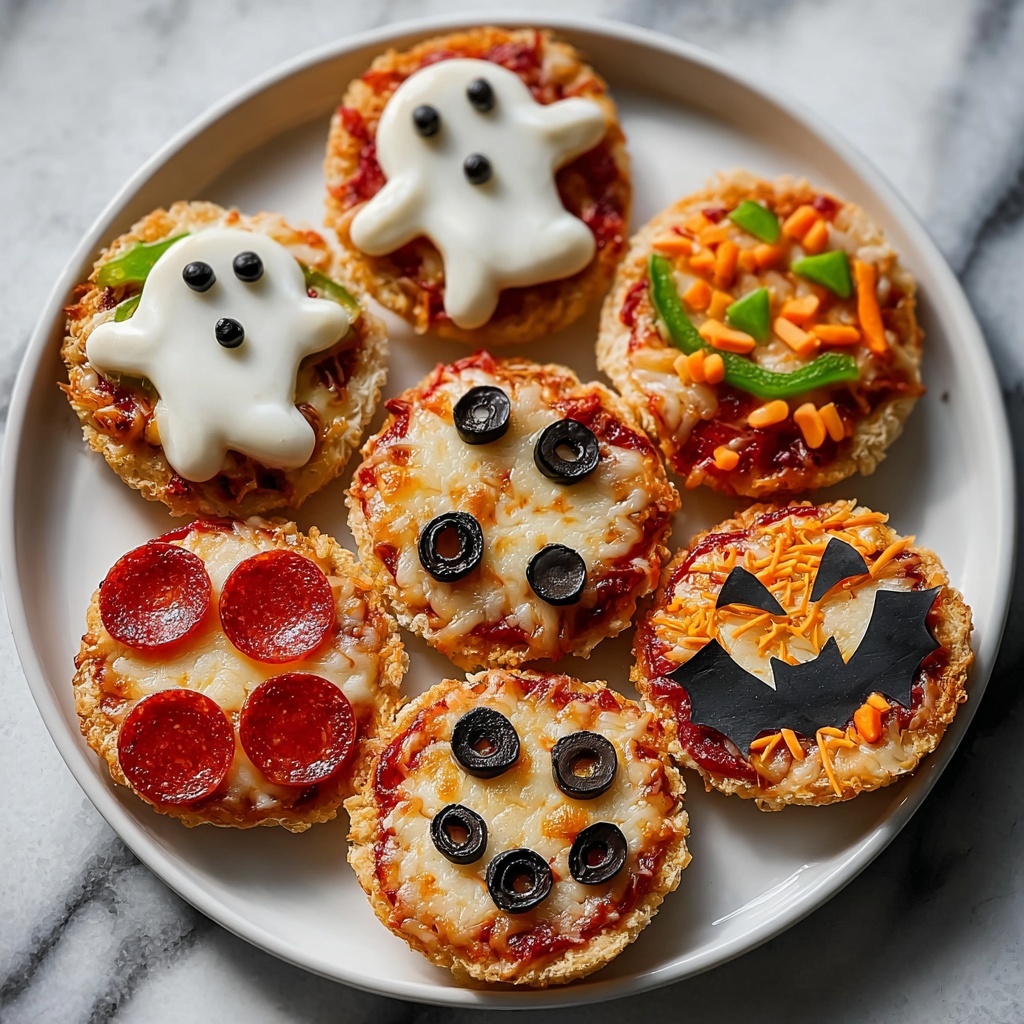
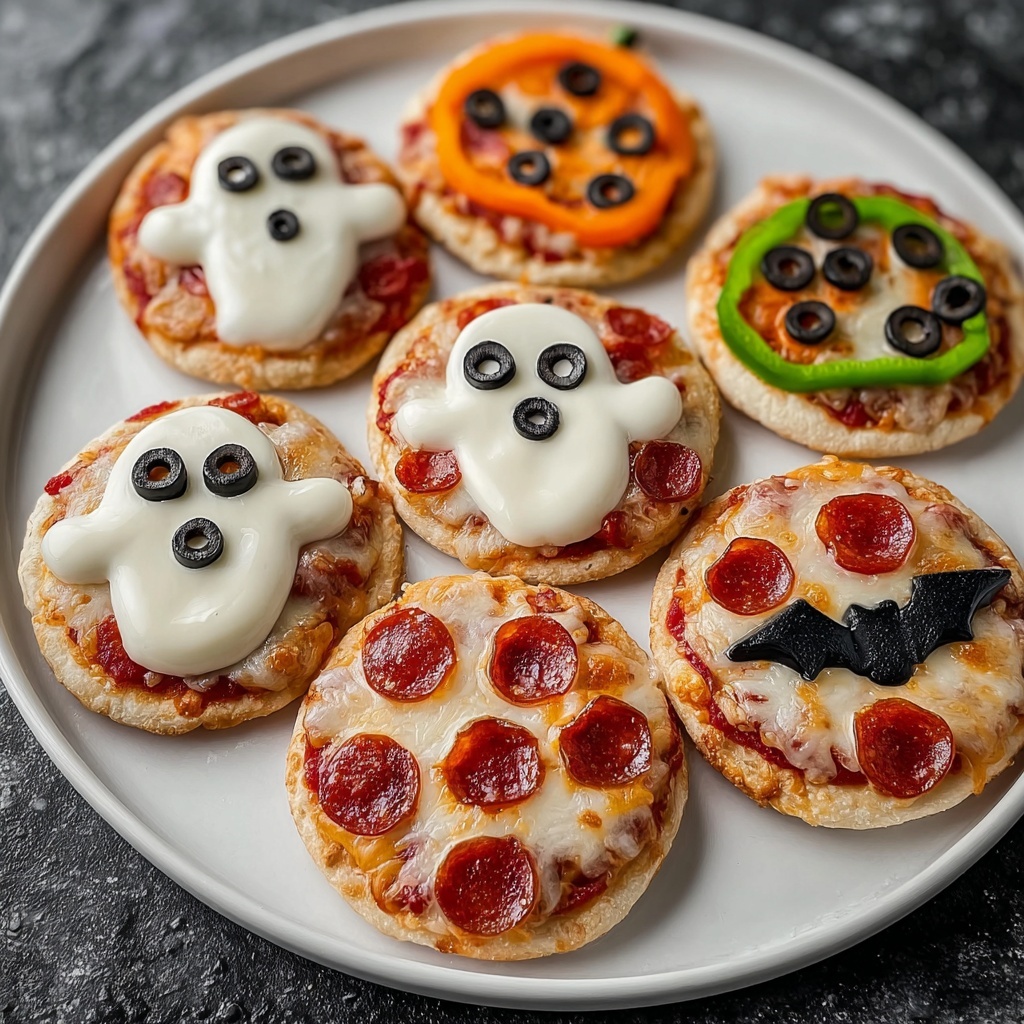
If you’re looking for a festive, fun, and absolutely delicious way to celebrate the spooky season, this Halloween Mini Pizzas Recipe is an absolute must-try. These bite-sized treats transform humble English muffins into spooky masterpieces topped with melty mozzarella, vibrant veggies, and creepy-cool shapes cut from pepperoni that will light up any Halloween party or cozy night in. They’re quick to make, playful to decorate, and irresistibly tasty—perfect for sharing smiles and creating memories with friends and family.
Ingredients You’ll Need
Getting ready to make these Halloween mini pizzas is a breeze thanks to the straightforward, fresh ingredients that pack a punch in both flavor and festive flair. Each one plays a key role: the English muffins provide the perfect crispy base, the pizza sauce brings zesty richness, and the colorful toppings add character and charm to every spooky bite.
- English muffins: Split in half and toasted to create a crisp, sturdy pizza crust that holds toppings beautifully.
- Pizza sauce: Adds a burst of tangy, herby flavor and keeps every bite saucy and satisfying.
- Shredded mozzarella cheese: Melts to gooey perfection, binding all toppings with creamy goodness.
- Pepperoni slices (optional): Perfect for cutting into fun Halloween shapes that add a savory punch.
- Black olives: Sliced to resemble spooky eyes or accents with their dark, rich flavor.
- Green bell pepper: Thinly sliced strips bring freshness and color contrast for eye-catching designs.
- Halloween-themed cookie cutters: Essential for creating festive shapes like bats, ghosts, and pumpkins out of pepperoni.
- Olive oil spray or brush: Helps the toppings crisp up, giving your mini pizzas a beautiful golden finish.
- Salt and pepper: Just a pinch to enhance and balance all the flavors perfectly.
How to Make Halloween Mini Pizzas Recipe
Step 1: Preheat and Prepare
Start by heating your oven to 375°F (190°C). This ensures it reaches the perfect temperature for quick, even cooking that melts the cheese and crisps the muffins without drying them out. Meanwhile, line your baking sheet with parchment paper or lightly spray it with olive oil to keep the mini pizzas from sticking—simple but crucial!
Step 2: Set the Pizza Base
Arrange the English muffin halves face up on your prepared baking sheet. Their nooks and crannies soak up the sauce wonderfully while providing a sturdy base to build your tiny pizza masterpieces.
Step 3: Sauce It Up
Spread about a tablespoon of pizza sauce onto each half. This layer not only delivers that iconic tomato flavor but acts as the perfect glue to help all the toppings stick and sing together.
Step 4: Add the Cheese
Sprinkle shredded mozzarella generously over the sauce. The cheese melts into a creamy blanket, making every bite comforting and absolutely irresistible with its gooey texture.
Step 5: Craft Your Spooky Toppings
Using your Halloween-themed cookie cutters, press shapes into the pepperoni slices. Get creative with bats, pumpkins, and ghosts to turn your pizzas into fun and festive little canvases. Add sliced black olives and thin green pepper strips for eyes, mouths, or eerie decorations that bring each mini pizza to life.
Step 6: Drizzle and Season
Lightly spray or brush olive oil over the tops to help everything brown nicely and add a subtle, rich scent. A pinch of salt and pepper at this stage helps all the flavors pop perfectly.
Step 7: Bake to Perfection
Pop the tray in the oven and bake for 10 to 12 minutes. Keep an eye out for bubbling cheese, golden edges, and lightly toasted muffin bases. Once done, take them out and give them a minute to cool—this lets the cheese set just enough so toppings stay put without any mess.
How to Serve Halloween Mini Pizzas Recipe
Garnishes
Elevate your mini pizzas by adding fresh basil leaves, a sprinkle of chili flakes, or a swirl of pesto. These toppings bring bursts of color, flavor, and a bit of sophistication to your festive snack table.
Side Dishes
Pair these mini pizzas with a crisp garden salad or carrot sticks with ranch dip for a balance of fresh and wholesome sides. For a truly Halloween-themed feast, consider serving with pumpkin soup or witchy green guacamole!
Creative Ways to Present
Think beyond the plate: arrange your mini pizzas on a Halloween-themed platter surrounded by fake cobwebs and small pumpkin decorations. Serving them on colorful paper plates with spooky napkins instantly boosts the festive atmosphere and invites guests to dig in with excitement.
Make Ahead and Storage
Storing Leftovers
Got extra mini pizzas? Keep them fresh by placing them in an airtight container in the refrigerator. They stay great for up to 2 days, perfect for snacking or quick reheat treats.
Freezing
To freeze, lay cooled mini pizzas on a baking sheet and freeze until solid, then transfer into freezer bags. This keeps them from sticking together and makes reheating convenient anytime you want a quick Halloween snack.
Reheating
For reheating, pop frozen or refrigerated mini pizzas into a preheated oven at 350°F (175°C) for 8-10 minutes or until warmed through and the cheese is melty again. Avoid microwaving to keep the crust crispy and delightful.
FAQs
Can I use different bread instead of English muffins?
Absolutely! You can use small pita breads, bagel halves, or even mini naan for a twist, though English muffins provide the perfect texture and size for these Halloween creations.
What toppings work best for Halloween Mini Pizzas Recipe?
Stick to colorful veggies like green peppers, olives, and sweetcorn, plus classics like pepperoni or sausage. The key is to keep the toppings easy to cut into fun shapes and vibrant to match the Halloween theme.
Are these pizzas suitable for kids?
Yes! These mini pizzas are kid-friendly, fun to assemble, and can be customized with toppings to please any picky eater. Plus, decorating them turns cooking into a playful activity.
How can I make these pizzas gluten-free?
Simply swap out the English muffins for your favorite gluten-free bread or base. Many gluten-free English muffins exist in stores and work perfectly for this recipe.
Can I prepare these mini pizzas vegan?
Definitely! Use vegan cheese, a dairy-free pizza sauce, and plant-based toppings. You can even find or make vegan-friendly pepperoni to cut out festive shapes.
Final Thoughts
There’s something truly magical about sharing food that looks as delightful as it tastes, especially at Halloween. This Halloween Mini Pizzas Recipe combines simplicity with creativity in such a charming way, making it a perfect dish to whip up for kids, friends, or any festive gathering. Give it a go this season and watch how these little pizzas bring big smiles and spooky fun to your table!
Print
Halloween Mini Pizzas Recipe
- Prep Time: 0h 15m
- Cook Time: 0h 12m
- Total Time: 0h 27m
- Yield: 12 mini pizzas
- Category: Snack
- Method: Baking
- Cuisine: American
Description
These Halloween Mini Pizzas are a fun and festive snack perfect for celebrating the spooky season. Made using English muffins as the base, topped with pizza sauce, mozzarella cheese, and creatively cut pepperoni slices and vegetables shaped into Halloween-themed designs, these mini pizzas are quick to prepare and bake, making them an ideal treat for kids and adults alike during Halloween parties.
Ingredients
Base
- 1 pack of English muffins (6 muffins, split in half)
Sauce and Cheese
- 1 cup pizza sauce
- 1 1/2 cups shredded mozzarella cheese
Toppings
- Pepperoni slices (optional)
- Black olives, sliced
- Green bell pepper, sliced into thin strips
Other
- Assorted Halloween-themed cookie cutters (e.g., bat, pumpkin, ghost)
- Olive oil spray or a small brush with olive oil
- Salt and pepper to taste
Instructions
- Preheat the oven. Set your oven to 375°F (190°C) to get it ready for baking the mini pizzas.
- Prepare the baking sheet. Line a baking sheet with parchment paper or lightly spray it with olive oil to prevent sticking.
- Arrange the muffin halves. Place the split English muffins face up on the prepared baking sheet, providing a sturdy base for the toppings.
- Spread pizza sauce. Evenly distribute about 1 tablespoon of pizza sauce on each muffin half to infuse flavor.
- Add shredded cheese. Sprinkle each muffin with shredded mozzarella cheese, covering the sauce adequately to melt and bind toppings.
- Cut out toppings shapes. Use Halloween-themed cookie cutters to cut shapes out of pepperoni slices or other toppings to create festive designs.
- Decorate the mini pizzas. Place the shaped pepperoni, sliced black olives, and green pepper strips on each muffin half to form spooky faces or Halloween motifs.
- Apply olive oil. Lightly spray or brush the tops of each mini pizza with olive oil to help toppings cook perfectly and achieve a golden finish.
- Season as desired. Sprinkle salt and pepper over the pizzas to enhance taste, according to personal preference.
- Bake the pizzas. Place the baking sheet into the preheated oven and bake for 10-12 minutes until the cheese is melted, bubbly, and the muffins are toasted lightly.
- Cool and serve. Remove the mini pizzas from the oven and let them cool for a couple of minutes before serving warm for the best flavor and texture.
Notes
- If you prefer a vegetarian version, omit the pepperoni and add extra vegetables as toppings.
- Use gluten-free English muffins to make this recipe gluten free.
- Experiment with different cheeses like cheddar or a blend for varied flavors.
- These mini pizzas can be prepared ahead up to the assembly stage and baked just before serving.
- Customize toppings to suit dietary restrictions or personal preferences.


